You can move Organizational Units (OUs) from one Active Directory container to another with the Active Roles Console.
To move an Organizational Unit
-
In the Console tree, locate and select the folder that contains the OU you want to move.
-
In the details pane, right-click the OU and click Move to display the Move dialog.
-
In the Move dialog, select the folder to which you want to move the OU, then click OK.
NOTE: Consider the following when moving an object:
-
With Active Roles, directory objects can only be moved within the same domain. This means that the folder to which you want to move the object must belong to the same domain as the object.
-
You can move multiple objects at a time with the Move dialog. To open the dialog, select the objects, right-click the selection, and click Move. To select multiple objects, press and hold Ctrl, then click each object.
-
To locate the object that you want to move, use the Find function of Active Roles. Once you found the accounts, open the Move dialog by right-clicking the object, and clicking Move.
-
The Console provides the drag-and-drop function for moving objects. To move objects, you can drag the selection from the details pane to a destination container in the Console tree.
You can delete Active Directory Organizational Units (OUs) with the Active Roles Console.
To delete an Organizational Unit
-
In the Console tree, locate the OU you want to delete.
-
Right-click the Organizational Unit, and click Delete.
NOTE: Consider the following when deleting an Organizational Unit:
-
If the selected OU contains any objects, the Active Roles Console will prompt you to confirm the deletion of those objects. You can either cancel or confirm the deletion of the OU along with every object it contains.
-
You can delete multiple objects at the same time by selecting the objects, right-clicking the selection, and clicking Delete. To select multiple objects, press and hold Ctrl, then click each object. If you select multiple objects, clicking Delete displays a dialog. To delete all the selected objects, select the Apply to all items check box, then click Yes.
-
When attempting to delete an object, you may receive an error message that access is denied to the object. This can typically occur if the object is protected from deletion. To remove this protection, navigate to the Properties > Object tab of the object you want to delete, then clear the Protect object from accidental deletion check box. After that, try deleting the object again.
A contact is an Active Directory object that holds email and telephone information about an individual, without giving that person a security account on the network.
Contacts do not have a security identifier, unlike user accounts and groups. Contacts are used to add members to distribution lists or groups without granting them access to network resources.
You can use Active Roles to create, modify, and delete contacts. You can also perform Exchange-related tasks such as establishing email addresses for contacts.
The following section describes how to use the Active Roles Console to manage contacts. You can also use the Active Roles Web Interface to perform contact management tasks.
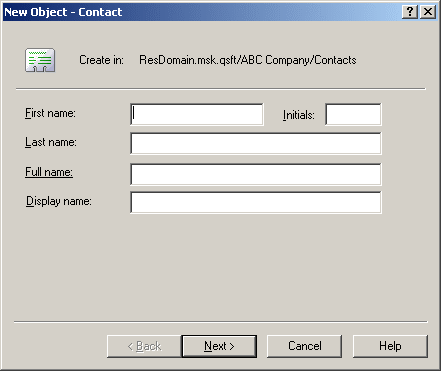
You can create new Active Directory contacts with the Active Roles Console.
To create a contact
-
In the Console tree, locate and select the folder in which you want to add the contact.
-
Right-click the folder, point to New and click Contact to start the New Object - Contact wizard.
-
Follow the wizard pages to specify properties of the new contact, such as the contact’s first name, last name, full name, display name, and Exchange email address settings.
Figure 21: Creating a contact
-
If you want to set values for additional properties (those for which the wizard pages do not provide data entries), click Edit Attributes on the completion page of the wizard.
-
After setting any additional properties, click Finish on the completion page of the wizard.
NOTE: In the wizard, some property labels may be displayed as hyperlinks. The hyperlink indicates that Active Roles enforces certain policy restrictions on the property. To examine policy details, click the hyperlink: the policy information is displayed. For more information, see Getting policy-related information.
