
Setting up the front-end authenticator in sp-cam.demo.local
|
2 |
|
3 |
|
4 |
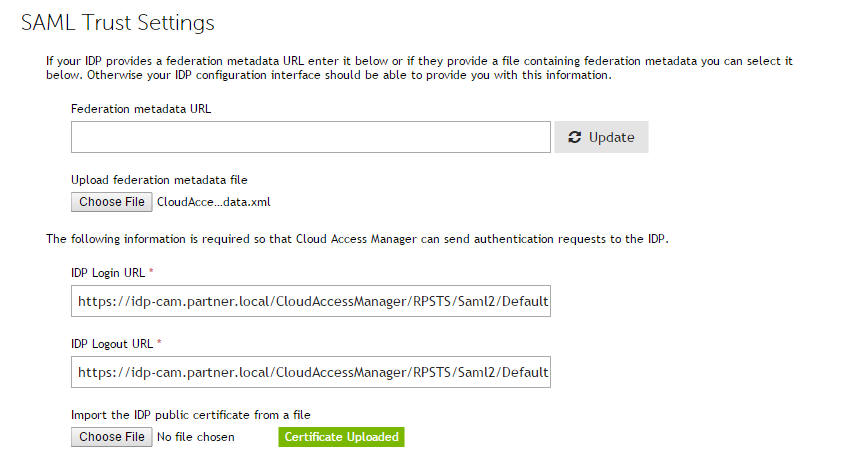
Click Next. On the SAML Trust Settings page, upload the Federation metadata file which you downloaded from the Federation Settings page of the Application Configuration wizard. Please refer to step 15 of Configuring the SAML application manually in the section Configuring the SAML application on idp-cam.partner.local for details. |
|
5 |
We have used metadata to configure our Service Provider so there is no need to enter an IDP Login URL, IDP Logout URL or import the Identity Provider (IDP) public certificate manually. This information is loaded automatically when the metadata file is imported. |
|
6 |
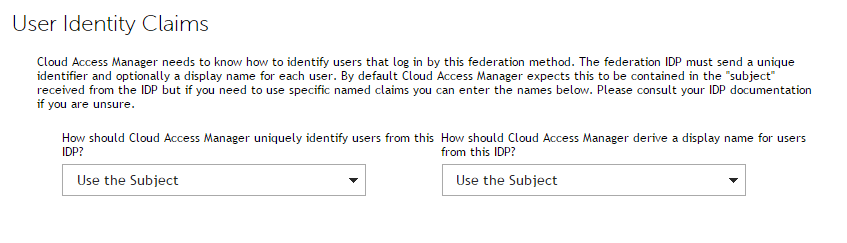
The User Identity Claims page is displayed. Here you can specify how Cloud Access Manager will uniquely identify users and derive the display name of users from this IDP. In this example, we allow both to default to Use the Subject. |
|
7 |
|
8 |
Click Finish. |
|
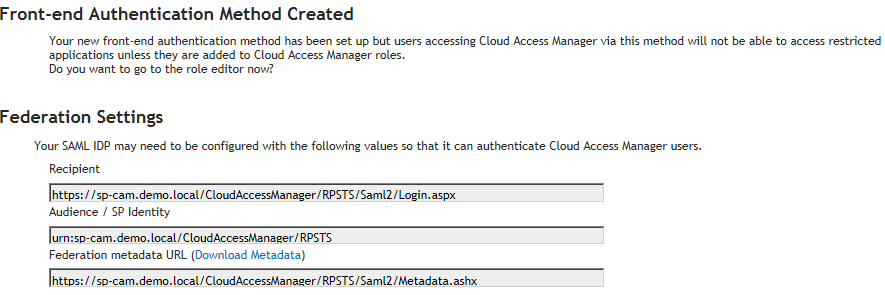
10 |
The Cloud Access Manager Identity Provider is now configured. You may want to configure the roles for the FEA at this point to control user access to applications. If so, click Edit Roles and carry out the remaining steps, otherwise click Finish. |
|
11 |
If you have followed the instructions in the section Configuring Cloud Access Manager roles to be returned then the roles from the IDP will be available when logging in using the newly created FEA. The Admin and Users roles will work automatically, any other roles you have created on the IDP you will have to add manually. To start, click Add Role. |
|
12 |
In the Edit Role section enter a name and description for the role. |
|
13 |
Click Add User. |
|
14 |
Select the new FEA from the User’s Authenticator list if it is not already selected. |
|
15 |
Edit the Include users with a claim named field to contain urn:dell/cam/role. This is the claim type for roles returned from the IDP. |
|
16 |
In the Having value field enter the name of the role as defined in the IDP roles, for example if you have created a role on the IDP with the name Sales, then you should enter Sales here. |
|
17 |
Click Save. |
|
18 |
Testing your configuration
|
3 |
Legal notices
Refer to our web site (quest.com) for regional and international office information.
|
CAUTION: A CAUTION icon indicates potential damage to hardware or loss of data if instructions are not followed. | |
|
WARNING: A WARNING icon indicates a potential for property damage, personal injury, or death. | |