
Configuring the front-end authentication service
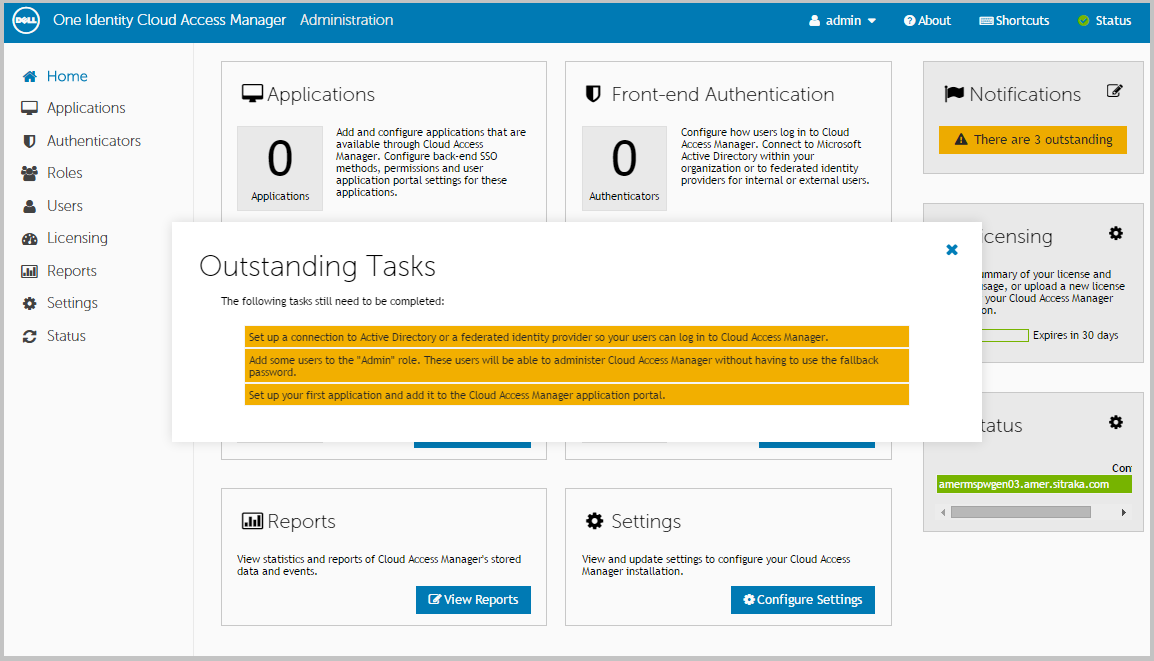
Before users and administrators can login to Cloud Access Manager, you need to configure a front-end authentication method. Typically, this would involve configuring the Microsoft® Active Directory® authenticator to authenticate users to your corporate domain, but equally you could configure the SAML or WS-Federated authenticator to authenticate users to a different identity management system. This example will use the Active Directory authentication method to authenticate users and administrators accessing Cloud Access Manager.
|
1 |
|
2 |
|
3 |
Enter the username and password of a Windows® domain account, and then click Test Connection. This will test that Dell™ One Identity Cloud Access Manager can connect to the domain which has read access to all user and group objects in the forest. Usually, a regular user account belonging to the Domain Users group is sufficient. When successful, click Next. |
|
4 |
|
5 |
On the Two Factor Authentication page, leave the Two factor authentication mode selection as Don’t use two factor authentication. Click Next. |
|
6 |
In the Authenticator Name field, enter the name that will be used to identify the authenticator within Cloud Access Manager, for example enter Active Directory, then click Finish. |
|
9 |
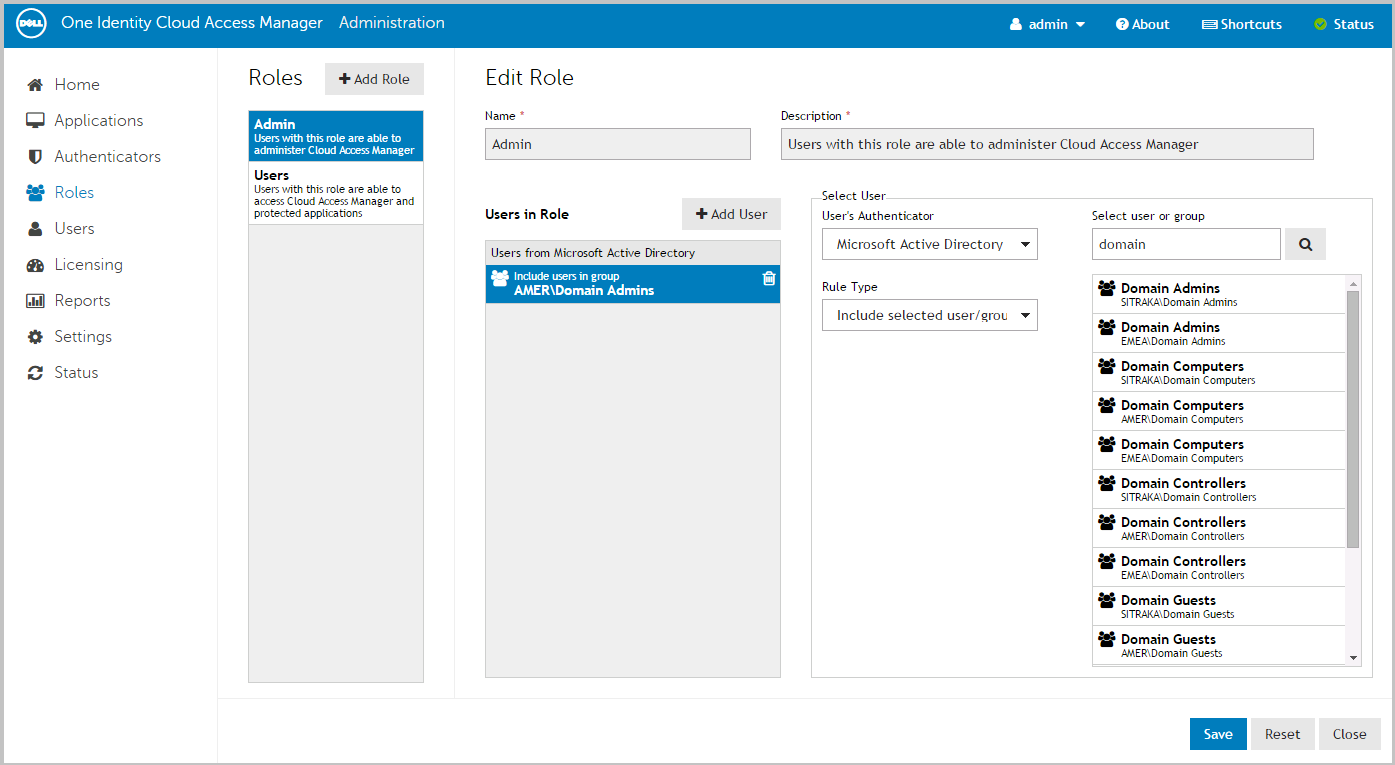
Click Admin. |
|
10 |
Click +Add User. |
|
11 |
|
12 |
|
13 |
Select the Domain Admins group from the list. |
|
14 |
Click Save. |
|
15 |
By default, all users are allowed access to Cloud Access Manager. If you want to restrict the set of users allowed access to Cloud Access Manager, click Users and follow step 15 through Step 20. |
|
16 |
Click Users. |
|
17 |
Click +Add User. |
|
18 |
|
19 |
In the Select new user or group text box, enter the name of the user or group you want to add, then press Enter or click the magnifying glass. |
|
21 |
Click Save. |
|
22 |
Click Close to return to the Cloud Access Manager Administration Console. The configuration is now complete. Cloud Access Manager administrators and users can now login to Cloud Access Manager using their Active Directory credentials. |
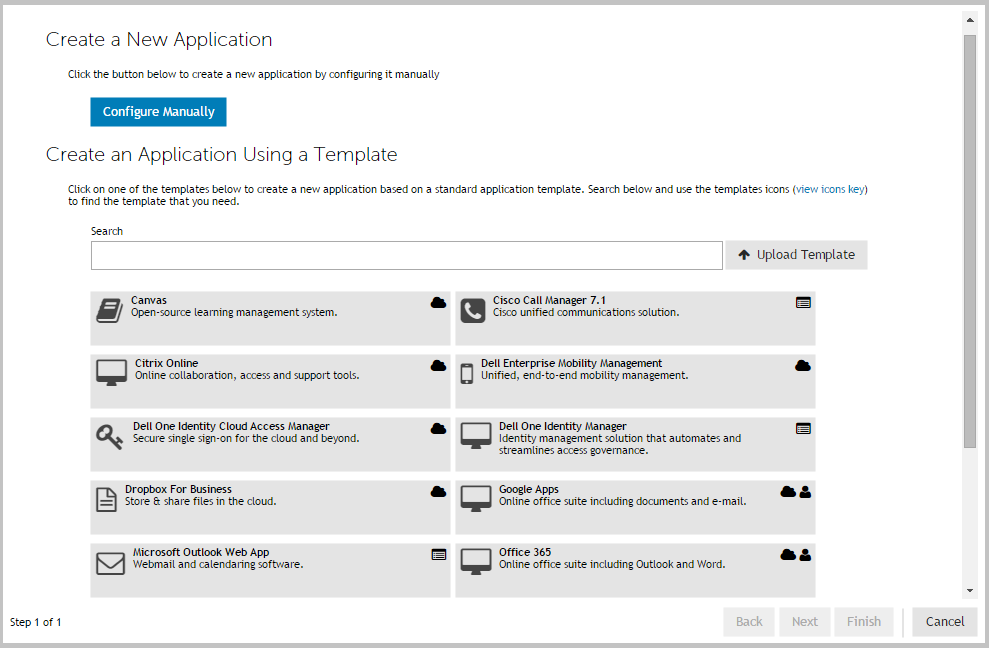
Configuring an application for single sign-on
|
1 |
|
2 |
|
3 |

|
4 |
xxx.xxx.xxx.xxx ars.webapps.democorp.com
Where xxx.xxx.xxx.xxx is the IP address of the Cloud Access Manager computer.
|
5 |
Enter the application's proxy URL into the Proxy URLs page of the application wizard in Cloud Access Manager. Click Next. 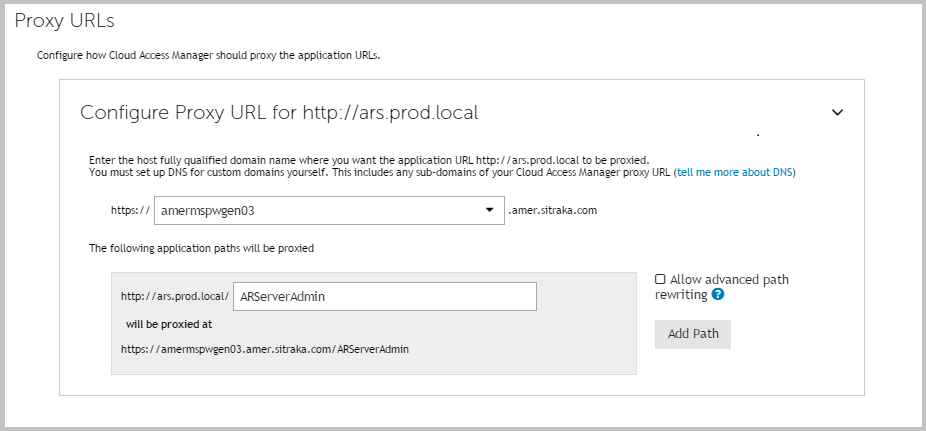 |
|
6 |
You will now see the Permissions page that enables you to control which users can access the application. By default, all Cloud Access Manager users have access to the application. You can restrict access to the application to users who belong to a particular role, but for this example, click Next to allow all users to access the application. |
|
7 |
Enter an Application Name, for example Active Roles Server. On this page you may also set whether the application uses the user’s primary log in credentials. If this is set, the user will be logged into the application with the same credentials they use to log in to Cloud Access Manager. Click Next. |
|
8 |
|
1 |
Close Internet Explorer® to end your Cloud Access Manager session. |
|
2 |
Open the Cloud Access Manager Portal using the desktop shortcut Cloud Access Manager Application Portal. |
|
3 |
Log in to the Cloud Access Manager Portal using a test user account defined in your Active Directory® forest, and click the Active Roles Server application. |