Step 1: Configure an Access Node
To configure an Access Node
- On the computer where the Defender Administration Console is installed, open the Active Directory Users and Computers tool (dsa.msc).
- In the left pane, expand the appropriate domain node, and then expand the Defender node
- In the left pane, right-click Access Nodes, from the shortcut menu, select New | Defender Access Node.
- Complete the wizard to configure the Defender Access Node.
- On the Enter a name and description for this Access Node page, type a descriptive name and description for the Access Node.
- On the Select the node type and user ID type for this Access Node page, use the following options:
Node Type From this list, select Radius Agent. This enables the RADIUS protocol for communications between Cisco ACS devices and Defender. Note that the RADIUS protocol is transmitted over UDP and uses port 1645 or 1812.
User ID From this list, select the user ID type you want to use.
- On the Enter the connection details for this Access Node page, use the following options:
IP Address or DNS Name Specify the Cisco AAA Server by entering its IP address or DNS name.
Step 2: Specify users or groups for the Access Node
In this step, you specify the users or groups who will use the configured Access Node to authenticate via Defender.
To specify users or groups for the Access Node
- On the computer where the Defender Administration Console is installed, open the Active Directory Users and Computers tool (dsa.msc).
- Open the properties of the Access Node you have configured:
- In the left pane, expand the domain node, expand the Defender node, and then click to select Access Nodes.
- In the right pane, double-click the Access Node.
- In the dialog box that opens, use the Members tab to add the users or groups to the Members list.
- When you are finished, click OK.
Using Defender VPN Integrator
Defender VPN Integrator is a tool that makes it very easy for remote users to utilize all the benefits of both VPN technology and the secure, two-factor authentication provided by Defender. Defender VPN Integrator simplifies the authentication process by integrating with the installed Defender Soft Token for Windows.
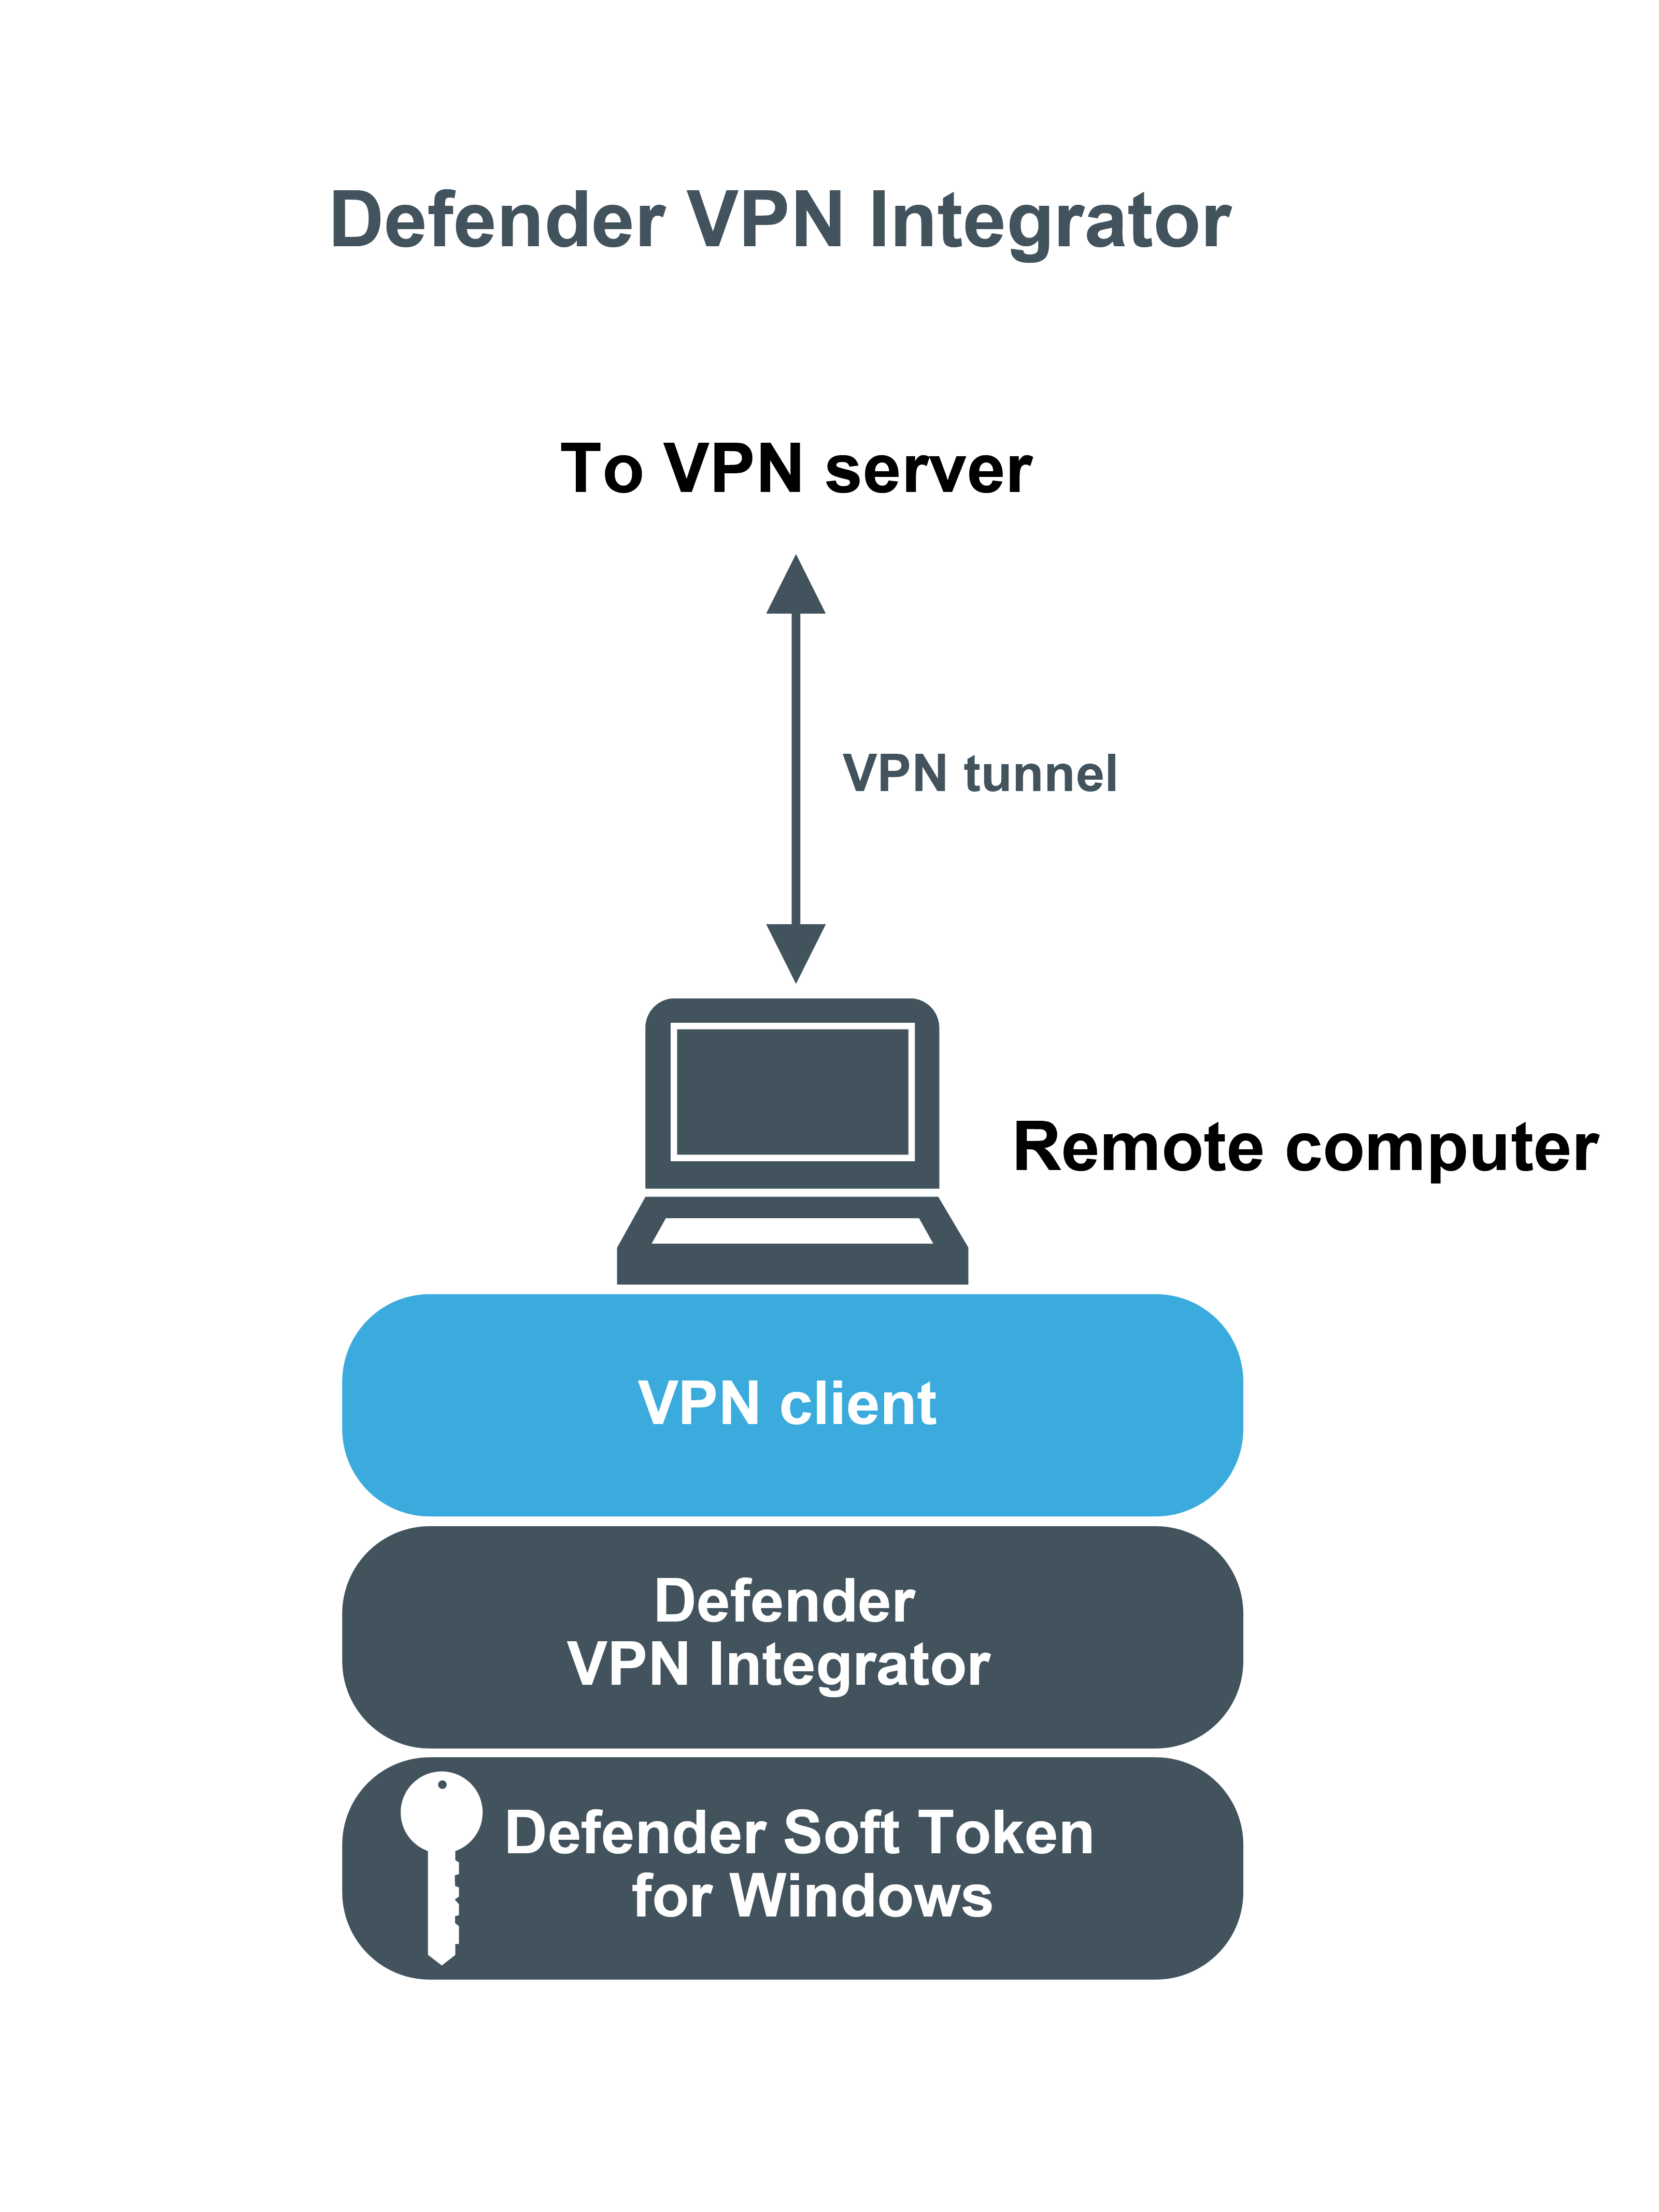
The Defender VPN Integrator is installed and configured on the end-user’s desktop, along with the Soft Token for Windows. When the user initiates a Defender protected VPN connection, VPN Integrator communicates between the Defender Soft Token for Windows and the third-party VPN client, to ensure that the secure, one-time password authentication process is handled automatically. The entire operation is seamless and very fast—only the passphrase for the Defender Soft Token for Windows is required from the user.
The guide describes how to install and configure Defender VPN Integrator within your environment.
Installing Defender VPN Integrator
To install Defender VPN Integrator
- Run the DefenderVPNIntegrator.exe file supplied in the Defender distribution package.
- Complete the wizard that starts to install the Defender VPN Integrator.
You may be prompted to restart your computer. When you complete the installation, Defender VPN Integrator runs as a service.
If an earlier version of Defender VPN Integrator is installed on your computer, you first need to uninstall the earlier version. Depending upon your version of the Windows operating system, use Programs and Features or Add or Remove Programs in Control Panel to uninstall the earlier version of Defender VPN Integrator. After uninstall, you may be prompted to restart your computer. When finished, run DefenderVPNIntegrator.exe to install the new version of Defender VPN Integrator.
