To view screenshots generated for encrypted audit trails and replay encrypted audit trails in your browser, you have to upload the necessary certificates and corresponding private keys to your private keystore. Depending on the encryption, decrypting the upstream part of an audit trail may require an additional set of certificates and keys.
Only RSA keys (in PEM-encoded X.509 certificates) can be uploaded to the private keystore.
|

|
NOTE:
Certificates are used as a container and delivery mechanism. For encryption and decryption, only the keys are used. |
One Identity recommends using 2048-bit RSA keys (or stronger).
Use every keypair or certificate only for one purpose. Do not reuse cryptographic keys or certificates (for example, do not use the certificate of the One Identity Safeguard for Privileged Sessions (SPS) webserver to encrypt audit trails, or the same keypair for signing and encrypting data).
For more information on audit trail encryption, see Encrypting audit trails and for more information about replaying audit trails in your browser, see Replaying audit trails in your browser.
You can upload certificates permanently or temporarily. The temporary certificates are deleted when you log out of SPS.
The certificates and private keys in your keystore can be protected with a passphrase. To use the certificates and private keys in a passphrase-protected keystore for decrypting audit trails, you have to unlock the keystore first by providing the security passphrase. The keystore then remains unlocked for the duration of your session.
To replay encrypted audit trails in your browser
-
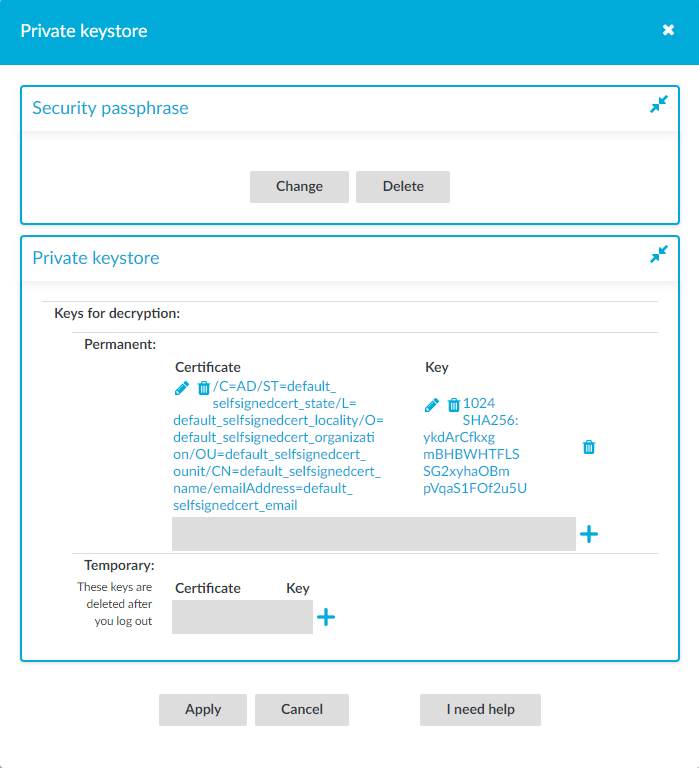
Click on User Menu > Private keystore.
Figure 237: User Menu > Private keystore — The private keystore
-
(Optional) Create a security passphrase, if you have not configured one yet.
-
In Security passphrase, click Change.
-
In the New: field, enter your new security passphrase. Repeat the same passphrase in the Confirm: field.
|
|
NOTE:
SPS accepts passwords that are not longer than 150 characters. The following special characters can be used: !"#$%&'()*+,-./:;<=>?@[\]^-`{|} |
-
Click Apply.
If you forgot your security passphrase, contact our Support Team.
-
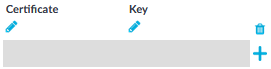
Click  to add a new certificate. A new empty row is added.
Figure 238: Adding certificates
-
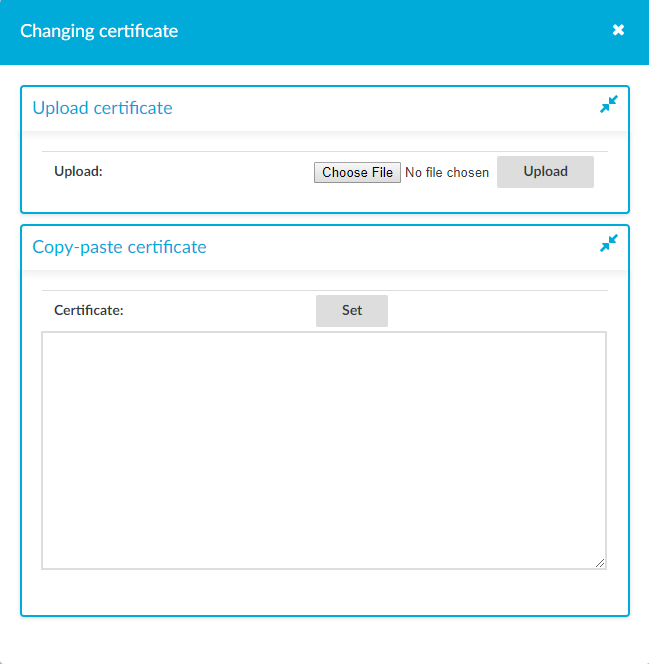
Click the first  (under Certificate) to upload the new certificate. A pop-up window with the header Changing certificate is displayed.
Figure 239: Uploading certificates
-
Click Choose File, select the file containing the certificate, and click Upload. Alternatively, you can also copy-paste the certificate into the Certificate field and click Set.
-
To upload the private key corresponding to the certificate, click the second icon (under Key). A pop-up window with the header Changing key is displayed.
Figure 240: Uploading the private key

-
Click Choose File, select the file containing the private key, provide the Password if the key is password-protected, and click Upload. Alternatively, you can also copy-paste the private key into the Key field, provide the Password there, and click Set.
-
To add more certificate-key pairs, click and repeat the steps above.
-
To finish uploading certificates and keys to your private keystore, click Apply.
|
|
NOTE:
Creating report subchapters from search queries is currently an experimental feature of One Identity Safeguard for Privileged Sessions (SPS), therefore One Identity recommends that only administrators use this feature and only at their own risk. |
You can turn any search query or statistics into a subchapter to add to your reports. This is an easy and flexible way of creating reports to monitor traffic, track certain parameters, or get alerted about particular events. The Search interface allows you to:
|
|
NOTE:
Creating report subchapters from search queries is currently an experimental feature of One Identity Safeguard for Privileged Sessions (SPS), therefore One Identity recommends that only administrators use this feature and only at their own risk. |
The following describes how to create a search-based report subchapter from search results.
To create a search-based report subchapter from search results
- Navigate to Search, and perform a query of your choice.
- Click Search. Search results are displayed.
- Click
 . The Create reporting subchapter page is displayed, with the query field populated with your query.
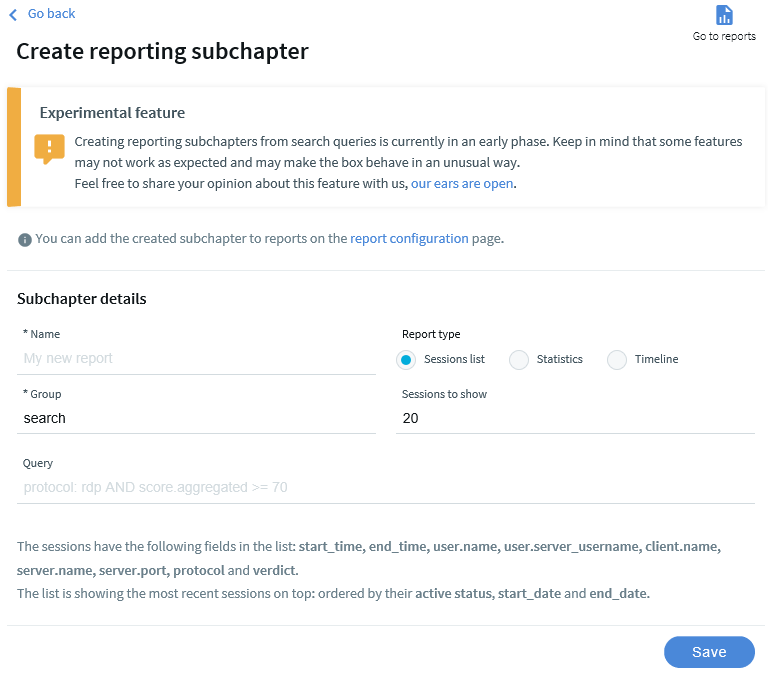
- In the name field, add a name to your report.
- In Report type, select the type that fits your query. You can choose from the following types:
- Sessions list: Displays a list of sessions.
Set the number of sessions to show in the report as required.
- Statistics: Visualizes the distribution of sessions based on the selected metadata.
Select a Statistic presentation for your report, such as Pie chart, List, Bar chart. Select the field (the metadata) to create your statistics on.
- Timeline: Visualizes the distribution of sessions within a day/week/month, depending on the time range chosen for the report under Reporting > Configuration > Generate this report every > Day/Week/Month.
- Click Save.
- Click
 . Alternatively, navigate to Reporting > Configuration.
- Configure a custom report from scratch, or add the subchapter to an existing report. For details, see Configuring custom reports.
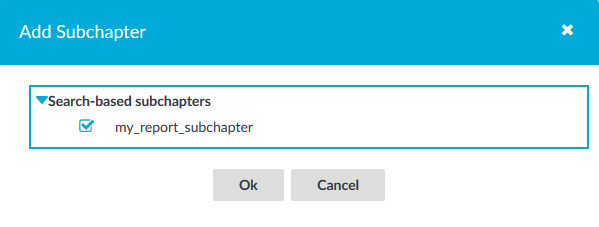
When adding the subchapter you created, look for it under Search-based subchapters.
|
|
NOTE:
Creating report subchapters from search queries is currently an experimental feature of One Identity Safeguard for Privileged Sessions (SPS), therefore One Identity recommends that only administrators use this feature and only at their own risk. |
The following describes how to create a search-based report subchapter from scratch.
To create a search-based report subchapter from scratch
-
If you have multiple SPS appliances and they are organized into a cluster where one of the nodes is the Search Master (or Central Search) node, log in to that node.
- Navigate to Reporting > Search subchapters.
- Click
 . The Create reporting subchapter page is displayed.
Figure 241: Reporting > Search subchapters — Create reporting subchapter
- In the name field, add a name to your report.
- In the query field, type the query that you want to create a report from.
- In Report type, select the type that fits your query. You can choose from the following types:
- Sessions list: Displays a list of sessions.
Set the number of sessions to show in the report as required.
- Statistics: Visualizes the distribution of sessions based on the selected metadata.
Select a Statistic presentation for your report, such as Pie chart, List, Bar chart. Select the field (the metadata) to create your statistics on.
- Timeline: Visualizes the distribution of sessions within a day/week/month, depending on the time range chosen for the report under Reporting > Configuration > Generate this report every > Day/Week/Month.
- Click Save.
- Click . Alternatively, navigate to Reporting > Configuration.
- Configure a custom report from scratch, or add the subchapter to an existing report. For details, see Configuring custom reports.
When adding the subchapter you created, look for it under Search-based subchapters.
