You can configure an O365 and Azure Tenant Selection policy in the Active Roles Console (also known as the MMC Interface) to:
- Validate the selected Azure tenants for Azure users, guest users, O365 Groups and contacts.
- Select O365 Licenses for Azure users and guest users.
- Select O365 Roles for Azure users and guest users.
- Preprovision OneDrive for Azure users.
Prerequisites
Consider the following before configuring an O365 and Azure Tenant Selection policy:
-
The OneDrive settings of this policy are applicable to hybrid Azure users only, and will work only if you have already enabled OneDrive for your Azure tenant in the Azure AD Configuration > Modify (Tenant details) window of the Active Roles Configuration Center. For more information on enabling OneDrive for Azure users in an Azure tenant, see Enabling OneDrive in an Azure tenant.
-
To configure an O365 and Azure Tenant Selection policy, your Organizational Unit (OU) must already have the Azure - Default Rules to Generate Properties built-in policy configured. For more information on configuring the policy, see Configuring the Azure - Default Rules to Generate Properties policy.
To configure an O365 and Azure Tenant Selection policy
-
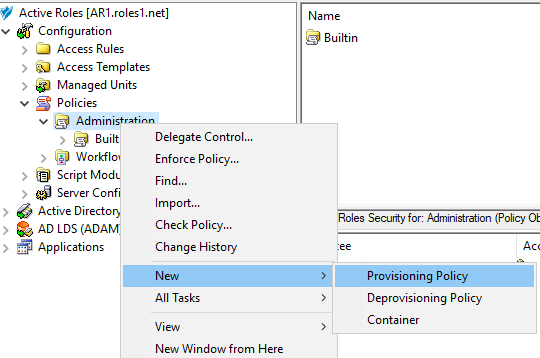
To open the New Provisioning Policy Object Wizard dialog, right-click in the middle pane to open the context menu, and then select New > Provisioning Policy.
-
On the Name and Description page, provide a unique Name for the new policy object. Optionally, also provide a Description. To continue, click Next.
-
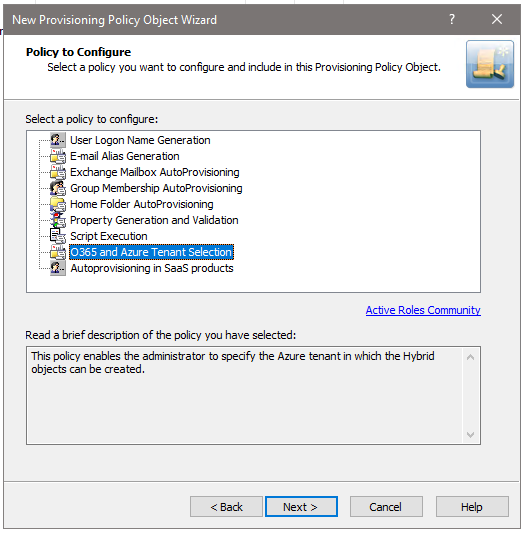
On the Policy to Configure page, select O365 and Azure Tenant Selection, and click Next.
-
On the Object Type Selection page, to specify the type of object you want the policy to provision, click Select, then click OK.
TIP: If you do not see the object type you need, expand the list by selecting Show all possible object types.
NOTE: If you want to assign and validate Office 365 licenses and roles, or provision OneDrive storage as part of the configured policy, select the User (user) object type in this step. Office 365 license and role validation, and OneDrive provisioning are not applicable to Azure Groups and Azure Contacts.
-
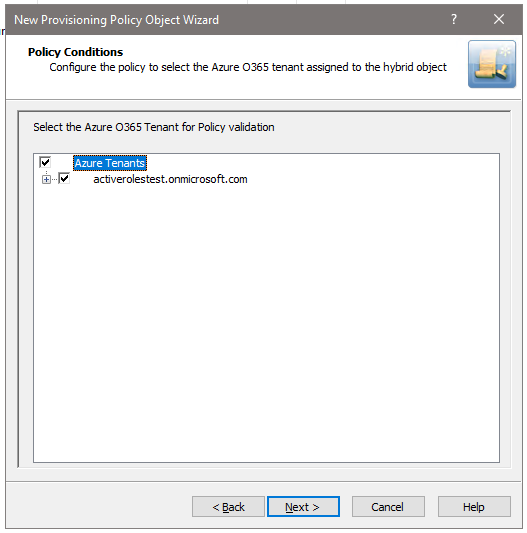
On the Policy Conditions page, select your Azure tenant for which you want to set up the policy. To continue, click Next.
-
(Optional) On the next Policy Conditions page, select the licenses to validate and assign to new Azure users in the Azure tenant. To continue, click Next.
NOTE: If OneDrive storage is planned to be provisioned in the selected Azure tenant for Azure users, make sure that you select the SharePoint Online license in this step. Otherwise, the configured OneDrive storage cannot be provisioned for Azure users created later. For more information, see Creating a new cloud-only Azure user.
-
(Optional) On the next Policy Conditions page, select the Office 365 roles to validate and assign to new Azure users in the Azure tenant. To continue, click Next.
-
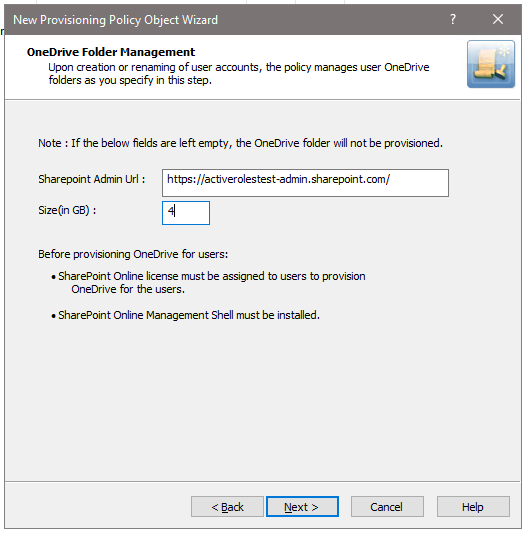
(Optional) To configure OneDrive storage for the Azure users of the Azure tenant, configure the following attributes on the OneDrive Folder Management page:
-
SharePoint Admin URL: Specify the URL of the SharePoint administration site of your Azure tenant. The URL has the following syntax: <azure-tenant-name>-admin.sharepoint.com
-
Size (in GB): Specify the default OneDrive storage size allocated for each Azure user in the Azure tenant.
If you do not need to provision OneDrive storage for users in the Azure tenant, leave the settings empty and click Next.
NOTE: If the wizard shows an error when clicking Next after configuring the OneDrive settings:
-
Check that the specified SharePoint Admin URL is correct.
-
Make sure that the specified OneDrive storage size is correct (that is, it is within the range of the individual cloud storage allowed for users in your organization).
-
-
On the Enforce Policy page, select the Organizational Unit (OU) for which the policy will be applied. To do so, click Add to open the Select Objects window, then select the OU from the list. To continue, click OK then Next.
-
To complete the wizard, click Finish.


