For SSH, RDP, Telnet, and Citrix ICA connections, usermapping policies can be defined. A usermapping policy describes who can use a specific username to access the remote server: only members of the specified local or LDAP usergroups (for example, administrators) can use the specified username (for example, root) on the server.
|

|
Caution:
In SSH connections, the users must use the following as their username: gu=username@remoteusername, where username is the username used in the LDAP directory, SPS will use this username to determine their group memberships, and remoteusername is the username they will use on the remote server. For example, to access the example.com server as root, use: gu=yourldapusername@root@example.com
For the username of SSH users, only valid UTF-8 strings are allowed. |
|
|
Caution:
In Telnet connections, usermapping policy works only if Extract username from the traffic is enabled. |
When configuring ICA connections, also consider the following:
|
|
Caution:
If the clients are accessing a remote application or desktop that is shared for Anonymous users (that is, the Users properties of the application is set to Allow anonymous users in the Citrix Delivery Services Console), the actual remote session will be running under an Anonymous account name (for example, Anon001, Anon002, and so on), not under the username used to access the remote server. Therefore, you need to enable usermapping to the Anon* usernames.
To accomplish this, create a usermapping policy and set the Username on the server option to Anon*, and the Groups option to *, then use this usermapping policy in your ICA connections. |
NOTE: Starting from SPS version 3.2, usermapping is possible only when gateway authentication is used as well.
To configure usermapping
-
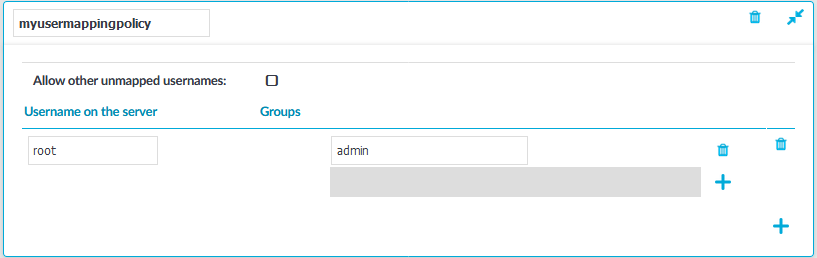
Navigate to Policies > Usermapping Policies.
Figure 35: Policies > Usermapping Policies — Configuring usermapping policies
-
Click  to create a new policy, and enter a name for the policy.
-
Click and enter the username that can be used to access the remote server (for example root) into the Username on the server field. SPS will use this username in the server-side connection. To permit any username on the server side, enter an asterisk (*).
-
Select Groups, click and specify who is permitted to use the remote username set in the Username on the server field.
-
If you have an LDAP Server set in the connection policy where you will use usermapping, enter the name of the local or LDAP usergroup (for example admins) whose members will be permitted to use the remote username.
NOTE: The LDAP server configured in the connection policy is not necessarily the same as the LDAP server used to authenticate the users accessing the SPS web interface.
-
If you do not authenticate the connections to an LDAP server, enter the name of the userlist whose members will be permitted to use the remote username.
Repeat this step to add further groups if needed.
-
Repeat steps 3-4 to add further usernames if needed.
-
To permit other users, who are not explicitly listed in the Usermapping Policy access the remote servers, select the Allow other unmapped usernames option. Note that these users must use the same username on the SPS gateway and the remote server.
-
Click  .
.
-
Navigate to the Connections page of the traffic (for example to SSH Control > Connections), and select the connection policy to modify.
-
Select the usermapping policy created in Step 2 from the Usermapping policy field.
-
Click .
NOTE: For RDP connections, usermapping is possible only when gateway authentication is used as well. When configuring usermapping for RDP connections, configure gateway authentication.
The following describes how to configure a local Credential Store that stores the credentials used to login to the target host.
Prerequisites
NOTE: Users accessing connections that use Credential Stores to authenticate on the target server must authenticate on SPS using gateway authentication or an AA plugin. Therefore gateway authentication or an AA plugin must be configured for these connections.
To configure a local Credential Store that stores the credentials used to login to the target host
-
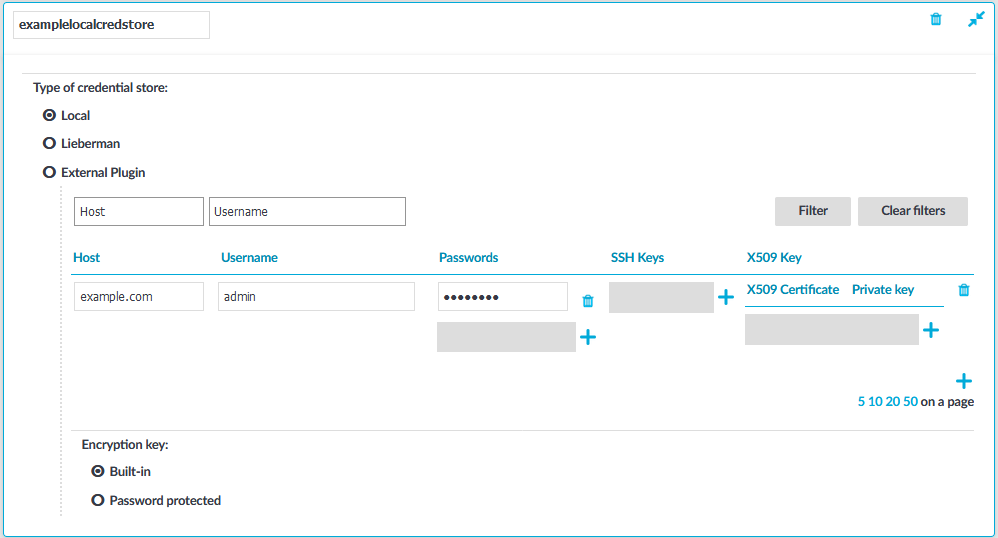
Navigate to Policies > Credential Stores.
-
Click and enter a name for the Credential Store.
-
Select Local.
-
Select Encryption key > Built-in. That way the credentials will be encrypted with a built-in password, and the Credential Store is automatically accessible when SPS boots up.
Figure 36: Policies > Credential Stores > Local — Configuring local Credential Stores
-
Add credentials to the Credential Store.
-
Click and enter the destination host and the username. For the destination host, you can use hostname, IP address, or subnet as well. To use the same credentials for every destination host, enter the 0.0.0.0/0 subnet. To use the credentials only on the hosts of a specific domain, enter *.domain. Note that:
-
Usernames are case sensitive.
-
To authenticate users of a Windows domain, enter the name of the domain into the Host field.
Use an IPv4 address.
-
Set the credentials. SPS will use these credentials to login to the destination host if the credential store is selected in a Connection policy. If more than one credential is specified to a host-username pair, SPS will attempt to use the credentials as the destination host requests it.
-
To add a password, click Passwords >  , then enter the password corresponding to the username.
-
To upload a private key, click SSH Keys > > , then paste or upload a private key.
NOTE: If the private key is protected by a passphrase, enter the passphrase. The passphrase is needed only once during the upload, it is not required for the later operation of the Credential Store.
-
To generate a keypair on SPS click SSH Keys > > , set the length and type of the key, then click Generate. After that, click the fingerprint of the key to download the public part of the keypair. There is no way to download the private key from the SPS web interface.
NOTE:
TIP: One Identity recommends using 2048-bit RSA keys (or stronger).
-
To upload a certificate and the corresponding private key, click X509 Keys > > , then paste or upload a certificate and the private key.
NOTE: If the private key is protected by a passphrase, enter the passphrase. The passphrase is needed only once during the upload, it is not required for the later operation of the Credential Store.
NOTE: SPS accepts passwords that are not longer than 150 characters and supports the following characters:
-
Repeat the previous step to add further credentials to the username as necessary.
-
Repeat the previous step to add further hosts or usernames as necessary.
NOTE: Credential Stores can be used together with usermapping policies to simplify the administration of users on the target hosts.
For more information, see Configuring usermapping policies.
-
Click .
-
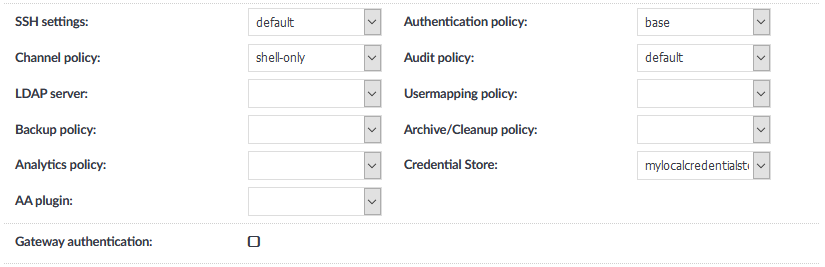
Navigate to the Connection policy where you want to use the Credential Store (for example, to SSH Contro > Connections), select the Credential Store to use in the Credential Store field, then click .
NOTE: The Connection Policy will ignore the settings for server-side authentication (set under Relayed authentication methods) if a Credential Store is used in the Connection Policy.
Figure 37: <Protocol name> Control > Connections — Select a Credential Store to use
Credential Stores offer a way to store user credentials (for example, passwords, private keys, certificates) and use them to log in to the target server, without the user having access to the credentials. That way, the users only have to perform gateway authentication on SPS with their usual password (or to an LDAP database), and if the user is allowed to access the target server, SPS automatically logs in using the Credential Store.
NOTE: Keyboard-interactive authentication is not supported when using credential stores.
Figure 38: Authenticating using Credential Stores
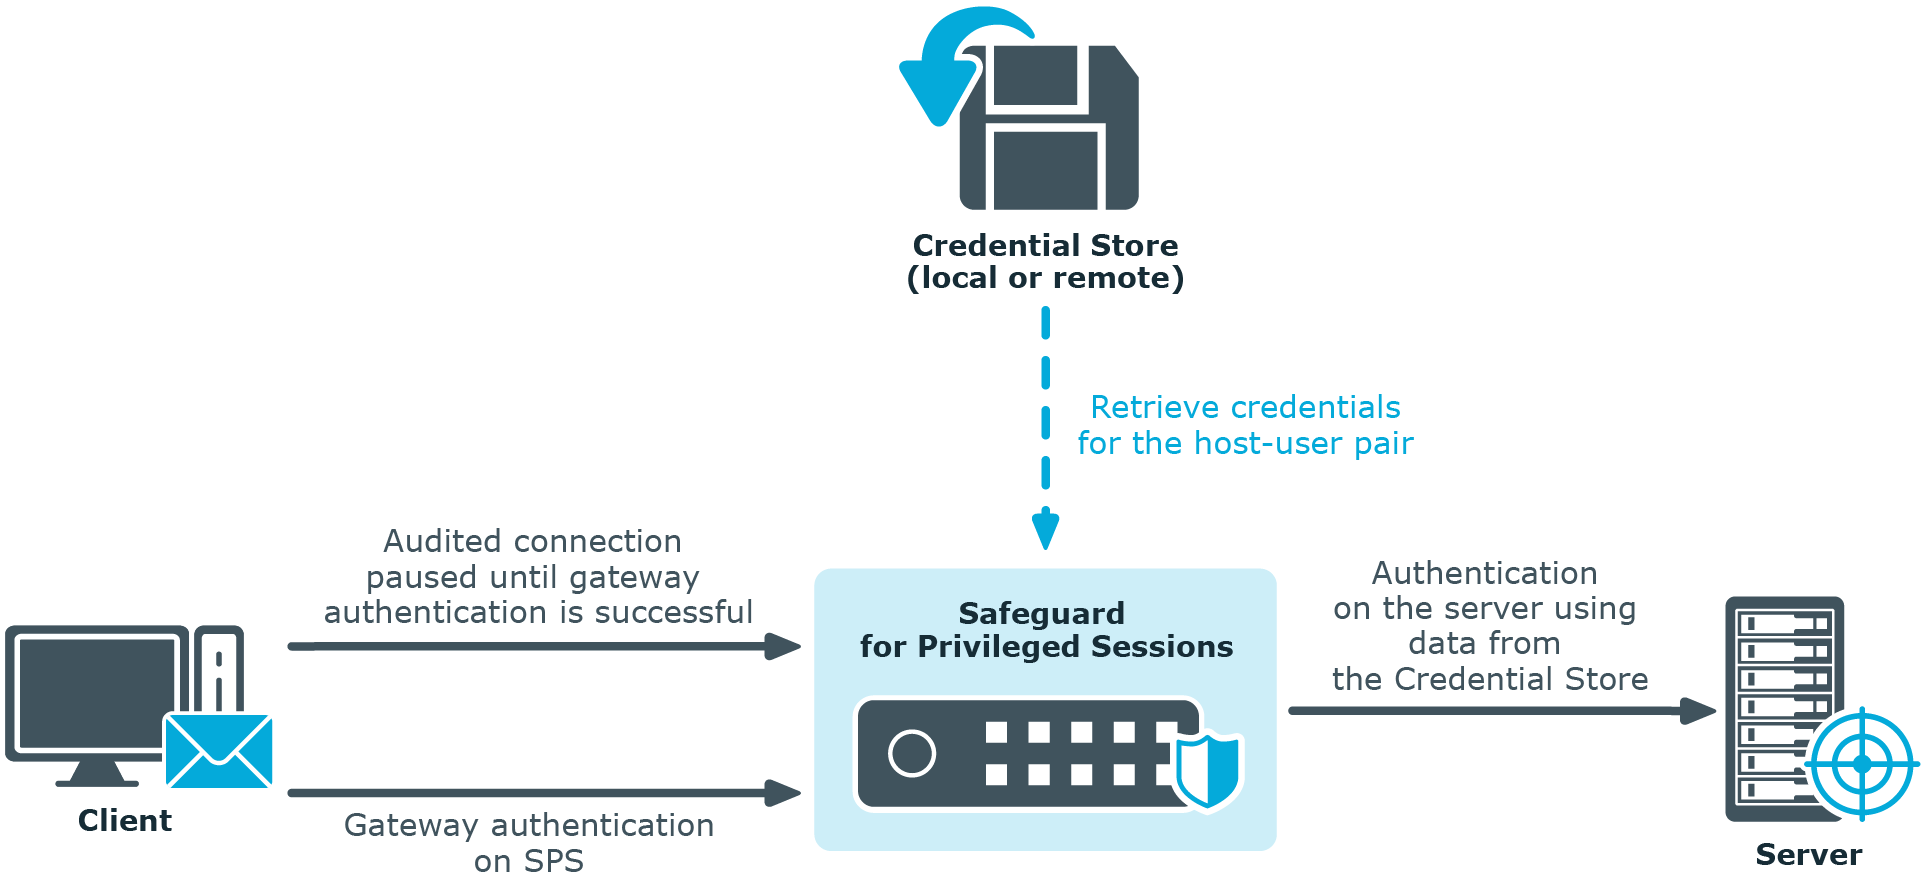
Credential Stores can be stored locally on SPS, or on a remote device. For remote Credential Stores, SPS integrates with external authentication and authorization systems using plugins.
NOTE: After performing a successful gateway authentication, if the credential store does not contain a password for the user, the user is prompted for the server-side password as a fallback.
In case of authenticating to RDP servers using Network Level Authentication (NLA), the server-side password is prompted at the start of the connection. If there is no password in the credential store for the user and the server-side password is incorrect, the connection is terminated.
To download the official plugins for your product version, navigate to the product page on the Support Portal. The not officially supported plugins are also available on GitHub .
To write your own custom plugin, feel free to use our Plugin SDK.
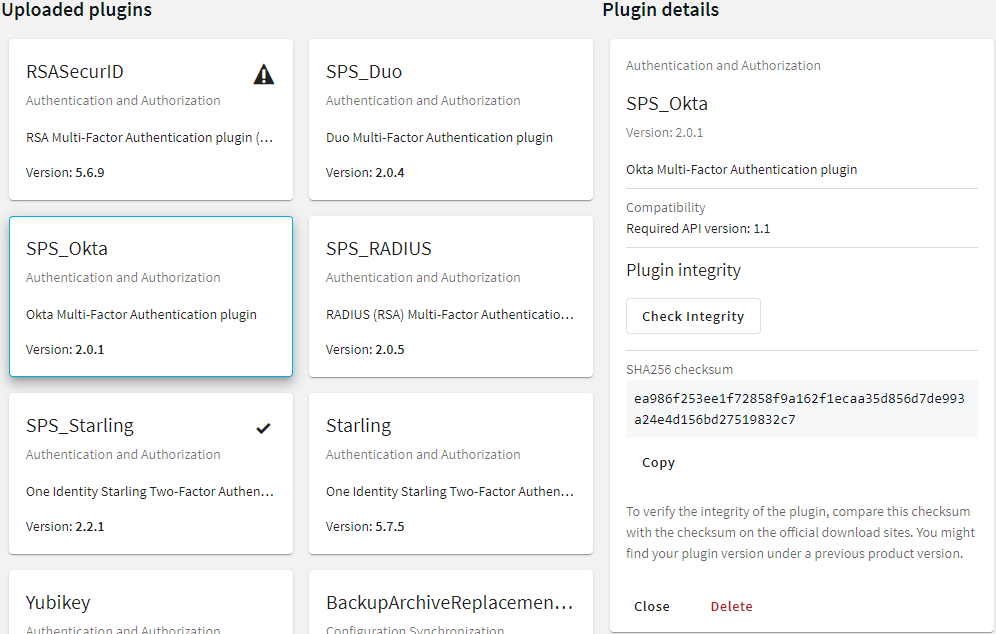
Figure 39: Basic Settings > Plugins — Viewing the uploaded plugins
The following plugin types can be uploaded to SPS:
