Navigation menu functions
Table 8: Functions in the navigation view toolbar
|
|
You can select a function in this context menu. The functions available depend on which database object you selected beforehand. |
 |
You can delete a database object with this button. |
 |
You can load a new database object with this button. |
 |
You can display database object properties with this button. |
To run a function
- Select either a module, component, project file, form type, layout definition, or test script in the category you want.
NOTE: You cannot add a web project through this context sensitive submenu. You can add new modules using the corresponding wizard. This procedure also applies to creating new web projects.
Depending on your choice, other functions are available in the context sensitive submenu displayed using the  .
.
- In the navigation view toolbar, click .
- In the submenu, select a function.
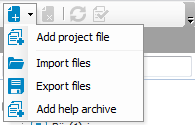
You can run the following functions in the Project files pane.
- Add project files
- Import files
- Export files
- Add help archive
To delete a database object
- In the navigation view, select a database object and click .
This deletes the selected object after confirming the security prompt from the database.
NOTE: is only enabled if you have selected a database object.
NOTE: The delete process cannot be undone.
To load new database objects
- Click the database objects in the appropriate category to refresh the database.
To view database object properties
To search in the navigation view
- In the navigation view, select the category in which you want to search for database objects.
This displays the selected category in the navigation view.
- Enter the search term in the text field and click RETURN.
The search results are listed under the text field.
Detailed information about this topic
Definition tree view
The Web Designer’s graphical user interface, which you can use to edit data objects in your web application, is displayed as a definition tree view. The definition tree view is displayed as a tab next to the start page. You open the definition tree view by selecting a database object from the navigation view for example.
Almost all database objects consist of several nodes that are shown as a tree structure in the definition tree view and can be edited. If you add a new database object (web project, module, component) to your web application, this database object is created with a predefined number of nodes in the object definition. The object definition is a type of view found within the definition tree view. For more information, see Menu bar icons in the definition tree view.
The predefined nodes of a database object provide the foundation for an XML document in your web application and, as a result, cannot be deleted. You can add additional nodes in addition to the predefined nodes using the context menu. These additional nodes can be removed again. When a database object is being edited, the user is always located at a defined position in the definition tree view.
A database object generally consists of several sub-documents that can be edited in separate views in the definition tree view. You can switch between different views using the toolbar in the definition tree view. The toolbar is explained in the following table.
Table 9: Menu bar icons in the definition tree view
  |
Object definition (read-only).
This view is mainly used to view existing database object nodes. This view is preset when you switch to the definition tree view. If the database object comes from the standard version of the Web Designer, the view is called Object definition (read-only). For more information, see Customizing object definitions. |
 |
Configuration (read-only). |
| |
Configuration (custom). |
 |
Generated code (read-only). |
 |
Settings. |
 |
Help for displaying selected node type. This button opens the One Identity Manager Web Designer Object Model Documentation.
NOTE: A WCF connection must be created for this function. |
 |
Find and replace. |
 |
Create object copy. |
 |
Compiles a single object without writing the changes to the database. |
Detailed information about this topic
Node editor
Node editor allows you to edit the properties of a node that you have selected in the definition tree view. Each node type has a special set of properties that are listed in the Node editor. Therefore, the list of properties varies depending on which node type you have selected.
The functions in the toolbar are listed in the following table.
The node editor is divided into several categories. These categories could be the following. Which categories are shown, depends on the type of node selected.
Table 11: Categories in the "Note editor" window.
| General settings |
Settings in this category include node ID, node type, viewing condition or condition for running. Not all settings are not listed here. Which settings are shown, depends on the type of node selected. This applies to all categories. |
| Workflow control |
This category is available for module or container nodes, for example. You can edit the data Identifier of the associated menu item for a module node. For a container node, you can edit the data Display node for enter key and Expression to trigger an AJAX update. |
| Style |
Menu for selecting a layout that you can modify with an editor. First select the check box to enable this function and add a condition to the layout. |
| Advanced settings |
In this category, there can be a control ID that you can overwrite. |
| Viewing options |
This category is available for nodes of type "Chart", for example. You can change styles or set heights and width of charts. |
| Source data collection |
This category is available for nodes of type "Combobox". You want to make source data from other collections available to the current collection. This means the user can select the collection with the desired source data over the menu. |
Global settings
You configure the basic settings for the Web Designer in the Global settings dialog. The settings are sometimes preset. You can adapt the settings to your needs.
To adjust Web Designer settings
- Select Connection > Settings in the menu bar.
The Global settings dialog opens. Detailed information concerning global settings is described in the following table.
- Open the relevant settings area and apply any necessary changes.
- Save the changes.
Table 12: Global settings for the Web Designer
| Common |
language |
Sets the language used. |
German |
| Resolution |
Sets the screen resolution. |
1280 X 1024 |
| Maximum history length |
Sets the maximum number of history items displayed. |
25 |
| Maximum number of recently opened items |
Sets the maximum number of recently opened items displayed. |
10 |
| Editor |
Use colors to distinguish data, display, and action |
Enables color differentiation. |
Enabled |
| Shorten long property values |
Enables a shortened display. |
Enabled |
| Show XPath navigation |
Enables XPath navigation. |
Not set |
| Show messages after syntax errors are found after editing |
Enables message display. |
Not set |
| Check for problems before publishing |
Enables checking. |
Enabled |
| Save and load Web Designer size within layout |
Enables the Web Designer to be saved and loaded with layout. |
Enabled |
| Show message, if new assemblies are available |
Enables information on new assemblies to be displayed. |
Enabled |
| Check if web is not published, when closing |
Enables checking. |
Enabled |
| Save and backup |
Ask for change label if none is selected |
Enables queries. |
Enabled |
| Keep backup of unsaved objects on the local machine |
Enables caching. |
Not set |
| Compiling and debugging |
Show warnings of this database modules |
Manual input of the module displaying the warnings. |
Empty field |
| Perform enhanced check |
Enables enhanced checking. |
Not set |
| Suppress background actions |
Disables background actions. |
Not set |
| Keyboard layout |
Zoom in on preview |
Zooms in on the preview. |
Ctrl + D |
| Recompile |
Recompiles the web application. |
F6 |
| Show next bookmark |
Displays the next bookmark. |
F2 |
| Enable/Disable the debugger |
Enables or disables the debugger. |
F9 |
| Resume debugging |
Resumes debugging after stoppage. |
F7 |
| Debugger - Step Into |
Locates the error at debugging. |
F11 |
| Suppress background actions |
Enables or disables background actions. |
F8 |
To switch the keyboard layout back to the default layout

 Database
 and name / icon of the base object


 to expand a group separately.
 to collapse them separately.
 to switch to the extension. A node that has had an extension added to it, is labeled in the definition tree view with