
Recovering from a split brain situation
A split brain situation is caused by a temporary failure of the network link between the cluster nodes, resulting in both nodes switching to the active (that is, primary node) role while disconnected. This might cause new data (for example, audit trails) to be created on both nodes without being replicated to the other node. Thus, it is likely in this situation that two diverging sets of data have been created, which cannot be trivially merged.
|
|
Caution:
Hazard of data loss In a split brain situation, valuable audit trails might be available on both One Identity Safeguard for Privileged Sessions (SPS) nodes, so special care must be taken to avoid data loss. |

The nodes of the SPS cluster automatically recognize the split brain situation once the connection between the nodes is reestablished, and do not perform any data synchronization to prevent data loss. When a split brain situation is detected, it is visible on the SPS system monitor, in the system logs (Split-Brain detected, dropping connection!), on the Basic Settings > High Availability page, and SPS sends an alert as well.
Once the network connection between the nodes has been re-established, one of the nodes will become the active (that is, primary) node, while the other one will be the backup node (that is, the secondary node). This means that one node is providing services similar to normal operation, and the other one is kept passive (as a backup) to avoid network interferences. Note that there is no synchronization between the nodes at this stage.
To recover a SPS cluster from a split brain situation, complete the following steps.
|
|
Caution:
Do NOT shut down the nodes. |
Data recovery
In the procedure described here, data will be saved from the host currently acting as the secondary node host. This is required because data on this host will later be overwritten by the data available on the current primary node.
|
|
NOTE:
During data recovery, there will be no service provided by SPS. |

To recover from a split brain situation
-
Log in to the primary node. If no Console menu is showing up after login, then this is the secondary node. In this case, try the other node.
-
Select Shells > Boot Shell.
-
Enter /usr/share/heartbeat/hb_standby. This will change the current secondary node to primary node and the current primary node to secondary node (HA failover).
-
Exit the console.
-
Wait a few seconds for the HA failover to complete.
-
Log in on the other host. If no Console menu is showing up, the HA failover has not completed yet. Wait a few seconds and try logging in again.
-
Select Shells > Core Shell.
-
Issue the systemctl stop zorp-core.service command to disable all traffic going through SPS.
-
Save the files from /var/lib/zorp/audit that you want to keep. Use scp or rsync to copy data to your remote host.
TIP: To find the files modified in the last n*24 hours, use find . -mtime -n.
To find the files modified in the last n minutes, use find . -mmin -n .
-
Enter:
pg_dump -U scb -f /root/database.sql
Back up the /root/database.sql file.
-
Exit the console.
-
Log in again, and select Shells > Boot Shell.
-
Enter /usr/share/heartbeat/hb_standby. This will change the current secondary node to primary node and the current primary node to secondary node (HA failover).
-
Exit the console.
-
Wait a few minutes to let the failover happen, so the node you were using will become the secondary node and the other node will become the primary node.
The nodes are still in a split-brain state but now you have all the data backed up from the secondary node, and you can synchronize the data from the primary node to the secondary node, which will turn the HA state from "Split-brain" to "HA". For details on how to do that, see HA state recovery.
HA state recovery
In the procedure described here, the "Split-brain" state will be turned to the "HA" state. Keep in mind that the data on the current primary node will be copied to the current secondary node and data that is available only on the secondary node will be lost (as that data will be overwritten).
Steps: Swapping the nodes (optional)
|
|
NOTE:
If you completed the procedure described in Data recovery, you do not have to swap the nodes. You can proceed to the steps about data synchronization. |
If you want to swap the two nodes to make the primary node the secondary node and the secondary node the primary node, perform the following steps:
-
Log in to the primary node. If no Console menu is showing up after login, then this is the secondary node. In this case, try the other node.
-
Select Shells > Boot Shell.
-
Enter /usr/share/heartbeat/hb_standby. This will output:
Going standby [all]
-
Exit the console.
-
Wait a few minutes to let the failover happen, so the node you were using will become the secondary node and the other node will be the primary node.
Steps: Initializing data synchronization
To initialize data synchronization, complete the following steps:
-
Log in to the secondary node. If the Console menu is showing up, then this is the primary node. In this case, try logging in to the other node.
-
Enter the following commands. These commands will make the secondary node discard the data available only here, on this node.
drbdadm secondary r0
drbdadm connect --discard-my-data r0
-
Log out of the secondary node.
-
Log in to the primary node.
-
Select Shells > Boot Shell.
-
Enter:
drbdadm connect r0
-
Exit the console.
-
Check the High Availability state on the web interface of SPS, in the Basic Settings > High Availability > Status field. During synchronization, the status will say Degraded Sync, and after the synchronization completes, it will say HA.
Replacing a HA node in a One Identity Safeguard for Privileged Sessions (SPS) cluster
The following describes how to replace a unit in a One Identity Safeguard for Privileged Sessions (SPS) cluster with a new appliance.
To replace a unit in a SPS cluster with a new appliance
-
Verify the HA status on the working node. Select Basic Settings > High Availability. If one of the nodes has broken down or is missing, the Status field displays DEGRADED.
-
Note down
-
Perform a full system backup. Before replacing the node, create a complete system backup of the working node. For details, see Data and configuration backups.
-
Check which firmware version is running on the working node. Select Basic Settings > System > Version details and write down the exact version numbers.
-
Log in to your support portal and download the CD ISO for the same SPS version that is running on your working node.
-
Without connecting the replacement unit to the network, install the replacement unit from the ISO file. Use the IPMI if needed.
-
When the installation is finished, connect the two SPS units with an Ethernet cable via the Ethernet connectors labeled as 4 or HA.
-
Reboot the replacement unit and wait until it finishes booting.
-
Login to the working node and verify the HA state. Select Basic Settings > High Availability. The Status field should display HALF.
-
Reconfigure
.
-
Click Other node > Join HA.
-
Click Other node > Reboot.
-
The replacement unit will reboot and start synchronizing data from the working node. The Basic Settings > High Availability > Status field will display DEGRADED SYNC until the synchronization finishes. Depending on the size of the hard disks and the amount of data stored, this can take several hours.
-
After the synchronization is finished, connect the other Ethernet cables to their respective interfaces (external to 1 or EXT,
Expected result
A node of the SPS cluster is replaced with a new appliance.
Resolving an IP conflict between cluster nodes
The IP addresses of the HA interfaces connecting the two nodes are detected automatically, during boot. When a node comes online, it attempts to connect to the IP address 1.2.4.1. If no other node responds until timeout, then it sets the IP address of its HA interface to 1.2.4.1, otherwise (if there is a responding node on 1.2.4.1) it sets its own HA interface to 1.2.4.2.
Replaced nodes do not yet know the HA configuration (or any other HA settings), and will attempt to negotiate it automatically in the same way. If the network is, for any reason, too slow to connect the nodes on time, the replacement node boots with the IP address of 1.2.4.1, which can cause an IP conflict if the other node has also set its IP to that same address previously. In this case, the replacement node cannot join the HA cluster.
To manually assign the correct IP address to the HA interface of a node, perform the following steps:
-
Log in to the node using the IPMI or the physical console.
Configuration changes have not been synced to the new (replacement) node, as it could not join the HA cluster. Use the default password of the root user of One Identity Safeguard for Privileged Sessions (SPS), see "Installing the SPS hardware" in the Installation Guide.
-
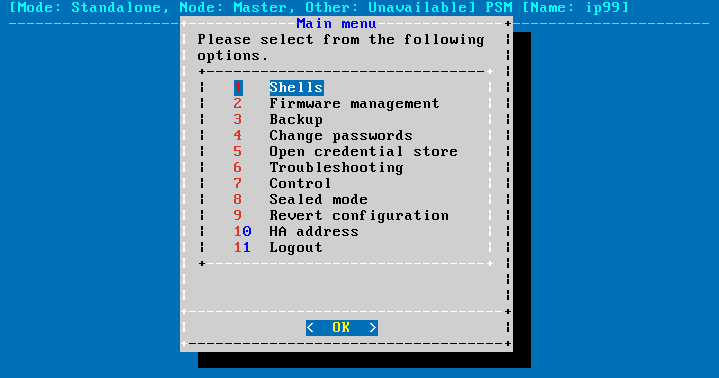
From the console menu, choose 10 HA address.
Figure 298: The console menu
-
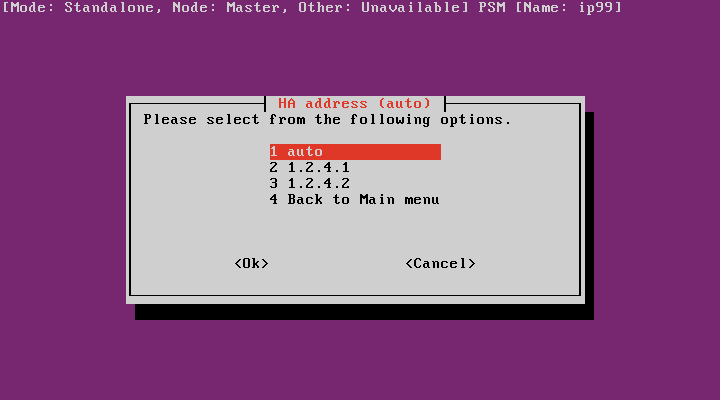
Choose the IP address of the node.
Figure 299: The console menu
-
Reboot the node.
Understanding One Identity Safeguard for Privileged Sessions (SPS) RAID status
This section explains the possible statuses of the One Identity Safeguard for Privileged Sessions (SPS) RAID device and the underlying hard disks. SPS displays this information on the Basic Settings > High Availability page. The following statuses can occur:
-
Optimal: The hard disks are working as expected.
-
Degraded: One or more hard disk has reported an error, and might have to be replaced. For assistance, contact our Support Team.
-
Failed stripes: One or more stripes of data failed on the RAID device. It is possible that data loss occurred, but unfortunately there is no way to find out the extent of the data loss (if any).
-
If you have a single SPS node: You must reinstall SPS and restore the data from the latest backup. For details, see "One Identity Safeguard for Privileged Sessions Software Installation Guide" in the Installation Guide and Restoring One Identity Safeguard for Privileged Sessions (SPS) configuration and data. If you do not have backup, contact our Support Team.
-
If you have a high-availability SPS cluster: Shut the node down. Do NOT disconnect its HA interface. Reinstall the node (for details, see "One Identity Safeguard for Privileged Sessions Software Installation Guide" in the Installation Guide), power it on, then navigate to Basic Settings > High Availability, and click Join HA. For assistance, contact our Support Team.
-
-
Offline: The RAID device is not functioning, probably because several disks have broken down. SPS cannot operate properly in this case. For assistance, contact our Support Team.