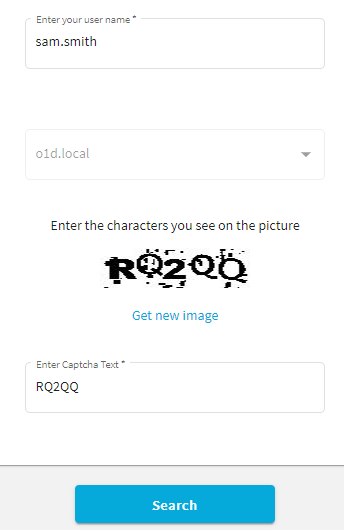
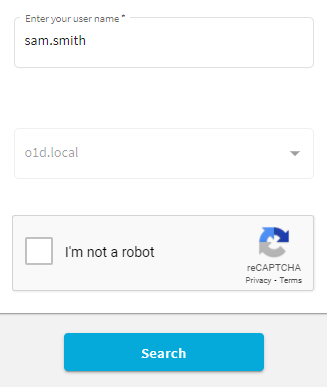
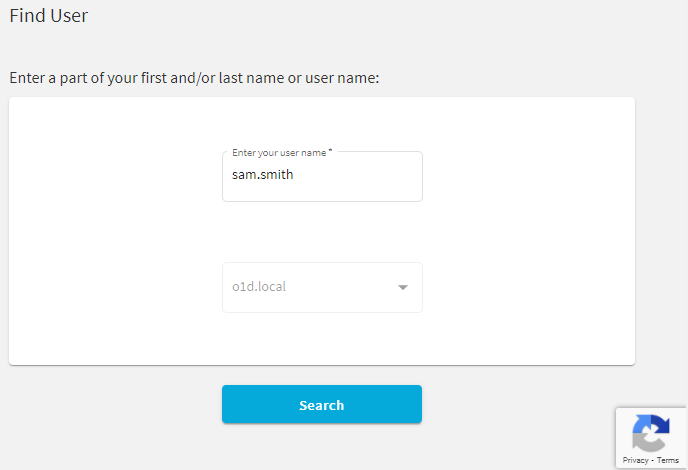
You can configure the Password Manager Self-Service Site to display CAPTCHA images on its Find User page as an anti-bot security measure.

To configure CAPTCHA images for the Self-Service Site
-
In the Password Manager Administration Site, navigate to General Settings > Search and Logon Options.
-
Scroll down to Security Settings.
-
To enable the CAPTCHA or reCAPTCHA settings, enable Show a security image to prevent bot attacks.
-
To configure the CAPTCHA settings, select Display CAPTCHA and click Settings.
-
In the CAPTCHA Settings dialog, configure the following options:
-
Number of characters: Specify the number of characters (1–15) to display on the generated CAPTCHA image. The default value is 5.
-
Noise level: Specify the number and size of noise artifacts on the generated CAPTCHA image. Higher levels mean more difficult readability.
When ready, click OK.
-
Under Security Settings, select Show a security image every time the search is performed to perform the configured anti-bot protection check each time a search is performed on the Find User page of the Self-Service Site.
TIP: Enable this setting for an increased protection against bot attacks.
-
To apply your settings, click Save.
You can configure the Find User page of the Password Manager Self-Service Site to include reCAPTCHA anti-bot protection. Password Manager supports the reCAPTCHA v2 and v3 engines.
NOTE: Password Manager supports only the "I'm not a robot" Checkbox challenge of reCAPTCHA v2. It does not support the Invisible reCAPTCHA badge and reCAPTCHA Android app validations.
Prerequisites
Before you configure reCAPTCHA v2 or v3 protection for the Password Manager Self-Service Site, make sure that the following conditions are met:
-
The server running Password Manager has an active Internet connection and can communicate with the Google reCAPTCHA endpoint.
-
You must sign up and generate a reCAPTCHA site key and secret key from Google. For more information, see the Google reCAPTCHA portal.
NOTE: When generating the keys on the Google reCAPTCHA Administration Site, provide the domain name(s) where the Password Manager Self-Service Site(s) are deployed. If multiple Self-Service Sites are deployed in several different domains, provide all the domains to generate the required number of site keys and secret keys.
To configure reCAPTCHA protection for the Self-Service Site
-
In the Password Manager Administration Site, navigate to General Settings > Search and Logon Options.
-
Scroll down to Security Settings.
-
To enable the CAPTCHA or reCAPTCHA settings, enable Show a security image to prevent bot attacks.
-
To configure the reCAPTCHA settings, select Display reCAPTCHA and click Settings.
-
In the reCAPTCHA Settings dialog, configure the following options:
-
Version: Select the reCAPTCHA version to use (v2 or v3).
-
Site key: Enter the site key generated on the Google reCAPTCHA Administration Site.
-
Secret key: Enter the secret key generated on the Google reCAPTCHA Administration Site.
-
Theme: Select the visual theme (Light or Dark) to use with the reCAPTCHA widget.
NOTE: This setting is available only for reCAPTCHA v2.
-
Enter reCAPTCHA v3 Score: Specify the reCAPTCHA v3 score threshold (0.0–1.0) under which the interaction is considered to be a bot attempt. The default value is 0.5, and One Identity recommends using it until further adjustments are made based on actual site traffic.
NOTE: This setting is available only for reCAPTCHA v3.
When ready, click OK.
-
Under Security Settings, select Show a security image every time the search is performed to perform the configured anti-bot protection check each time a search is performed on the Find User page of the Self-Service Site.
TIP: Enable this setting for an increased protection against bot attacks.
-
To apply your settings, click Save.
Once you configured reCAPTCHA, the Find User page of the Self-Service Site will be updated to include the configured anti-bot protection method:
-
If reCAPTCHA v2 is configured, the I'm not a robot check box widget appears.

-
If reCAPTCHA v3 is configured, the reCAPTCHA widget appears at the bottom right corner of the screen.

You can export and import the configuration settings of Password Manager instance. You can export the configuration to a configuration file to back up the instance or create replicas of the existing instance. You can import the configuration to join the current Password Manager instance to an existing realm.
By exporting configuration settings to a configuration file, you can back up the current instance or use the configuration file to create a Password Manager realm.
A realm is a group of Password Manager instances using common configuration settings, including but not limited to Management Policies, general settings, password policies, and so on.
If you want to create a realm, you need to export the configuration settings from a Password Manager instance and create a replica of this instance by importing the configuration settings. To learn more about creating Password Manager realms, see Installing multiple instances of Password Manager.
To export configuration settings
-
To connect to the Administration Site, enter the Administration Site URL in the address bar of your web browser. By default, the URL is http://<ComputerName>/PMAdmin/.
NOTE: When prompted to log in, provide your domain user name in a domainname\username format.
-
On the menu bar, click General Settings, then click the Import/Export tab and select the Export configuration settings option and click Export.
IMPORTANT: Remember and store the password that is generated while exporting the configuration file. You must enter this password when importing the configuration file for a new instance when, you want to join to a realm or restoring the configuration. Losing this password requires re-installation of the application.
Export the configuration settings and save in a secure location. Use these settings to create secondary instances of Password Manager, and to recover data in the event of server disaster, or serious data loss.


