返回
-
标题
How to use Postman with Starling Connect -
说明
What are the steps needed to use Starling Connect with Postman -
解决办法
To test Postman against a Starling Connect connector:
1. Log into the Starling Connect platform:
a. Connect.Cloud.Oneidentity.com
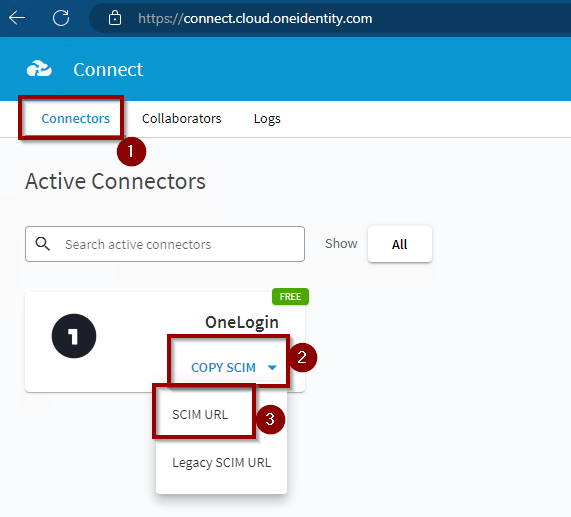
2. Under the "Active Connectors" section, for the Connector to test click "Copy SCIM" | "SCIM URL".
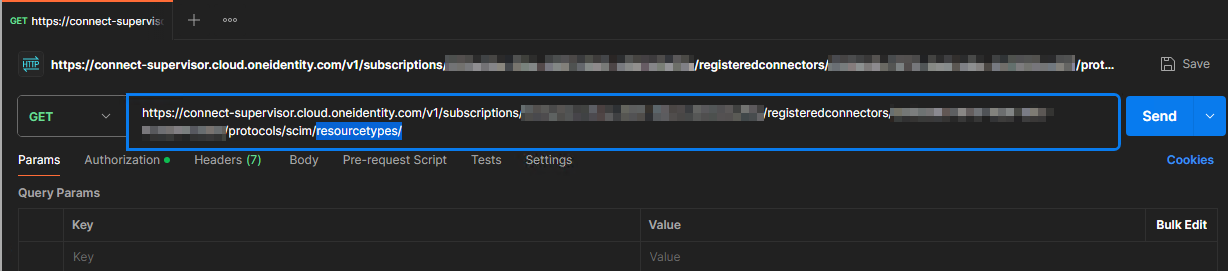
3. Open Postman and paste the URL into the "Enter URL or paste text" field by "GET", and add "/resourcetypes/" to the end of the URL.
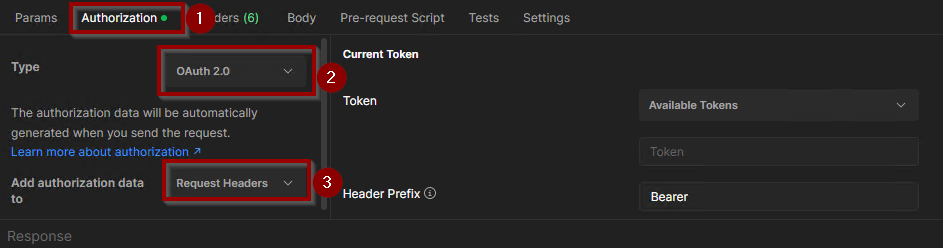
4. Still in Postman, select the "Authorization" tab and change the "Auth Type" to "Oauth 2.0" and the "Add Authorization data to" field to "Request Headers"
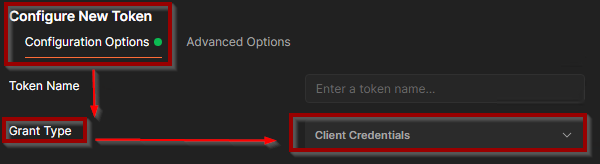
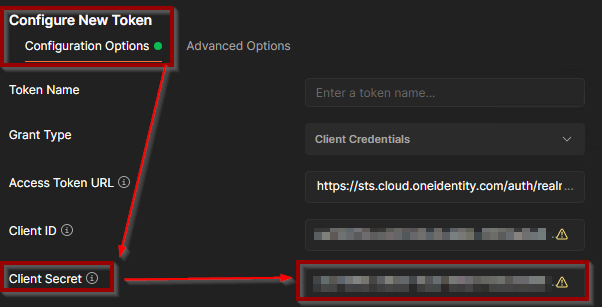
5. Scroll down in the "Authorization" tab, and under the "Configure New Token" change the "Grant Type" to "Client Credentials"
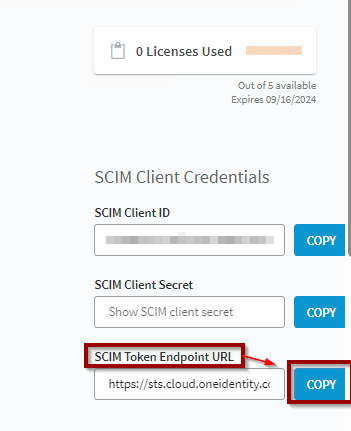
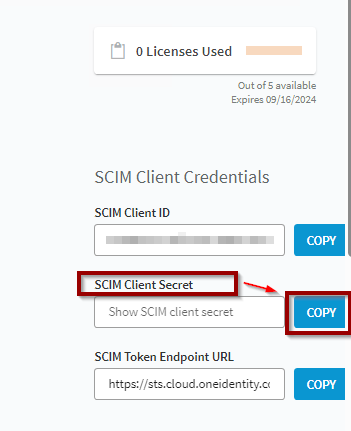
6. Back in the Connect portal, locate the "SCIM Token Endpoint URL" field (on the right-hand side of the page) and click "COPY"
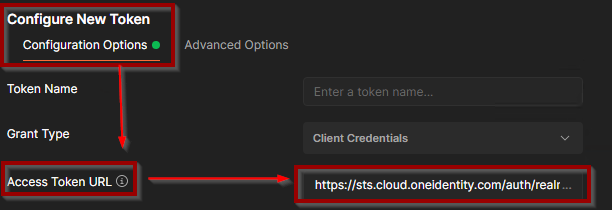
7. Back in Postman, paste the copied "SCIM Token Endpoint URL" into the "Access Token URL" field.
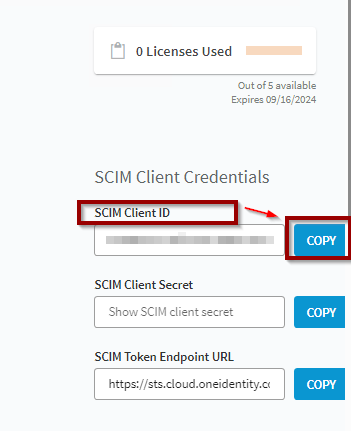
8. Back on the Connect page, now click "COPY" for the "SCIM Client ID"
9. Back in Postman, paste the copied "SCIM Client ID" into the "Client ID" field.

10. Back in the Connect portal, now click "COPY" for the "SCIM Client Secret"
11. In Postman, paste the copied "SCIM Client Secret" into the "Client Secret" field.
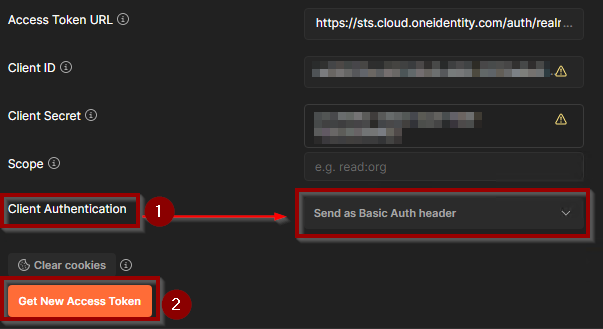
12. Ensure the "Client Authentication" field is set to "Send as Basic Auth Header" before scrolling down to click "Get New Access Token"
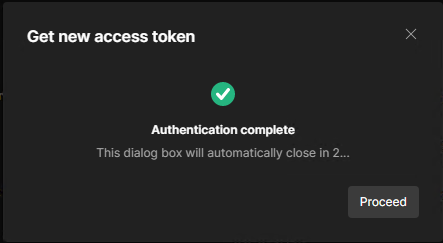
13. A popup should appear indicating success
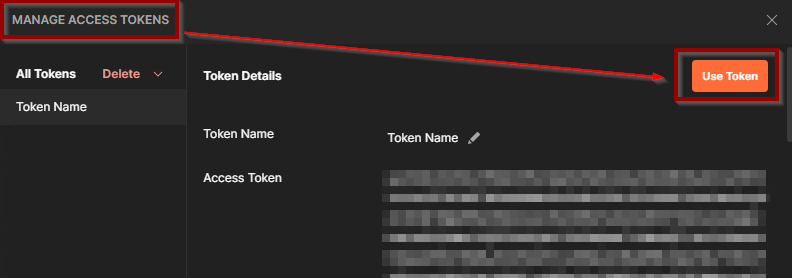
14. In the "Manage Access Tokens" popup, click the "Use Token" button
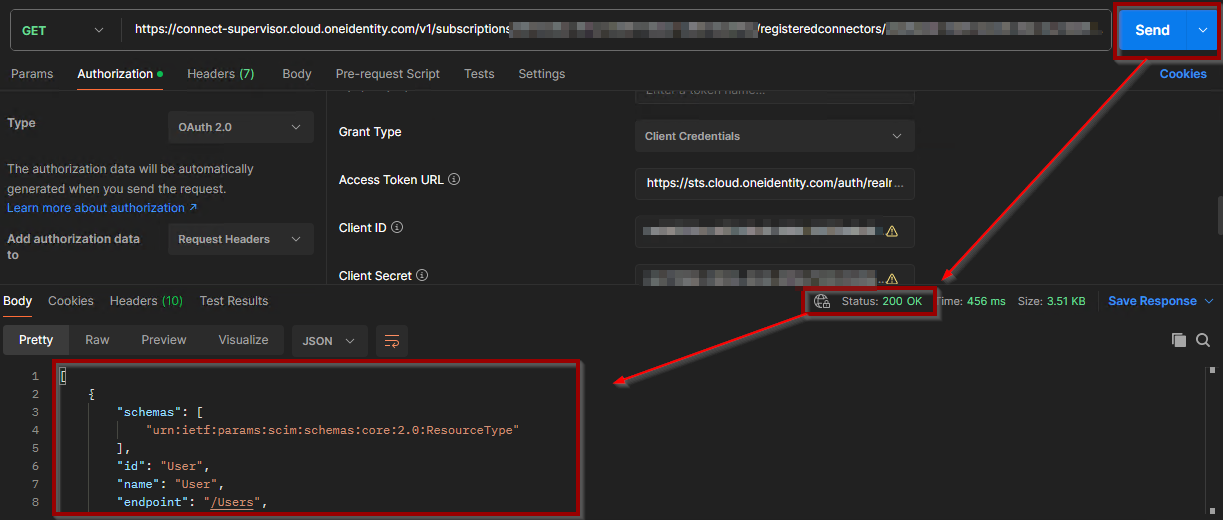
15. Click "Send" by the URL.
16. Ensure that the Status returned "200 OK" and view the "Body" data returned.