To create the license CAB file
- Locate your license file and rename it to:
Quest-QAS-GSSAPI-for-SAP.asc
- Run the following command:
makecab.exe Quest-QAS-GSSAPI-for-SAP.asc license.cab
Note: You may need to download makecab.exe if it is not available on your system.
This creates a file called license.cab.
- Copy license.cab to the directory containing the qas-sso-for-sap-<version>.msi and qas-sso-for-sap.mst files.
To deploy Single Sign-on for SAP through Group Policy silently
- Open a command prompt window, navigate to the directory containing the qas-sso-for-sap-<version>.msi, qas-sso-for-sap.mst and license.cab files.
- Run the following command:
msiexec /i "qas-sso-for-sap-<version>.msi" TRANSFORMS="qas-sso-for-sap.mst" /qb
To configure the SAP GUI client on Windows XP
- Verify that the environment variable SNC_LIB contains the path to qgsskrb5.dll.
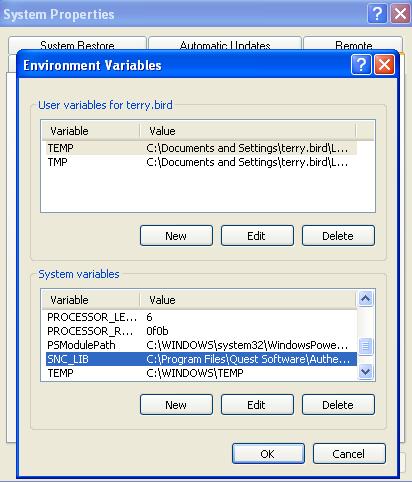
The library is located in the folder where you installed Single Sign-on for SAP.
- Run the SAPlogin application.
- Select a server connection and click Change Item to open the properties.
The SAP GUI client should already be installed and configured for normal password-based authentication.
- Click the Advanced button to open the Advanced Options.
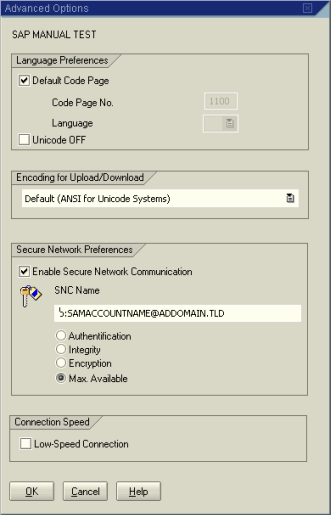
- Select Enable Secure Network Communication to enable SNC.
- In the SNC Name field, enter the KPN of the SAP Server. For example, enter:
p:sAMAccountName@realm
This is the same KPN that was used for the SAP instance profile key snc/identity/as described in Enabling SNC on the SAP server.
- Select the Max. Available option to enable single sign-on as well as data integrity and encryption for all of the traffic between the SAP GUI client and the R3 server.
- Click OK to save these settings.
You can now click the server name in SAPlogon to log onto the server without being prompted for a user name or password.
Once you have configured the server connection to use SNC, it is now possible to create desktop shortcuts using SAPlogon. Shortcuts normally require a password to either be included with the shortcut (not recommended) or else the user is prompted for a password when the shortcut is activated. With SNC activated, however, it is only necessary to enter an arbitrary shortcut (a single letter will do) in the password field of the shortcut. This shortcut is not actually used for authentication, as the SAP system attempts authentication using GSSAPI first.
The use of SNC and shortcuts allows SAP administrators to create desktop icons for users that will launch them directly into specific SAP applications, securely authenticating without the use of passwords.
To configure the SAP GUI client on Windows Vista
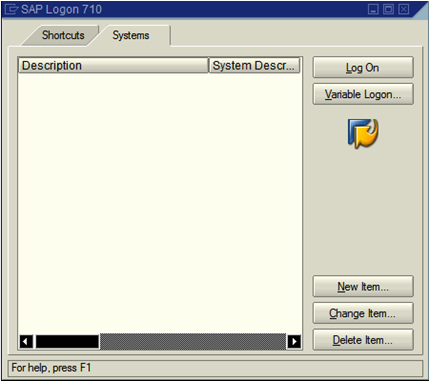
- Open SAP GUI Logon 7.10 and click New Item.
-
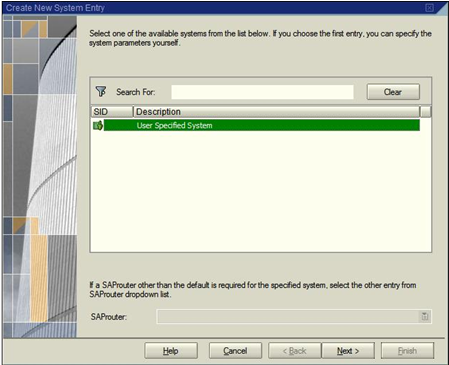
On the Create New System Entry screen, select User Specified System and click Next.
-
Ensure Connection Type is Custom Application Server.
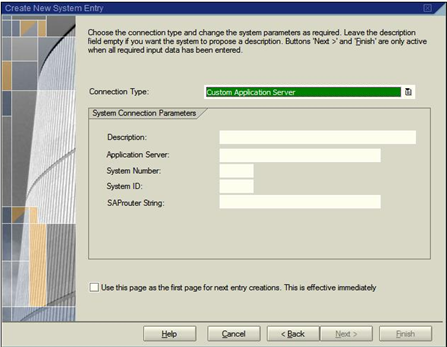
Enter the appropriate information in Application Server, System Number, and System ID and click Next.
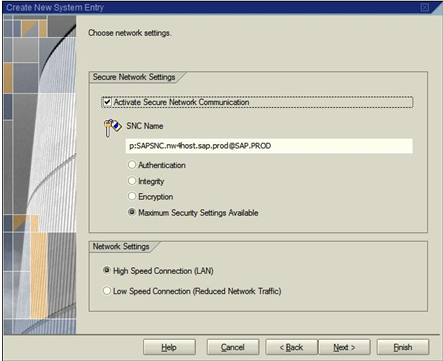
- Select the Activate Secure Network Communication option and enter the Kerberos Principal Name (KPN) of the SAP Server and click Next.
For example, enter:
p:sAMAccountName@realm
Use the same KPN that you used for the SAP instance profile key snc/identity/ as described in Enabling SNC on the SAP server.
-
Leave the defaults on this screen and click Finish.
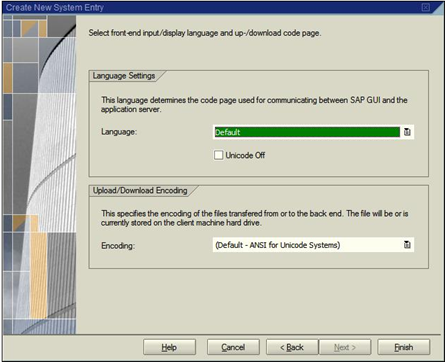
The new item you created will now appear on the SAP GUI log on.
- Click Logon and log in as a user who is set up to use SNC.
