Importing hardware token objects
In order to assign hardware tokens to users in your environment, you first need to import the corresponding hardware token objects into Active Directory.
To import hardware token objects, you need to have the file that contains the definitions of the token objects you want to import. Normally, this file is provided together with hardware tokens.
Note that the instructions in this section do not apply to hardware VIP credentials.
To import hardware token objects into Active Directory
- On the computer where the Defender Administration Console is installed, open the Active Directory Users and Computers tool (dsa.msc).
- In the left pane (console tree), expand the appropriate domain node, and click to select the Defender container.
- On the menu bar, select Defender | Import Tokens.
- Complete the wizard to import the token objects.
For more information about the wizard steps and options, see Import Wizard reference.
Assigning a hardware token object to a user
Before providing a hardware token to a user, you need to assign the corresponding hardware token object to the user in Active Directory. In order you could assign a hardware token object, you need to import it first into Active Directory. For instructions, see Importing hardware token objects.
To assign a hardware token object to a user
- On the computer on which the Defender Administration Console is installed, open the Active Directory Users and Computers tool (dsa.msc).
- In the left pane (console tree), expand the appropriate domain node to select the container that holds the user to which you want to assign the hardware token object.
- In the right pane, double-click the user object.
- In the dialog box that opens, on the Defender tab, under the Tokens list, click the Add button.
- Use the dialog box that opens to specify search criteria to search for the token object you want to assign.
The dialog box has the following elements:
- Token Serial Number Type the token serial number to search for the corresponding token object. If you do not know the token serial number, leave this text box blank.
- Show unassigned tokens only Select this check box if you want to search for token objects not assigned to any user. When this check box is cleared, the search results will include both assigned and unassigned token objects.
- Token Type Use this list to select the token type you want to search for.
- After specifying search criteria, click OK to start your search.
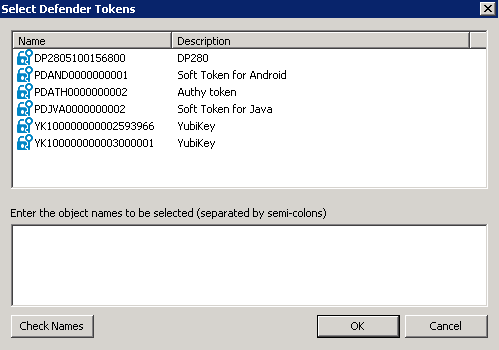
When your search completes, a list of search results opens:

- In the upper pane of this dialog box, double-click the token object you want to assign to the user, and then click OK to assign the object.
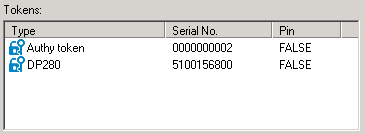
The assigned token object appears in the Tokens list on the Defender tab in the user properties dialog box:

Modifying token object properties
To modify token object properties
- On the computer on which the Defender Administration Console is installed, open the Active Directory Users and Computers tool (dsa.msc).
- In the left pane (console tree), expand the appropriate nodes to select the container that stores the token object whose properties you want to modify.
By default, token objects are stored in the <Domain> | Defender | Tokens container.
- In the right pane, double-click the token object whose properties you want to modify.
- Use the dialog box that opens to modify the token object properties as necessary. You can use the following tabs:
- General tab Provides the token type and token activation code expiry date. You can also use this tab to program, reset, test, and recover the token.
- Details tab Displays information about the token.
- Assigned Users Provides a list of users to whom the token is assigned. You can use this tab to assign or remove the token from users.
- When you are finished, click OK to apply your changes.
General tab
This tab provides information about the token type and token manufacturing date or token activation code expiry date. You can also use this tab to program, reset, test, and recover the token.
On this tab, you can use the following elements:
- Token Type Displays the token type.
- Token Date For objects representing hardware tokens, this option displays the manufacture date of the token. By using this date, you can calculate the approximate expiry date of the token’s battery. For objects representing software tokens, this option displays the activation code expiry date or indicates that the token has already been activated.
- Program Click this button to program the token.
- Reset Click this button to synchronize the token with the Defender Security Server.
The token generates a one-time password that is based on an internal time clock and DES keys. For successful authentication, the Defender Security Server must agree with the token's time clock and DES keys. The token's time clock can become out-of-sync with the Defender Security Server. If this value is out-of-sync, the user cannot use the token for authentication. If access is denied, the token clock must be synchronized with the Defender Security Server clock.
After resetting the token, instruct the user to generate a one-time password on the token and use it for Defender authentication.
- Test Click this button to run a test that verifies the token is programmed correctly and valid for the user. After you click this button, use the Response text box to type the one-time password displayed on the token, and then click Verify.
- Recover Click this button to remotely recover the token after it has reached its preset use limit or been invalidated because the user exceeded the preset number of bad PIN attempts. The Recover button also allows you to reset a passphrase for the token. These values are defined in the token profile assigned to the user.
After you click this button, use the Unlock Challenge text box to type the challenge value displayed on the token, and then click the Get Response button. Enter the displayed response into the token to complete the recover procedure.


