Use the Active Roles Configuration Center to view or modify the tenant type of an existing Azure tenant. This is useful if you need to change the default domain settings of an Azure tenant due to an IT or organizational change.
NOTE: Consider the following limitations when modifying the properties of the selected Azure tenant:
-
If you set the tenant type of your Azure tenant to Federated Domain or Synchronized Identity Domain, then the Azure properties fields of the objects (Azure users, Azure guest users, groups and contacts) in the Azure tenant will be disabled and cannot be edited in the Active Roles Web Interface.
-
You cannot modify the Tenant name, Tenant ID, Tenant Environment Type and authentication settings of the Azure tenant.
To view or modify the Azure tenant properties
-
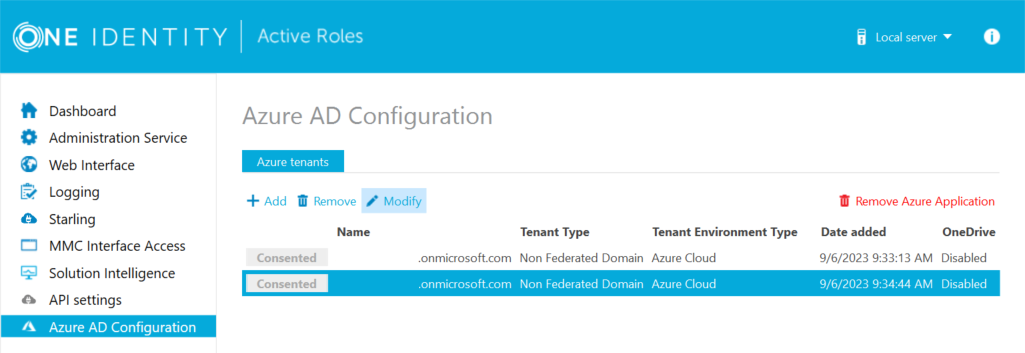
In the Active Roles Configuration Center, on the left pane, click Azure AD Configuration.
The list of existing Azure tenants appears.
-
Select the Azure tenant you want to view or modify, then click Modify.
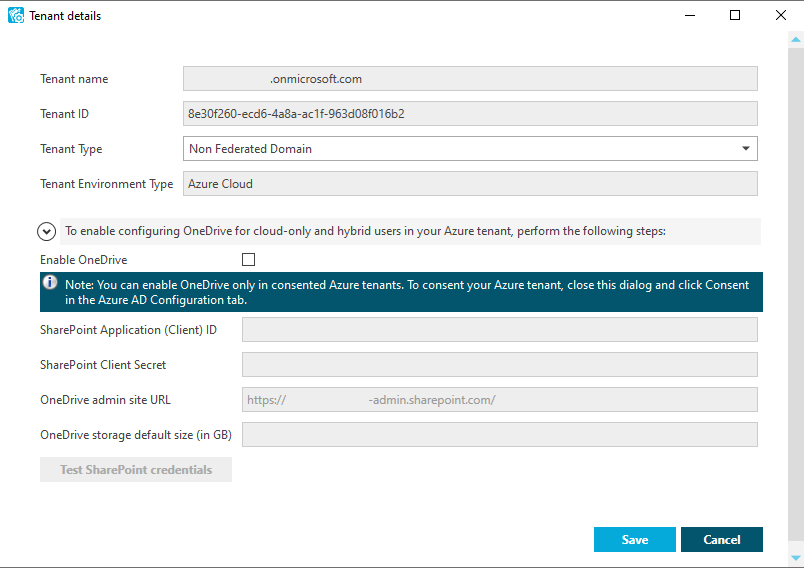
The Tenant details window appears.
-
(Optional) To change the Tenant type of the Azure tenant, select the applicable type from the drop-down list.
-
Non-Federated Domain: When selected, on-premises domains are not registered in Azure AD , and Azure AD Connect is not configured. Azure users and Azure guest users are typically created with the onmicrosoft.com UPN suffix.
-
Federated Domain: On-premises domains are registered in Azure AD and Azure AD Connect. Also, Active Directory Federation Services (ADFS) is configured. Azure users and Azure guest users are typically created with the UPN suffix of the selected on-premises domain.
-
Synchronized Identity Domain: On-premises domains may or may not be registered in Azure AD. Azure AD Connect is configured. Azure users and Azure guest users can be created either with the selected on-premises domain, or with the onmicrosoft.com UPN suffix.
-
(Optional) To enable, disable or modify the provisioned OneDrive storage of the Azure tenant, select or clear Enable OneDrive, and (when selected), configure the SharePoint and OneDrive settings listed in the Tenant details window. For more information on configuring OneDrive storage in an Azure tenant, see Enabling OneDrive in an Azure tenant.
-
To close the Tenant details window without any changes, click Cancel. To apply your changes, click Save.
You can enable OneDrive in your consented Azure tenant(s) for cloud-only and hybrid Azure users in the Azure AD Configuration > Tenant details window of the Active Roles Configuration Center.

To enable OneDrive in an Azure tenant, you must:
-
Configure a SharePoint App-Only for authentication.
-
Specify the required application permissions for the configured SharePoint App-Only.
-
Specify the SharePoint admin site URL of your Azure tenant.
-
Configure the default size of the OneDrive storage provisioned for Azure users in the Azure tenant.
For the detailed procedure, see Configuring OneDrive for an Azure tenant.
NOTE: Once OneDrive is enabled, consider the following limitations:
-
Active Roles supports creating OneDrive storage for new cloud-only and hybrid Azure users only if OneDrive is pre-provisioned in your organization. For more information, see Pre-provision OneDrive for users in your organization in the Microsoft SharePoint documentation.
-
When creating new cloud-only Azure users with OneDrive storage in the Active Roles Web Interface, make sure that the General > Allow user to sign in and access services setting is selected. Otherwise, Active Roles will not provision and create the OneDrive storage of the new Azure user. For more information on creating a new cloud-only Azure user in the Active Roles Web Interface, see Creating a new cloud-only Azure user in the Active Roles Web Interface User Guide.
-
The OneDrive admin site URL and OneDrive storage default size (in GB) settings of the Tenant details window are applicable to cloud-only Azure users only, and do not affect OneDrive provisioning for hybrid users in your Azure tenant. To configure the OneDrive admin site URL and the default OneDrive storage size for hybrid users, you must set these settings in the Active Roles Console (also known as the MMC Interface) by configuring an O365 and Azure Tenant Selection policy for your Azure tenant, after configuring OneDrive in the Active Roles Configuration Center. For more information, see Configuring an O365 and Azure Tenant Selection policy.
Before configuring OneDrive for an Azure tenant in the Active Roles Configuration Center, make sure that the Azure tenant meets the following conditions:
-
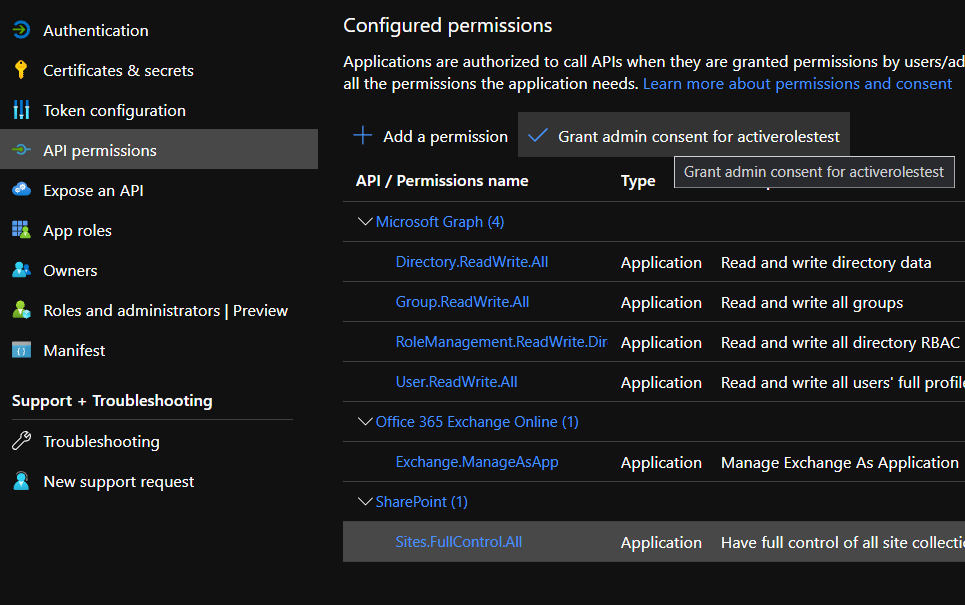
The Azure tenant has the Sites.FullControl.All SharePoint application permission. Active Roles automatically configures this permission when consenting Active Roles as an Azure application for a newly-configured Azure tenant.
However, if the Azure tenant for which you want to enable OneDrive has already been used in an Active Roles version earlier than Active Roles 7.5, you must add the Sites.FullControl.All SharePoint application permission manually for Active Roles in the Azure tenant. Failure of doing so will result in an error in the Tenant Details window of the Active Roles Configuration Center when testing the configured SharePoint credentials.
For more information, see Checking and adding the Sites.FullControl.All permission for Active Roles.
If the Azure tenant for which you want to enable OneDrive has already been used in an Active Roles version earlier than Active Roles 7.5, you must add the Sites.FullControl.All SharePoint application permission manually for Active Roles in the Azure tenant. Failure of doing so will result in an error in the Tenant Details window of the Active Roles Configuration Center when testing the configured SharePoint credentials.
To check that Active Roles has the Sites.FullControl.All application permission in an Azure tenant
-
Log in to Azure Portal.
-
Open the Azure tenant of your organization by clicking Azure AD on the main screen.
-
To open the list of applications registered for your Azure tenant, navigate to Manage > App registrations.
-
Select your Active Roles deployment either by finding it in the All applications or Owned applications list, or by searching it in the search bar.
-
To open the list of API permissions, navigate to Manage > API permissions.
-
Check that the Sites.FullControl.All permission is listed under the API / Permissions name > SharePoint heading.
Figure 152: List of configured permissions under Azure AD > Manage > API Permissions of Azure Portal
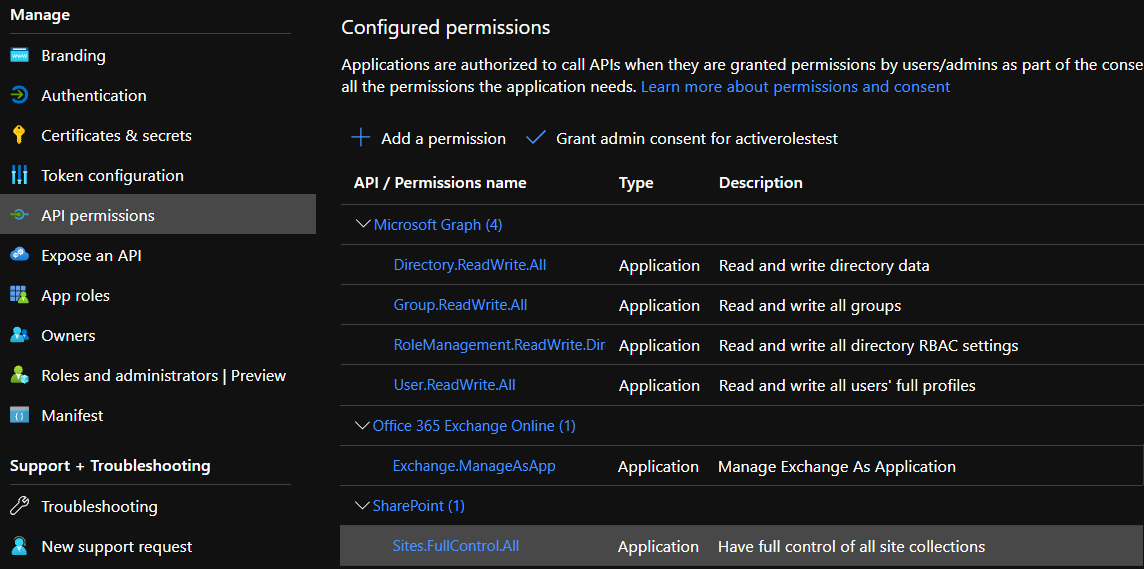
If Sites.FullControl.All is not listed, add it to Active Roles in the Azure tenant by completing the next procedure.
To add the Sites.FullControl.All application permission to Active Roles in an Azure tenant
-
In the Configured permissions list (available under Manage > API permissions) click Add a permission.
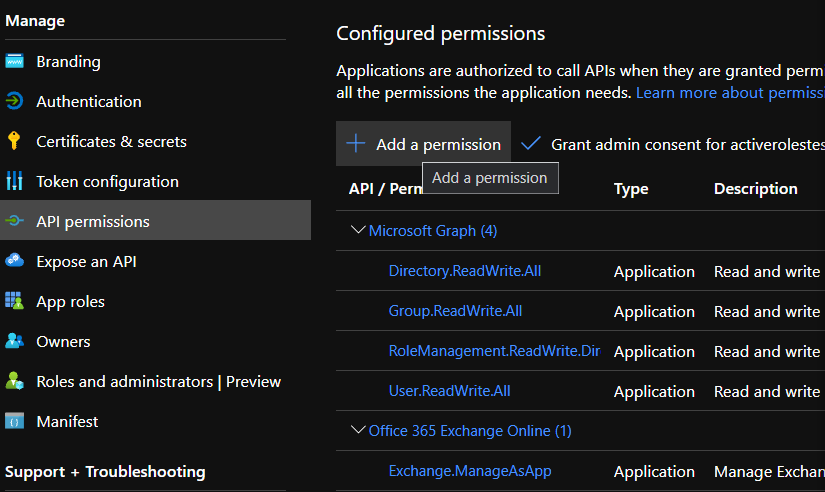
The list of available API permissions will appear on the right side of the screen under Request API permissions.
-
In the list of available API permissions, click SharePoint.
-
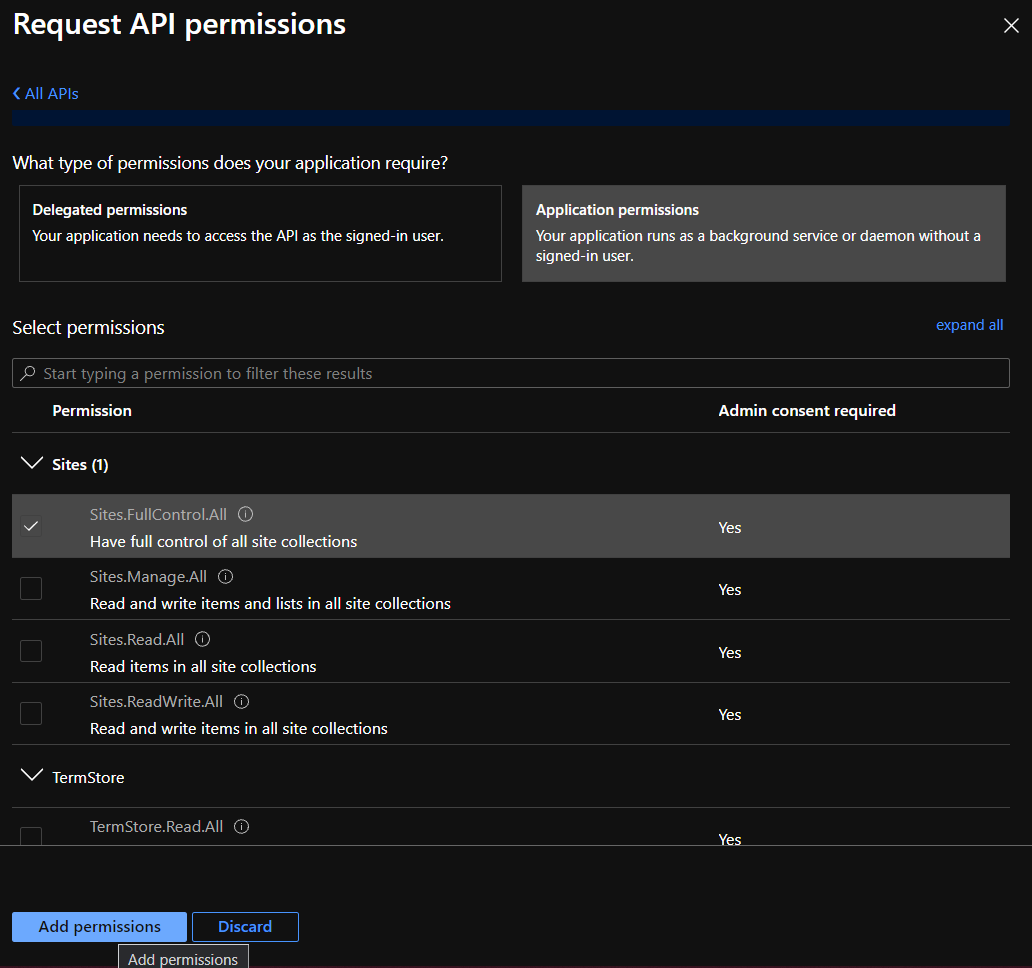
Click Application permissions.
-
Under Select permissions > Sites, select Sites.FullControl.All and click Add permissions.
-
To apply your changes, select Sites.FullControl.All under Configured permissions and click Grant admin consent for <azure-tenant-name>.
