The Move data to a remote server using NFS archive method connects to a shared directory of the target server with the Network File Share protocol.
|

|
NOTE:
Backup and archive policies only work with existing shares and subdirectories.
If a server has a share at, for example, archive and that directory is empty, when the user configures archive/scb1 (or similar) as a backup/archive share, it will fail. |
The version of NFS used is automatically detected. All versions of NFS, up to and including NFS version 4 protocol, are supported.
-
Navigate to Policies > Backup & Archive/Cleanup and click  in the Archive/Cleanup policies section to create a new archive policy.
-
Enter a name for the archive policy.
-
Enter the time when the archive process should start into the Start time field in HH:MM format (for example 23:00).
You can add the start time for additional archive processes.
|

|
Caution:
When specifying an additional start time, ensure that the previous archive process finishes before the new archive process starts. |
-
To archive the data collected on SPS more than once a day, click . You can schedule multiple archive times.
|
|
NOTE:
In case an archive process is not finished before the next one would start, the next archive process waits for the previous process to be completed. |
-
Fill the Delete data from SPS after field. Data older than this value is archived to the external server.
|
|
NOTE:
The archived data is deleted from SPS. |
-
Select Move data to a remote server using NFS from the Before deleting data from PSM radio buttons.
Figure 63: Policies > Backup & Archive/Cleanup —Configuring cleanup and archiving

-
Enter the domain name of the remote server into the Target server field.
-
Enter the name of the NFS export into the Export field.
SPS saves all data into this directory, automatically creating the subdirectories.
-
The remote server must also be configured to accept connections from SPS.
Add a line that corresponds to the settings of SPS to the /etc/exports file of the remote server. This line should contain the following parameters:
-
The path to the archive directory as set in the Export field of the SPS archive policy.
-
The IP address of the SPS interface that is used to access the remote server. For more information on the network interfaces of SPS, see Network settings.
Use an IPv4 address.
-
The following parameters: (rw,no_root_squash,sync).
Example: Configuring NFS on the remote server
For example, if SPS connects the remote server from the 192.168.1.15 IP address and the data is saved into the /var/backups/SPS directory, add the following line to the /etc/exports file:
/var/backups/SPS 192.168.1.15(rw,no_root_squash,sync)
-
On the remote server, execute the following command:
exportfs -a
Verify that the rpc portmapper and rpc.statd applications are running.
-
SPS organizes the audit trails into directories based on the date or the protocol. The subdirectories are created directly into the archive directory. Select one of the following directory structures:
-
Protocol/Connection/Archive Date/
-
Archive Date/Connection/Protocol/
-
Connection Date/Protocol/Connection/
-
Archive Date/
-
Connection Date/
For example, the Protocol/Connection/Archive Date template will have create subdirectories for the audited protocols (that is, ssh, rdp, telnet, vnc), for the name of the connection policy, and finally, for the date (YEAR-MONTH-DAY in YYYY-MM-DD format).
|
|
NOTE:
Connection Date refers to the time the connection started, while Archive Date to the time it was archived. The difference between the two dates depends on the retention time set for the archiving policy. |
-
When your SPS instance is a node in a cluster, select Include the Cluster Node ID in the path. This ensures that the ID of the node is included in the path of the relevant directory, which is required to prevent cluster nodes from archiving data to the same location, and so overwriting each other's data and resulting in data loss. In addition, having the node's ID in the directory name also enables easy identification.
|
|
Caution:
Hazard of data loss
Unchecking Include the Cluster Node ID in the path when your SPS is a node in a cluster can result in data loss if you have configured configuration synchronization across your cluster nodes. |
-
To receive e-mail notifications, select the Send notification on errors only or the Send notification on all events option. Notifications are sent to the administrator e-mail address set on the Management tab, and include the list of the files that were backed up.
|
|
NOTE:
This e-mail notification is different from the one set on the Alerting & Monitoring tab. This notification is sent to the administrator's e-mail address, while the alerts are sent to the alert e-mail address (see Configuring system monitoring on SPS). |
-
Click  .
.
-
To assign the archive policy to the connection you want to archive, see Archiving or cleaning up the collected data.
To configure data archiving/cleanup, assign an archive/cleanup policy to the connection.
Prerequisites:
You have to configure an archive/cleanup policy before starting this procedure. For details, see Archiving and cleanup.
To assign an archive/cleanup policy to the connection
-
Navigate to the connection (for example to SSH Control > Connections).
-
Select the connection.
-
Select the archive/cleanup policy you want to use in the Archive/Cleanup policy field.
-
Click .
-
Optional: To start the archiving or clean up process immediately, click Archive now. This functionality works only after a corresponding policy has been configured.
SPS can forward session data to Splunk, ArcSight, or other third-party systems that enable you to search, analyze, and visualize the forwarded data.
Using the Splunk forwarder
The Splunk forwarder can automatically send file-based data to Splunk. Using the Balabit Privileged Account Analytics, you can integrate this data with your other sources, and access all your data related to privileged user activities from a single interface.
Unlike the universal SIEM forwarder, the Splunk forwarder can forward data based on various criteria such as source or type of event, and, as a result, it is more resource-heavy.
Use the Splunk forwarder if you need to analyze or make changes to the data before you forward it, or you need to control where the data goes based on its contents. For more information, see Using the Splunk forwarder.
|
|
NOTE:
Since SPS version 5.11, the universal SIEM forwarder supports Splunk easier than in previous versions. If you want to integrate your SPS with Splunk, One Identity recommends using the universal SIEM forwarder instead of the Splunk forwarder (which will be deprecated as of SPS version 6.4). |
Using the universal SIEM forwarder
The universal SIEM forwarder can automatically send data about the audited sessions to Splunk, ArcSight, or other third-party systems. The messages are standard syslog messages in RFC3164 format (also called legacy-syslog or BSD-syslog format). The body of the syslog message (the MESSAGE part) can be formatted as JavaScript Object Notation (JSON), Common Event Format (CEF), or JSON-CIM format. For information about the details of the messages that the universal SIEM forwarder sends to the external SIEM network elements, see Message format forwarded to SIEMs in the Adminsitration Guide.
One of the main advantages of the universal SIEM forwarder is that it has a lower impact on network and performance.
Each message contains the minimal information relevant to the event. Use the built-in correlation feature of the SIEM to combine events by session ID and view all information in one place.
Use the universal SIEM forwarder if you need a less resource-heavy solution. For more information, see Using the universal SIEM forwarder.
SPS can forward session data to Splunk near real-time. Using the One Identity Safeguard for Privileged Sessions App for Splunk you can integrate this data with your other sources, and access all your data related to privileged user activities from a single interface. To configure SPS to forward session data to Splunk, complete the following steps.
Prerequisites and restrictions:
-
SPS version 5 F5 or later
-
Splunk version 6.5 or later
-
SPS does not send historical data to Splunk, only data from the sessions started after you complete this procedure.
|
|
NOTE:
The Splunk forwarder will be deprecated as of version 6.4 of SPS and will be removed in that feature release. One Identity recommends using the Universal SIEM forwarder instead. |
To configure SPS to forward session data to Splunk
-
Install the One Identity Safeguard for Privileged Sessions App for Splunk to your Splunk installation. This will automatically enable and configure the HTTP Event Collector (HEC) in your Splunk installation, and create an HTTP Event Collector authentication token ("HEC token") that SPS will use.
To help identify the source of the received data, the following settings are configured automatically in the One Identity Safeguard for Privileged Sessions App for Splunk:
-
index: The One Identity Safeguard for Privileged Sessions App for Splunk creates the index automatically, with the name balabit_events.
-
sourcetype: The source type of the events the SPS fowards is balabit:event.
-
On your Splunk interface, navigate to Settings > Data inputs > HTTP Event Collector. Copy the Token Value from the Balabit_HEC field. This is the HTTP Event Collector authentication token and you will need it when configuring SPS.
-
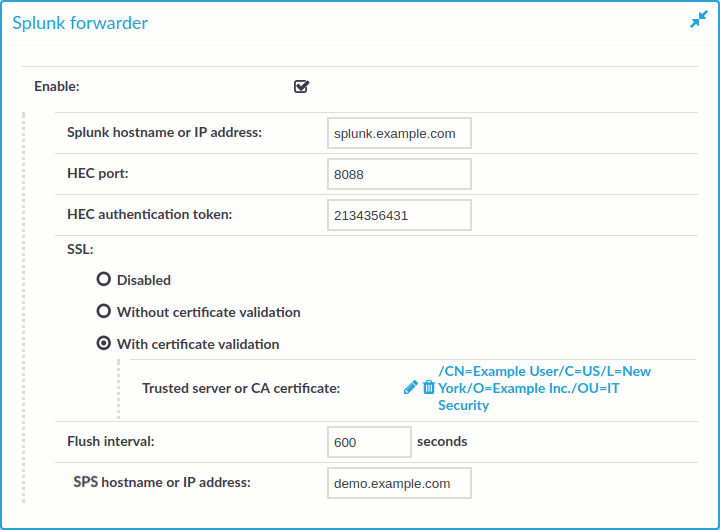
Log in to SPS and navigate to Basic Settings > Management > Splunk forwarder.
Figure 64: Basic Settings > Management > Splunk forwarder — Sending session data to Splunk
-
Enter the IPv4 address or hostname of your Splunk installation into the Splunk hostname or IP address field.
-
Enter the port number where your Splunk HTTP Event Collector is accepting connections into the HEC port field. By default, Splunk uses port 8088.
-
Copy the HTTP Event Collector authentication token you have generated for SPS into the HEC authentication token field.
-
-
If your Splunk HTTP Event Collector accepts unencrypted HTTP connections, select SSL > Disabled.
Since the data forwarded to Splunk contains sensitive information, One Identity recommends to use HTTPS encryption between SPS and Splunk.
-
To use HTTPS encryption between SPS and Splunk, select SSL > Without certificate validation.
-
To use HTTPS encryption between SPS and Splunk and also verify the identity of the Splunk server, select SSL > With certificate validation, then click  and upload the certificate of the Splunk server, or the certificate of the CA that issued the certificate of the Splunk server.
-
Splunk will display the data received from SPS as it was received from the host set in the PAM hostname or IP address field. By default, this is the hostname and domain name of the SPS appliance as set on the Basic Settings > Network > Naming page. Adjust this field as needed for your environment.
-
Click . From now on, SPS will forward session data to Splunk. If the Splunk server becomes unaccessible, SPS will try to resend the data when the period set in Flush interval expires.
-
Start a session that SPS will audit to test your configuration, and verify that the data of the session appears in Splunk.
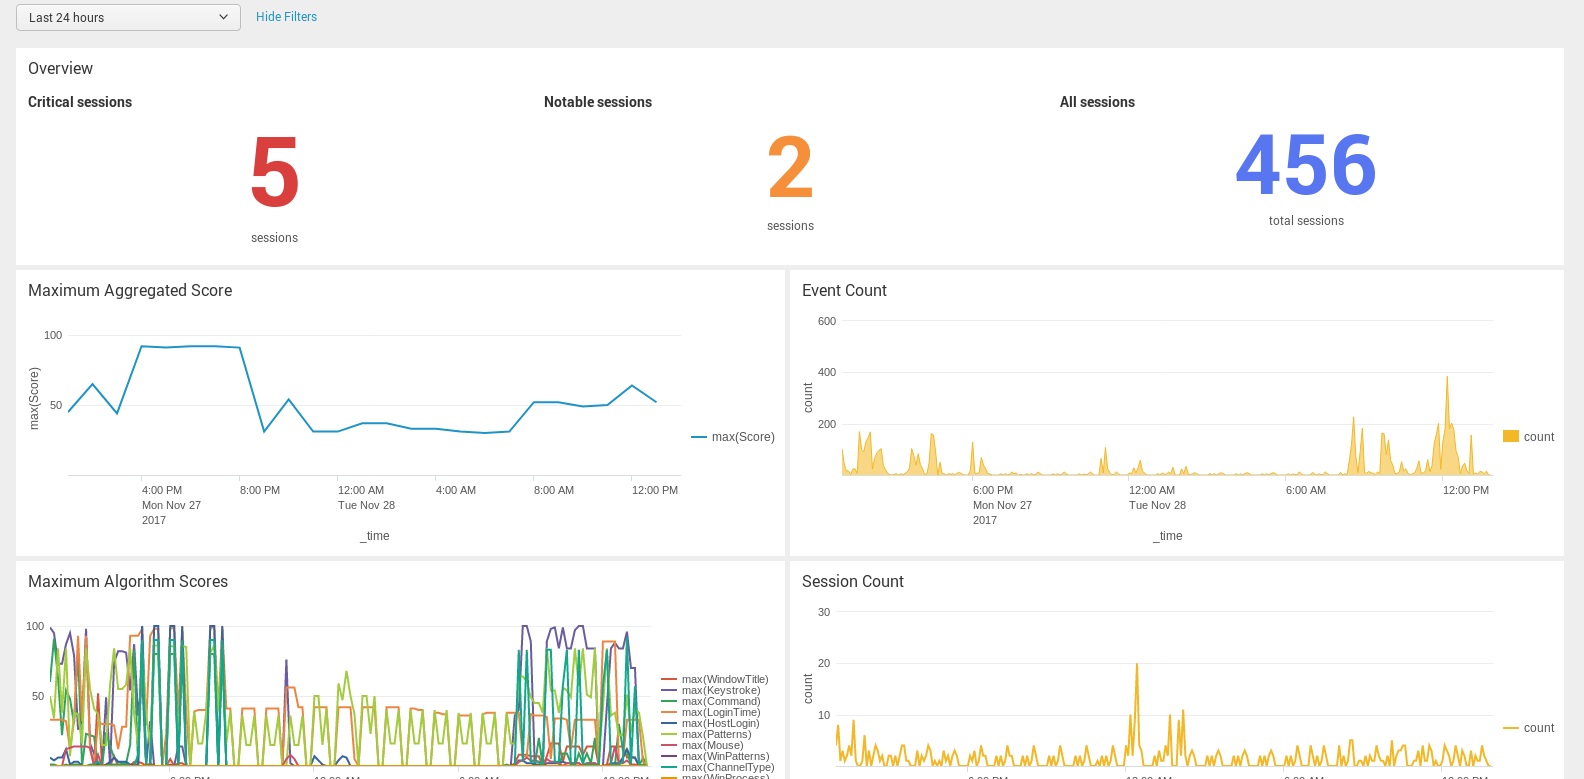
Figure 65: Balabit Privileged Account Analytics