To install the InTrust Reporting Pack
- Using an InTrust Administration account, log in to your InTrust server.
- Run the MSI file extracted in the previous section from Privilege_Manager_InTrust_<version>.zip
# d:\temp\QPM4U.1.0.0.006.msi
To use the MSI installer for the InTrust Reporting Pack, your InTrust Server must use the WindowsSQL Server 2005 as its back-end database.
- Follow the instructions in the on-screen Wizard.
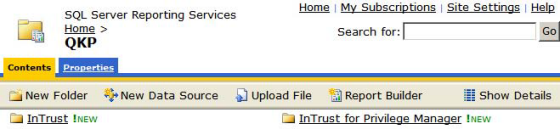
- Using a web browser, navigate to your InTrust reports and verify that you now have an InTrust for Privilege Manager for Unix section, for example:
http://<Intrust Server>/Reports
To install the InTrust data collection
- Using an InTrust Administration account, log in to your InTrust server.
- From the menu, navigate to: Configuration | Sites | Unix Network | Privilege Manager for Unix hosts.
- Right click, then select Properties.
- Select the Objects tab, click Add | Computer, then enter the name of your Privilege Manager for Unix policy server InTrust agent.
- Click Apply, then OK.
- From the menu, navigate to: Workflow | Tasks | Privilege Manager for Unix daily collection of events.
- Right click, then select Run.
- From the menu, navigate to: Workflow | Sessions and view the status of your running task which should complete within a couple of minutes, depending on the size of your InTrust event log.
- Verify that the task completes successfully without errors.
InTrust provides all of its reporting services through the InTrust Knowledge Portal which is based on Microsoft SQL Server Reporting Services. This provides functionality to generate reports dynamically from the InTrust data store and display them though a simple browser based utility.
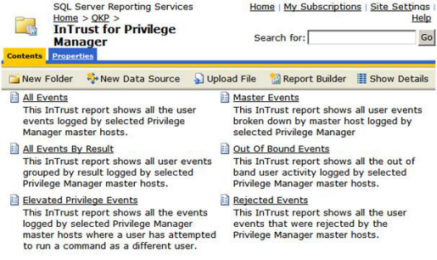
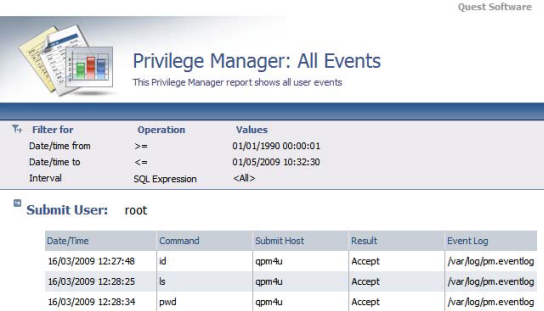
The Knowledge Portal allows you to create reports manually, however there are a number of pre-compiled reports that gather the following Privilege Manager for Unix event log data:
- All events
- Elevated privilege events
- All events grouped result
- Out of band events
- Rejected events
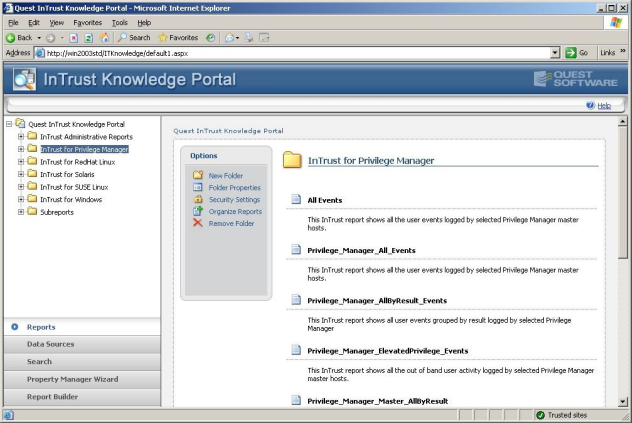
The reports are provided in a .msi installer which installs and configures the required Knowledge Portal components. To view the reports, simply load the Knowledge Portal using Start | Programs | Quest Software | Quest InTrust Knowledge Portal | Quest InTrust Knowledge Portal, then select InTrust for Privilege Manager for Unix from the report list.
For more information, please refer to the InTrust for Active Directory documentation.