Reconfiguring Azure tenants manually
If your organization has any Azure tenants managed in Active Roles, you will need to reauthenticate and reconsent each Azure tenant after installing a new version of Active Roles. Otherwise, you may experience difficulties with Exchange Online connectivity and managing Azure AD resources (for example, assigning Azure AD roles).
Azure tenant reauthentication is part of the in-place Upgrade configuration process by default (for more information, see Reconfiguring Azure tenants during upgrade configuration). However, if reauthentication fails during that process for any reason, you can complete the reauthentication and reconsenting of existing Azure tenants with the following manual steps later.
To reconfigure Azure tenants after upgrading from Active Roles 7.4.1 or 7.4.3 to Active Roles 8.1
-
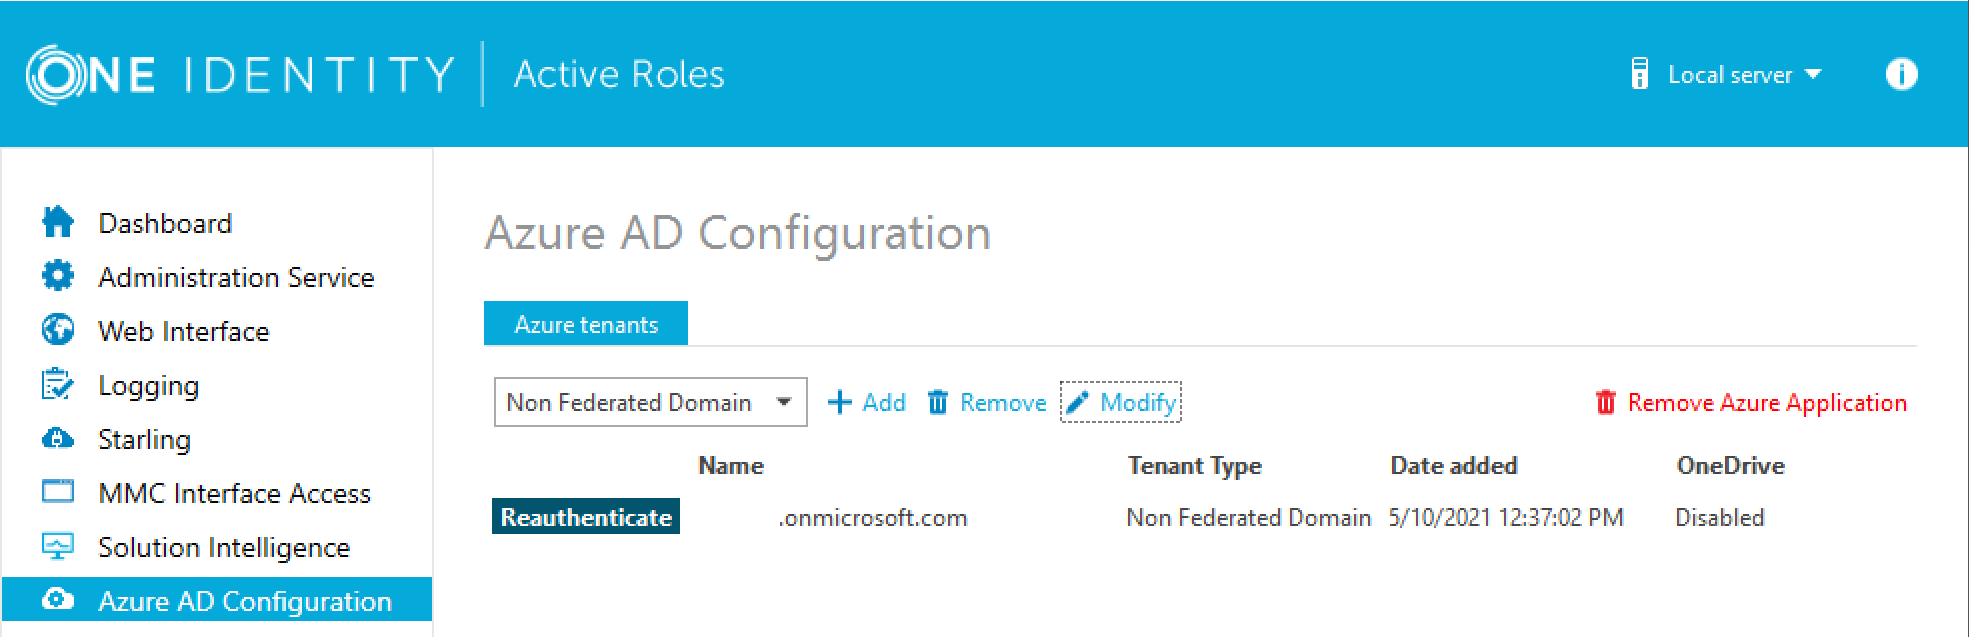
In the Active Roles Configuration Center, navigate to Azure AD Configuration.
-
To reconfigure the existing Azure tenants, select a tenant and click Reauthenticate in its row. Repeat the process for each existing Azure tenant.
-
To make the configured Azure tenant appear in the Active Roles Web Interface, you must restart the Administration Service. Click Administration Service on the left pane, then either click Restart, or first click Stop and then Start.

-
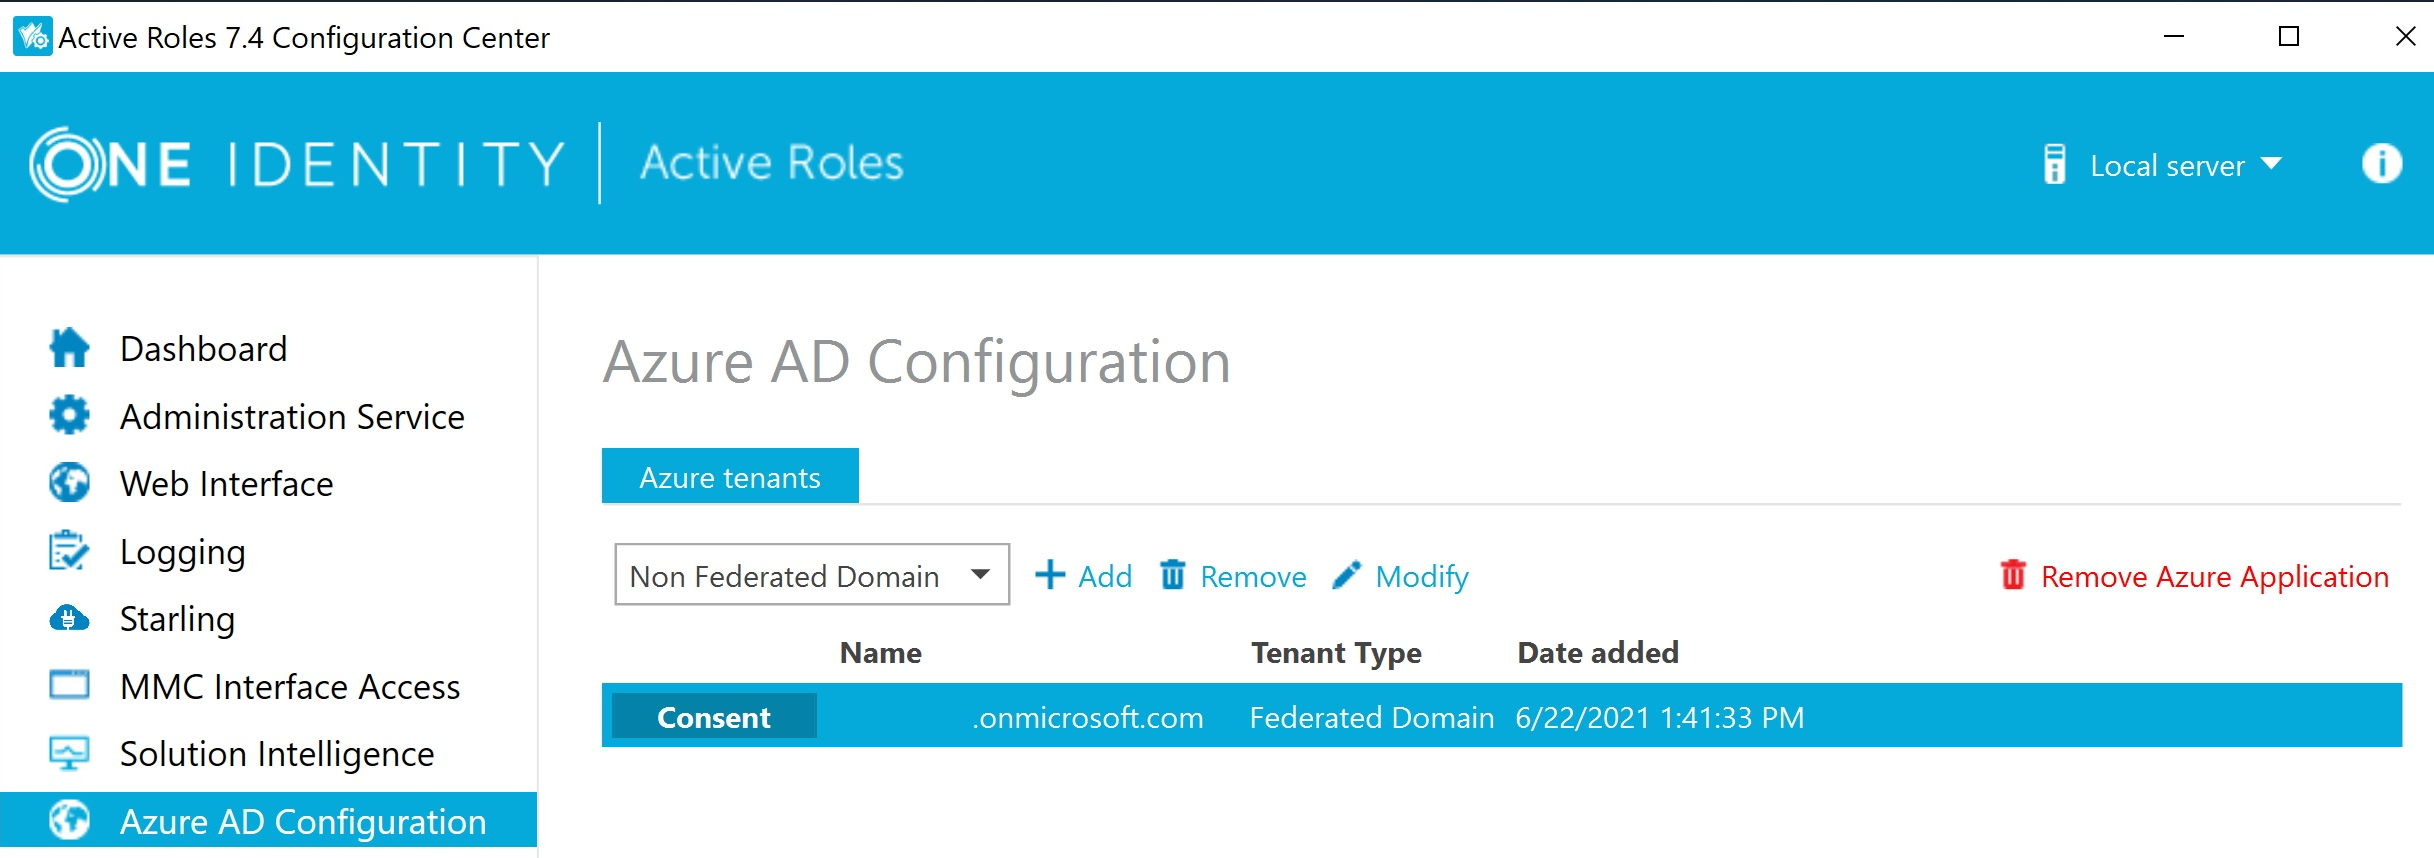
Once the Administration Service is restarted, consent Active Roles as an Azure application for each reconfigured Azure tenant. To do so, navigate again to Azure AD Configuration, select the Azure tenant and click Consent.
-
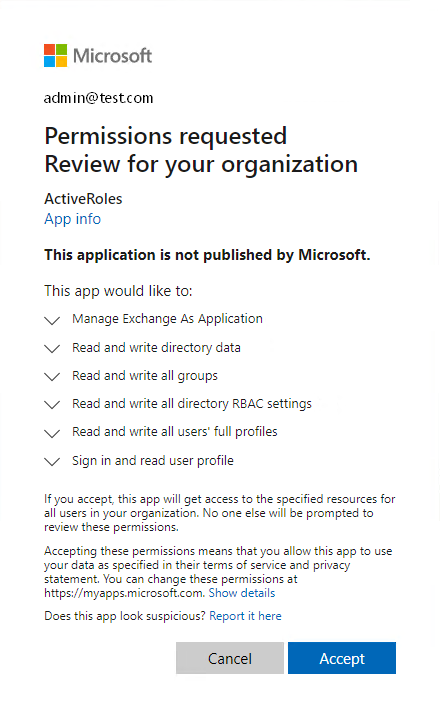
To complete consenting, click Accept on the Microsoft Permissions Requested page that appears.
-
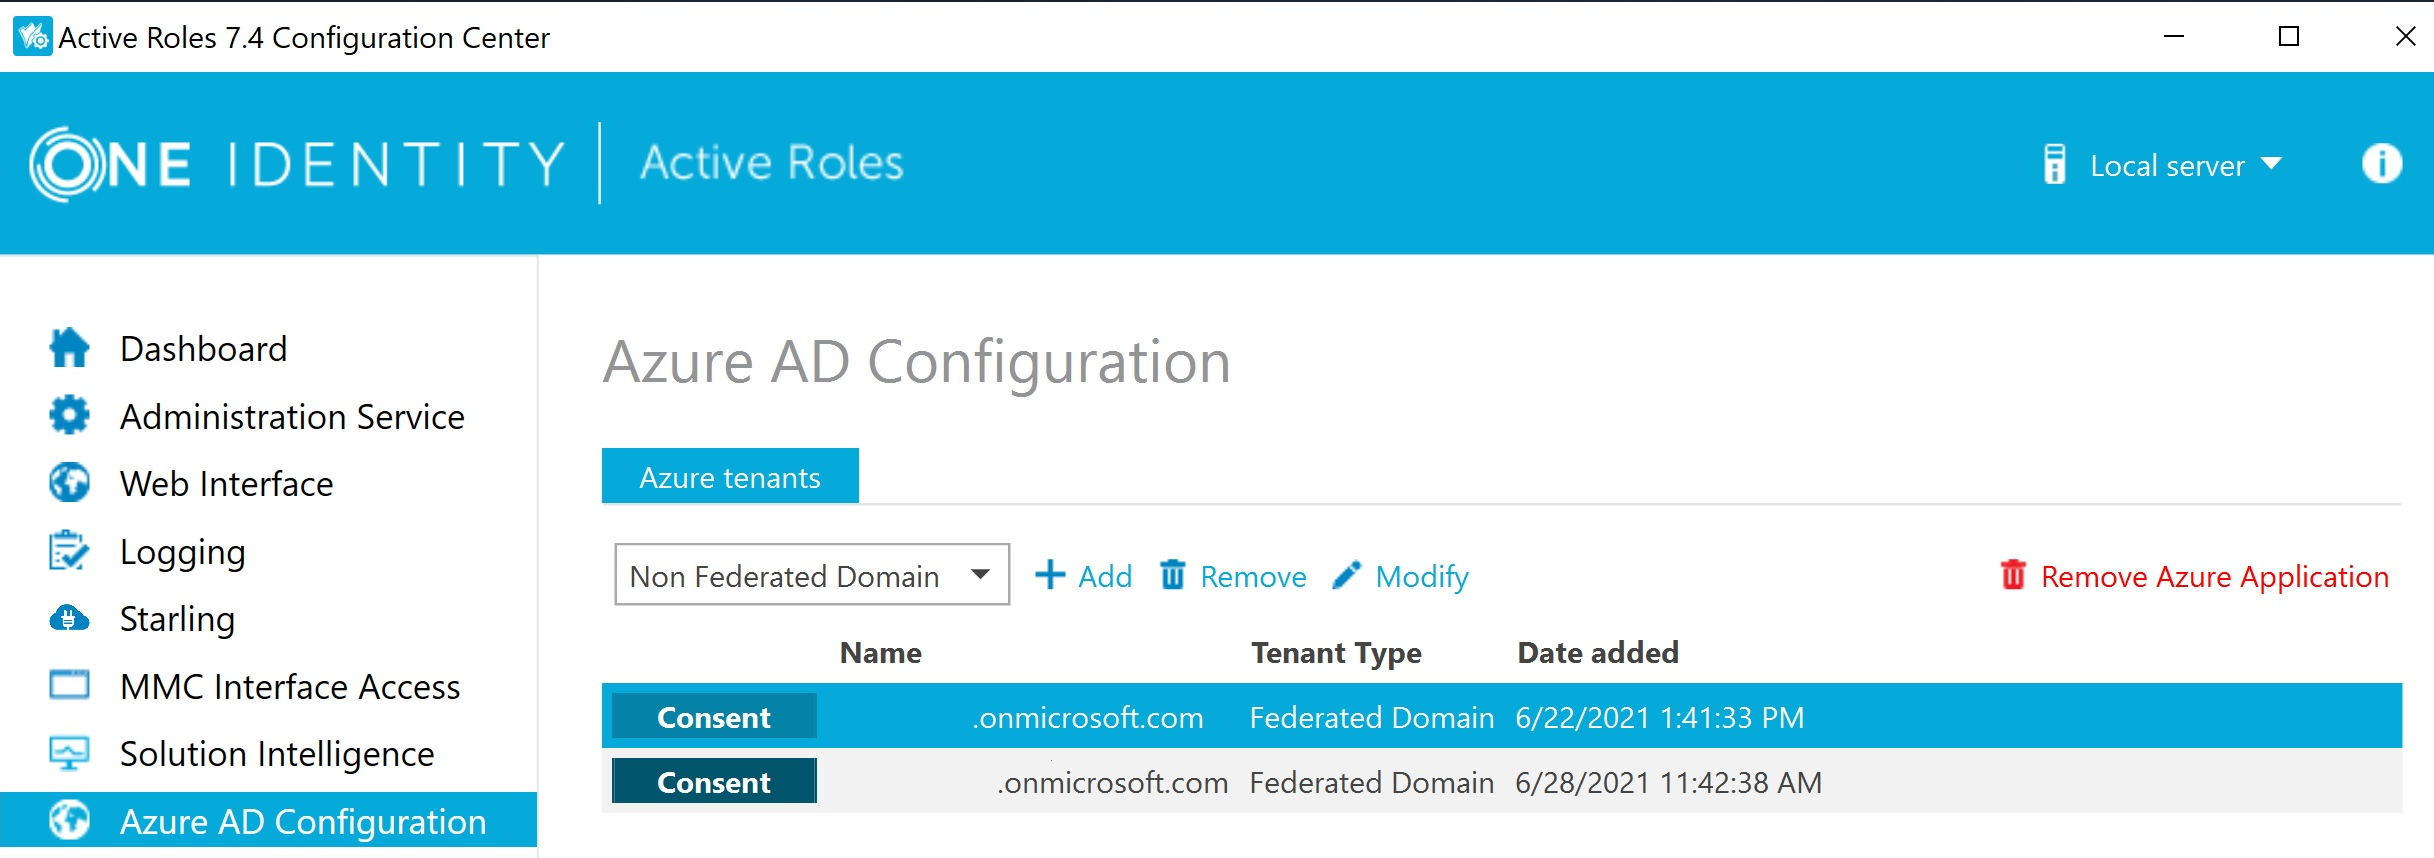
Repeat the previous two steps for each Azure tenant.
To reconfigure Azure tenants when upgrading from Active Roles 7.4.4 to 8.1
-
In the Active Roles Configuration Center, navigate to Azure AD Configuration.
-
Remove all Azure tenants. To do so, select an Azure tenant and first click Remove Azure Application, and then click Remove.
-
Repeat the previous step for each remaining Azure tenant.
-
Add the removed Azure tenants again to the list. To do so, use the drop-down box to select the type of domain assigned to the Azure tenant (Non-Federated Domain, Federated Domain, Synchronized Identity Domain), and click Add.
Upon successful authentication, the new Azure tenant appears in the list.
-
Repeat the previous step for each Azure tenant that you previously removed.
-
To make the configured Azure tenants appear in the Active Roles Web Interface, you must restart the Administration Service. Click Administration Service on the left pane, then either click Restart, or first click Stop and then Start.
-
Once the Administration Service is restarted, consent Active Roles as an Azure application for the reconfigured Azure tenants. To do so, navigate to Azure AD Configuration, select an Azure tenant and click Consent.
-
To complete consenting, click Accept on the Microsoft Permissions Requested page that appears.
-
Repeat the previous two steps for each Azure tenant.
Upgrading the Web Interface
You can upgrade the Web Interface of version 7.0, 7.1, 7.2, or 7.3 to version 7.4.x.
Upgrading the Web Interface implies creation of a new Web Interface instance of the latest version that has the same Web Interface sites as your Web Interface of an earlier version, with the site configuration data imported from your Active Roles configuration of the earlier version. As a result, the new Web Interface sites inherit all customizations that were made to the menus, commands, forms, and other elements of your Web Interface sites of the earlier version.
When an import configuration is performed from Active Roles version 7.3 to 8.1.1, the Web Interface does not get upgraded. However, the Configuration Center or any client report the Active Roles Web Interface version incorrectly as 8.1.1. To upgrade the Web Interface to the latest version, see Creating Web interface sites and importing configuration.
Creating Web interface sites and importing configuration
To create a new Web interface instance of the latest version and import the site configurations perform the following steps:
- For each Web Interface site of your earlier Active Roles version, identify and note down the name of the configuration object that the Administration Service uses to store the site’s configuration data.
- Install and configure the Web Interface instance of the latest Active Roles version, choosing the new Administration Service to which you have imported configuration of your earlier Active Roles version. For more information, see Install and configure the Administration Service.
- On the new Web Interface instance that you installed and configured, create sites based on information you noted previously, importing data from the configuration objects used by your earlier Web Interface version. Those configuration objects were copied to the new Administration Service during configuration data import. For more information, see Import configuration.
- Optionally, delete the default sites that were created when you configured the Web Interface in Step 2. The default sites are unaware of your existing site customizations, and have the default configuration of menus, command, forms and other elements.
These steps are covered in the topics that follow.
You can install the Web Interface of version Active Roles side-by-side with the Web Interface of version 6.9 on the same computer, and perform the upgrade without interrupting operations or affecting the configuration of your Web Interface sites of the earlier Active Roles version.
If you no longer need the Web Interface of the earlier version, you can uninstall it using Programs and Features in Control Panel: Right-click Web Interface in the list of installed programs, and then click Uninstall.
Identify configuration objects
When creating Web Interface sites of the new Active Roles version, you need to know which configuration objects are used by your Web Interface sites of the earlier version. Each site stores its configuration in a certain object on the Administration Service, referred to as the site configuration object. Upgrade of the Administration Service copies the existing site configuration objects to the new Administration Service, retaining the name of each object.
To create a Web Interface site of the new Active Roles version that inherits your existing site customizations, you need to specify the name of the corresponding site configuration object of the earlier version. Then, Active Roles creates a site configuration object of the new version, imports the site configuration data to that object, and causes the new Web Interface site to use that object. As a result, the new Web Interface site has the same configuration as the Web Interface site of the earlier version.
To identify the configuration object of the Web Interface site of an earlier Active Roles version
- On the Web server running your Web Interface of the earlier Active Roles version, start the Web Interface Sites Configuration wizard.
To start the wizard, select Web Interface Sites Configuration on the Apps page or Start menu, depending upon the version of the Windows operating system on the Web server.
- Proceed to the Web Interface Configuration page in the Web Interface Sites Configuration wizard.
The page lists your Web Interface sites of the earlier Active Roles version.
- On the Web Interface Configuration page, click the list item representing the desired site, and then click the Edit button.
You can distinguish sites by alias, shown in the Virtual Directory column on the Web Interface Configuration page. The alias defines the virtual path used in the address of the Web Interface site on the Web server.
- Note down the name of the site’s configuration object shown in the Configuration settings area of the dialog box that appears.
The name of the object is displayed in the Name box under the Use existing configuration option, and includes the version number.
- Click Cancel to close the dialog box.
To identify the configuration object of the Web Interface site of the current Active Roles version
- Start the Configuration Center on the computer running the Administration Service instance on which you want to identify the web interface sites.
You can start Configuration Center by selecting Active Roles 7.4 Configuration Center on the Apps page or Start menu, depending upon the version of your Windows operating system.
- On the Configuration Settings main window, on the left pane, click Web Interface.
The Web Interface page is displayed, which lists the Web Interface sites of the current Active Roles version that are deployed on the Web server running the Web Interface.
For each Web Interface site, the list provides the following information:
- IIS Web site The name of the Web site that holds the Web application implementing the Web Interface site
- Web app alias The alias of the Web application that implements the Web Interface site, which defines the virtual path of that application on the Web server.
- Configuration Identifies the object that holds the Web Interface site’s configuration and customization data on the Active Roles Administration Service.
- From the Web Interface page, you can open Web Interface sites in your Web browser:
- Click an entry in the list of Web Interface sites.
- Click Open in Browser on toolbar.
You can also use Configuration Center to:
- Create, modify or delete Web Interface sites
- Export a Web Interface site’s configuration object to a file
For more information, see the Web Interface management tasks section in the One Identity Active Roles Administration Guide.
Identify the configuration object for each of your existing Web Interface sites, and note down the name of each object. You will need these names when creating the Web Interface sites of the new Active Roles version.
Install and configure the Web Interface
To create a new Web Interface instance, you first install Web Interface files and then perform initial configuration.
To install the Web Interface files
- Log on with a user account that has administrator rights on the computer.
- Navigate to the location of the Active Roles distribution package, and start the Setup wizard by double-clicking ActiveRoles.exe.
- Follow the instructions in the Setup wizard.
- On the Component Selection page, ensure that the Web Interface component is selected, and click Next.
- On the Ready to Install page, click Install to perform installation.
- On the Completion page, confirm that the I want to perform configuration check box is selected, and click Finish.
The Setup wizard only installs the files. After you have completed the Setup wizard, you need to configure the newly installed Web Interface instance by using Active Roles Configuration Center that opens automatically if you select the I want to perform configuration check box on the Completion page in the Setup wizard. Another way to open Configuration Center is by selecting Active Roles 8.1.1 Configuration Center on the Apps page or Start menu, depending upon the version of your Windows operating system.
To perform initial configuration
- In Configuration Center, under Web Interface, click Configure.
This starts the wizard that will perform initial configuration of the Web Interface.
- On the Administration Service page, specify the new Administration Service instance created during upgrade. For more information, see Install and configure the Administration Service.
If the new Administration Service instance runs on the computer on which you are installing the new Web Interface, choose the option Administration Service on the computer running the Web Interface. Otherwise, choose the option Administration Service on this computer, and supply the fully qualified domain name of the computer running the new Administration Service instance.
- Click the Configure button, and wait while the wizard completes the configuration.
Create sites based on old configuration objects
After you have installed and configured the Web Interface instance of the new Active Roles version, you can use Configuration Center to create Web Interface sites of the new version, importing site configuration data from the configuration objects used by your existing Web Interface sites of the earlier Active Roles version (see Identify configuration objects). As a result, the new Web Interface sites will inherit all customizations that were made to the menus, commands, forms and other elements of your Web Interface sites of the earlier version.
To create a Web Interface site based on an old configuration object
- Open Configuration Center.
You can open Configuration Center by selecting Active Roles 8.1.1 Configuration Center on the Apps page or Start menu, depending upon the version of your Windows operating system.
- In the Configuration Center main window, under Web Interface, click Manage Sites.
- On the Sites page, click Create.
- On the Web Application page in the Create Web Interface Site that appears, choose the IIS Web site to contain the Web application that implements the Web Interface site, and specify an alias for that application.
The alias defines the virtual path that is a part of the Web Interface site’s address. You can view the resulting address on the Web Application page.
- Click Next to proceed to the Configuration page.
- From the list on the Configuration page, select the Import from an existing configuration option.
- Complete the fields on the Configuration page:
- In the Configuration name field, supply the name of the configuration object for the new Web Interface site. You can accept the default name.
- The wizard will create a configuration object with the specified name, and import configuration data to that object.
- From the list in the Configuration to import box, select the name of the configuration object from which to import the configuration data.
This must be the name of the configuration object used by one of your existing Web Interface sites of the earlier Active Roles version (see Identify configuration objects).
- Click the Create button, and wait while the wizard creates the new Web Interface site.
Perform these steps for each of your Web Interface sites of the earlier version, selecting the appropriate object name in Step 7b.
Delete default sites
After you created the Web Interface sites of the new version that inherit the configuration of your Web Interface sites of the earlier version, you can delete the default Web Interface sites that were created by initial configuration of the Web Interface. For more information, see Install and configure the Web Interface.
To delete the default Web Interface sites
- Open Configuration Center.
You can open Configuration Center by selecting Active Roles 8.1.1 Configuration Center on the Apps page or Start menu, depending upon the version of your Windows operating system.
- In the Configuration Center main window, under Web Interface, click Manage Sites.
- On the Sites page, identify list entries representing default Web Interface sites, and use the Delete button to delete them one by one.
You can distinguish list entries representing default Web Interface sites by the name in the Configuration column:
- Site for Administrators (8.1.1) indicates the default site for administrators
- Site for HelpDesk (8.1.1) indicates the default site for Help Desk
- Site for Self-Administration (8.1.1) indicates the default site for self-administration
Upgrading other components
This section covers upgrade options for the following components of Active Roles:
- Console (MMC Interface)
- Management Shell
- ADSI Provider
- SDK
- Collector and Report Pack
- Synchronization Service
Upgrade of the Active Roles console
You can install the Active Roles Console of version 8.1.1 side-by-side with the Active Roles Console of version 6.9, on the same computer. Alternatively, you can install the new Console on a different computer. For installation instructions, see Steps to install the console.
To upgrade from Active Roles console of version 7.x to the latest Active Roles version, perform an in-place upgrade or a new installation with import configuration from the earlier Active Roles version. In case of an in-place upgrade, the Active Roles console is upgraded automatically to the console of latest version of Active Roles.
If you no longer need the console of version 6.9 or earlier, you can uninstall it using Programs and Features in Control Panel: Right-click MMC Interface in the list of installed programs, and then click Uninstall.
Upgrade of the Shell, ADSI Provider and SDK
The Active Roles Management Shell, ADSI Provider and SDK of version 8.1.1 are packaged into a single component referred to as Management Tools. You can install Management Tools side-by-side with Active Roles version 6.9, on the same computer. Alternatively, you can install Management Tools on a different computer. Active Roles setup installs Management Tools by default. You can install Management Tools without installing other components (see Steps to install only the Shell, ADSI Provider and SDK).
To upgrade from Active Roles Management Shell, ADSI Provider and SDK of version 7.x to the latest Active Roles version, perform an in-place upgrade. In case of an in-place upgrade, the Active Roles Management Shell, ADSI Provider and SDK is upgraded automatically to the components of the latest version of Active Roles.
If you no longer need the Management Shell that ships with Active Roles 6.9, you can uninstall it using Programs and Features in Control Panel: Right-click Management Shell in the list of installed programs, and then click Uninstall. Note that the Administration Service requires the Management Shell. Do not uninstall the earlier version of Management Shell from the computer running the Administration Service of version 6.9.
The Active Roles SDK is packaged as a feature of the Administration Service installation. You can uninstall it by using the Administration Service Setup wizard in maintenance mode: In Programs and Features, right-click Administration Service, and then click Change to start the Setup wizard. On the Select Features page in the wizard, choose the option to remove the SDK and Resource Kit feature.
The Active Roles ADSI Provider of version 6.9 is normally installed together with any of the Active Roles core components, such as the Administration Service, Web Interface or MMC Interface, and is removed once you have uninstalled the core components.
Upgrade of Collector and Report Pack
The Active Roles reporting components should be upgraded in the following order:
- Collector
- Report Pack
- Collector’s database
Collector
To upgrade, first uninstall your earlier version of Collector and then install the new version. To uninstall Collector, use the Programs and Features list of the Windows Control Panel. Once you uninstalled your earlier version of Collector, install the new version. For installation instructions, see Steps to install Collector and Report Pack.
Report Pack
To upgrade, first uninstall your earlier version of the Report Pack and then install the new version. The Report Pack should be uninstalled on the computer that was initially used to install the Report Pack. You can uninstall the Report Pack by using Programs and Features in Control Panel.
Once you have uninstalled your earlier version of the Report Pack, deploy the new version. For instructions, see Deploying Report Pack.
Collector’s database
The new version of the Report Pack is incompatible with the database of an earlier Collector version. To create reports based on the events held in that database, you need to import the events to the database of the new Collector version, and then specify the database of the new Collector version as the data source for the reports of the new Report Pack version. For instructions on how to configure the data source, see “Working with reports” in the Active Roles Administration Guide.
To import events from the database of an earlier Collector version
- Start the Collector wizard.
You can start the Collector wizard by selecting Active Roles 8.1.1 Collector and Report Pack on the Apps page or Start menu, depending upon the version of your Windows operating system.
- On the Select Task page, click Import events from an earlier database version, and then click Next.
- On the Source database page, click Specify, and supply the name, database type and the database server of the database used by your Collector of an earlier version. Click Next.
- On the Target Database page, click Specify, and supply the database type, database server, and database name of the database used by your Collector of the current version.
- Click Next, and wait while the wizard performs the import.
Synchronization Service
If you have synchronization workflows configured and run by Quick Connect (predecessor of Synchronization Service), or earlier versions of Synchronization Service, then you can transfer those synchronization workflows to Active Roles and have them run by Synchronization Service.
You can transfer synchronization workflows from the following Quick Connect or Synchronization Service versions:
- Quick Connect Sync Engine 5.2.0, 5.3.0, 5.4.0, 5.4.1, or 5.5.0
- Quick Connect Express for Active Directory 5.3.0, 5.4.0, 5.4.1, 5.5.0, or 5.6.0
- Quick Connect for Cloud Services 3.3.0, 3.4.0, 3.5.0, 3.6.0, 3.6.1, 3.6.2, or 3.7.0
- Quick Connect for Base Systems 2.2.0, 2.3.0, or 2.4.0
- Synchronization Service 7.0, 7.1, 7.2, or 7.3
Performing a pilot deployment
In a large enterprise environment, a pilot project may need to be conducted before upgrading to the new Active Roles. In a pilot project, you deploy components of the new version in your production environment side-by-side with the existing installation of the components you are going to upgrade, evaluate the results, and fix problems.
Normally, a pilot project is conducted with a small group of users in the production environment where select individuals perform particular tasks using the new Active Roles version. This demonstrates that the new version works as expected and that it meets the organization’s requirements.
A pilot project is a deployment of the new Active Roles version to a subset of the user group. Those who do not participate in the pilot project perform their regular, daily work using the earlier Active Roles version. This requires that the earlier version be up and running in the production environment side-by-side with the pilot deployment.
When the pilot project is deemed successful and ready for production, you can upgrade your existing production components to the new version.
Deploying a pilot project involves the following steps:
- Deploying the pilot Administration Service Deploy an instance of the Administration Service of the new Active Roles version, and update that instance with the configuration data from the database used by your production Administration Service of the earlier Active Roles version.
- Deploying the pilot Web Interface Deploy an instance of the Web Interface of the new Active Roles version so that the new instance uses the Administration Service you deployed in the previous step, and create the Web Interface sites on that Web Interface instance by importing the configuration data used by your production Web Interface sites of the earlier Active Roles version.
- Installing the console Install the Active Roles console of the new version.
These steps are discussed in the sections that follow.
