Computer account management
Computer account management
Computer accounts are Active Directory objects used to represent physical computers. Computer accounts allow computers to join the domain, and control their access to resources on the network. The operating system uses computer account information to determine access permissions for a computer.
Active Roles provides the facility to perform administrative tasks such as create, modify, and delete computer accounts. Active Roles can also be used to disable and enable accounts, add and remove accounts from groups, and reset accounts.
The following section describes how to use the Active Roles Console to manage computer accounts. You can also use the Active Roles Web Interface to perform management tasks on computer accounts.
Creating a computer account
You can create new computer accounts with the Active Roles Console.
To create a computer account
-
In the Console tree, locate and select the folder in which you want to add the computer account.
-
Right-click the folder, point to New and click Computer to start the New Object - Computer wizard.
-
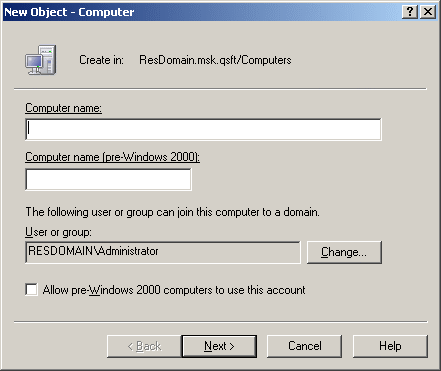
Follow the wizard pages to specify properties of the new computer account, such as the computer name and pre-Windows 2000 computer name.
Figure 19: Creating a computer account

-
If you want to set values for additional properties (those for which the wizard pages do not provide data entries), click Edit Attributes on the completion page of the wizard.
-
After setting any additional properties, click Finish on the completion page of the wizard.
NOTE: Consider the following when creating a computer account:
-
In the wizard, some property labels may be displayed as hyperlinks. The hyperlink indicates that Active Roles enforces certain policy restrictions on the property. To examine policy details, click the hyperlink: the policy information is displayed. For more information, see Getting policy-related information.
The policy information is also displayed whenever you supply a property value that violates a policy restriction. The wizard cannot proceed until you enter an acceptable value.
-
Normally, the rights of a domain administrator are required to join a computer to the domain through the use of an existing, newly created computer account. If you want to authorize a certain user or group to perform this task, you can do so when creating the computer account: Under The following user or group can join this computer to a domain, click Change, then select the user or group you want.
-
If the computer to be associated with the computer account you are creating is running a pre-Windows 2000 operating system, select the Allow pre-Windows 2000 computers to use this account check box.
Finding a computer account
To find a computer account, right-click the container you want to search and click Find. In the Find window, select Computers from the Find list, specify your search criteria, and start the search. In the search results list, you can right-click computer accounts and use commands on the shortcut menu to perform management tasks.
For step-by-step instructions on how to search for computer accounts, see Searching for a computer.
Modifying computer account properties
You can modify the properties of computer accounts with the Active Roles Console.
To modify computer account properties
-
In the Console tree, locate and select the folder that contains the computer account that you want to modify.
-
In the details pane, right-click the computer account you want to modify, then click Properties.
-
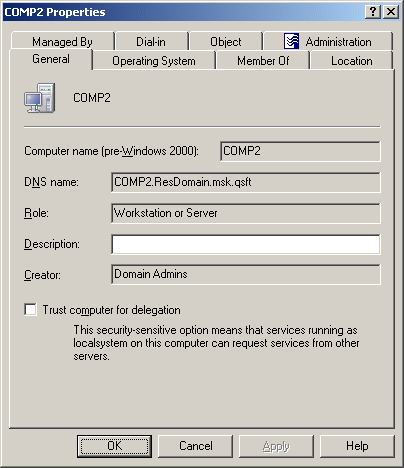
Use the tabs in the Properties dialog to view or modify properties of the computer account.
Figure 20: Properties

-
If you want to view or modify additional properties (those for which the tabs in the Properties dialog do not provide data entries), navigate to the Object tab and click Advanced Properties.
-
After setting all the properties you want, click OK.
NOTE: Consider the following when modifying object properties:
-
In the wizard, some property labels may be displayed as hyperlinks. The hyperlink indicates that Active Roles enforces certain policy restrictions on the property. To examine policy details, click the hyperlink: the policy information is displayed. For more information, see Getting policy-related information.
The policy information is also displayed whenever you supply a property value that violates a policy restriction. The wizard cannot proceed until you enter an acceptable value.
-
To modify properties for multiple objects, press and hold Ctrl, then click each object. Right-click the selection, then click Properties.
-
You can use the Properties dialog to view or modify any property of the object by navigating to the Object tab and clicking Advanced Properties. In the Advanced Properties window you can manage all properties, including those that cannot be accessed via the Properties dialog itself.
You can also display the Advanced Properties window by right-clicking the object and selecting All Tasks > Advanced Properties.
-
To locate the object that you want to modify, use the Find function of Active Roles. Once you found the object, open the Properties page by right-clicking the object, and clicking Properties.


