Accessing and configuring One Identity Safeguard for Privileged Sessions (SPS)
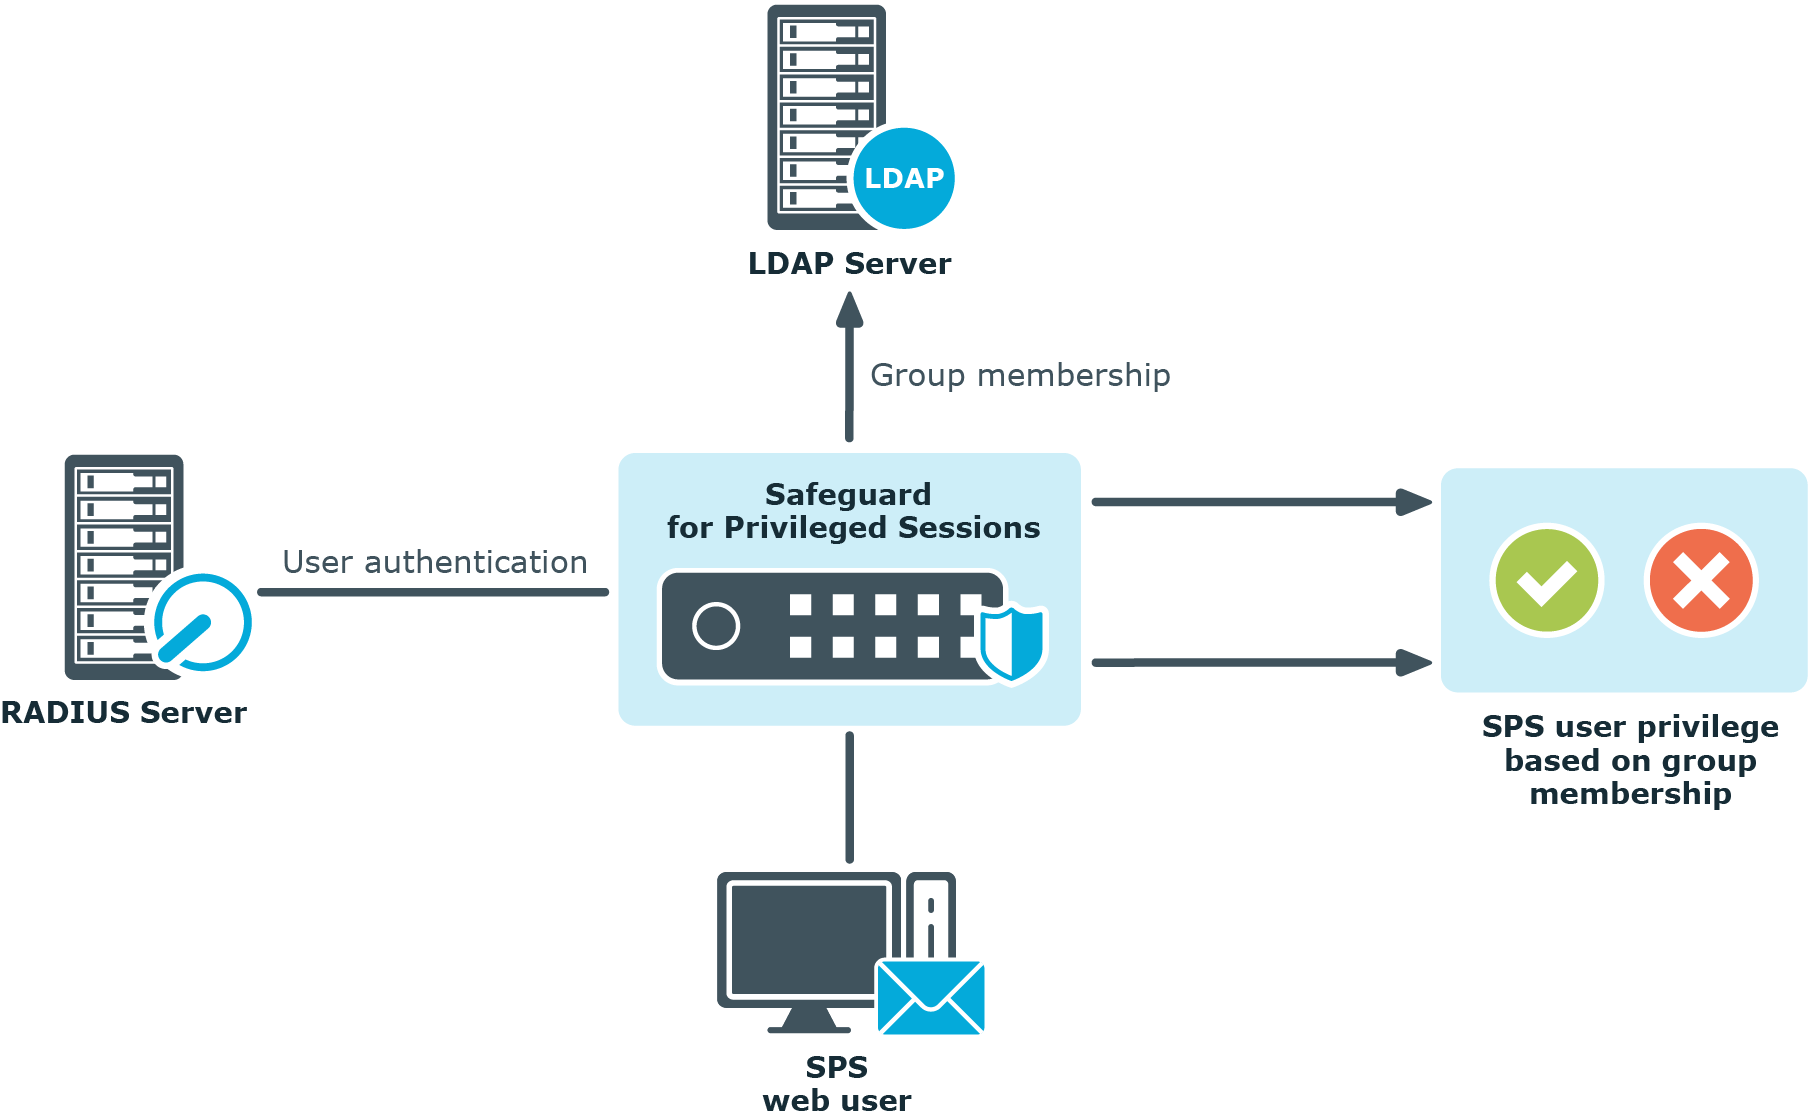
One Identity Safeguard for Privileged Sessions (SPS) has a web interface and is configured from a browser. The users of SPS can be authenticated using local, LDAP, or RADIUS databases. The privileges of users are determined by group memberships that can be managed either locally on SPS, or centrally in an LDAP database. Assigning privileges to groups is based on Access Control Lists (ACLs). It is also possible to match groups existing in the LDAP database to a set of SPS privileges. Access control in SPS is very detailed, it is possible to define exactly who can access which parts of the interface and of the stored data.
Figure 17: Authenticating the users of SPS
The Welcome Wizard and the first login
This section describes the initial steps of configuring One Identity Safeguard for Privileged Sessions (SPS). Before completing the steps in The initial connection to One Identity Safeguard for Privileged Sessions (SPS), unpack, assemble, and power on the hardware. Connect interface 1 (labelled 1 or EXT) to the local network, or directly to the computer from which SPS will be configured.
|
|
NOTE:
For details on unpacking and assembling the hardware, see "One Identity Safeguard for Privileged Sessions Hardware Installation Guide" in the Installation Guide. For details on how to create a high availability SPS cluster, see "Installing two SPS units in HA mode" in the Installation Guide. For more information about the supported browsers, see Supported web browsers and operating systems. |
The initial connection to One Identity Safeguard for Privileged Sessions (SPS)
One Identity Safeguard for Privileged Sessions (SPS) can be connected from a client machine using web browsers and accessed from the local network.
|
|
NOTE:
For details on supported browsers, see Supported web browsers and operating systems. |
Starting with version 3.1, SPS attempts to receive an IP address automatically via DHCP. If it fails to obtain an automatic IP address, it starts listening for HTTPS connections on the 192.168.1.1 IP address. Note that certain switch configurations and security settings can interfere with SPS receiving an IP address via DHCP. SPS accepts connections via its interface 1 (labelled 1 or EXT). For details on the network interfaces, see Network interfaces).
|
|
TIP:
The SPS console displays the IP address on which interface 1 is listening. |
If SPS is listening on the 192.168.1.1 address, note that the 192.168.1.0/24 subnet must be accessible from the client. If the client machine is in a different subnet (for example, its IP address is 192.168.10.X), but in the same network segment, the easiest way is to assign an alias IP address to the client machine. Creating an alias IP on the client machine virtually puts both the client and SPS into the same subnet, so that they can communicate. To create an alias IP complete the following steps.
-
For details on creating an alias IP on Microsoft Windows, see Creating an alias IP address (Microsoft Windows).
-
For details on creating an alias IP on Linux, see Creating an alias IP address (Linux).
-
If configuring an alias interface is not an option for some reason, you can modify the IP address of SPS. For details, see Modifying the IP address of One Identity Safeguard for Privileged Sessions (SPS).
|
|
Caution:
The Welcome Wizard can be accessed only using interface 1, as the other network interfaces are not configured yet. |
Creating an alias IP address (Microsoft Windows)
Purpose
This procedure describes how to assign an alias IP address to a network interface on Microsoft Windows platforms.
Steps
To assign an alias IP address to a network interface on Microsoft Windows platforms
-
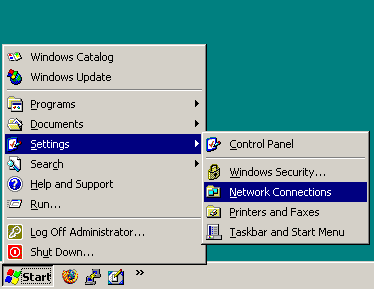
Navigate to Start menu > Settings > Network Connections.
-
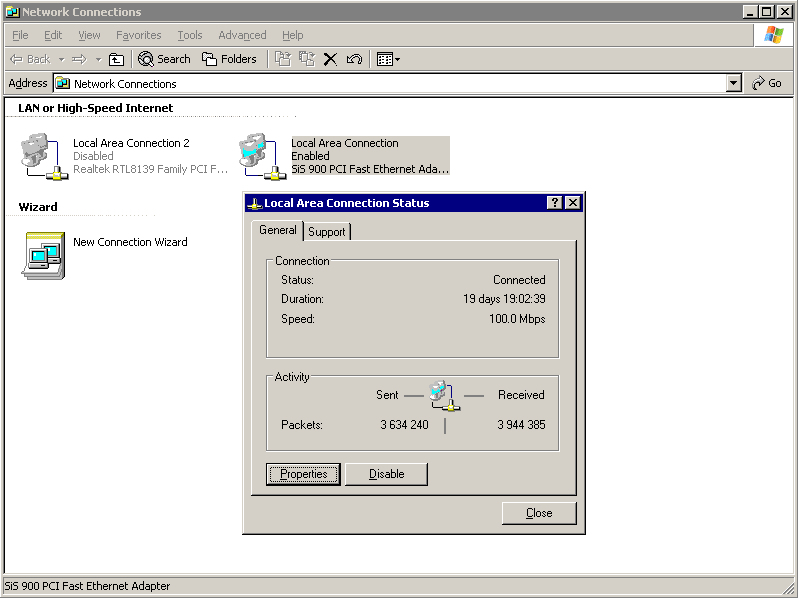
Double-click Local Area Connection and then click Properties.
-
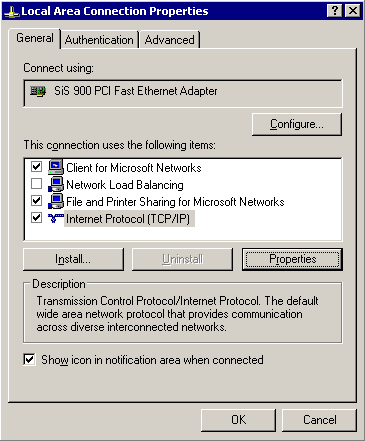
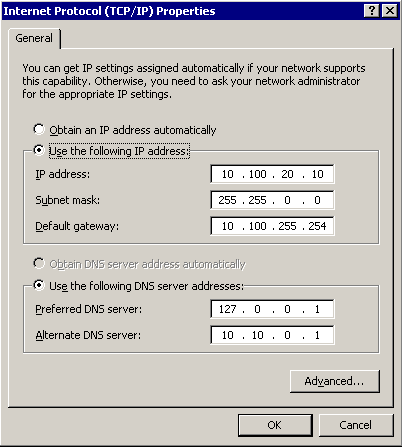
Select the Internet Protocol (TCP/IP) component in the list and click Properties.
-
To display the Advanced TCP/IP Settings window, click Advanced.
-
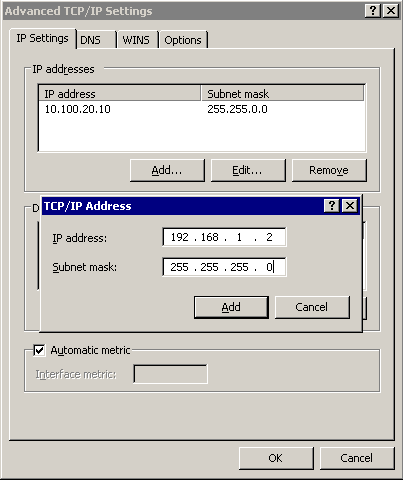
Select the IP Settings tab, and click Add in the IP Addresses section.
-
Enter 192.168.1.2 into the IP Address field, and enter 255.255.255.0. into the Netmask field.
Caution: If your internal network uses the 192.168.1.0/24 IP range, it is possible that the 192.168.1.1 and 192.168.1.2 addresses are already in use. In this case, disconnect One Identity Safeguard for Privileged Sessions (SPS) from the network, and connect a computer directly to interface 1 (labelled 1 or EXT) using a standard cross-link cable.
-
To complete the procedure, click Add.


