SSB can be connected from a client machine using any modern web browser.
SSB can be accessed from the local network. SSB attempts to receive an IP address automatically via DHCP. If it fails to obtain an automatic IP address, it starts listening for HTTPS connections on the 192.168.1.1 IP address. Note that certain switch configurations and security settings can interfere with SSB receiving an IP address via DHCP. SSB accepts connections via its external interface (EXT, for details on the network interfaces, see Network interfaces).
|

|
TIP:
The SSB console displays the IP address the external interface is listening on. |
If SSB is listening on the 192.168.1.1 address, note that the 192.168.1.0/24 subnet must be accessible from the client. If the client machine is in a different subnet (for example its IP address is 192.168.10.X), but in the same network segment, the easiest way is to assign an alias IP address to the client machine. Creating an alias IP on the client machine virtually puts both the client and SSB into the same subnet, so that they can communicate. To create an alias IP complete the following steps.
|

|
Caution:
The Welcome Wizard can be accessed only using the external network interface of SSB, as the management interface is not configured yet. |
Open the page https://192.168.1.1 from your browser and accept the certificate shown. The Welcome Wizard of SSB appears.
Purpose
This procedure describes how to assign an alias IP address to a network interface on Microsoft Windows platforms.
Steps
To assign an alias IP address to a network interface on Microsoft Windows platforms
-
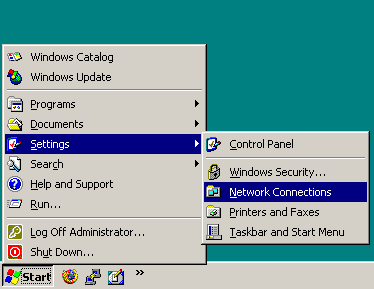
Navigate to Start menu > Settings > Network Connections.
-
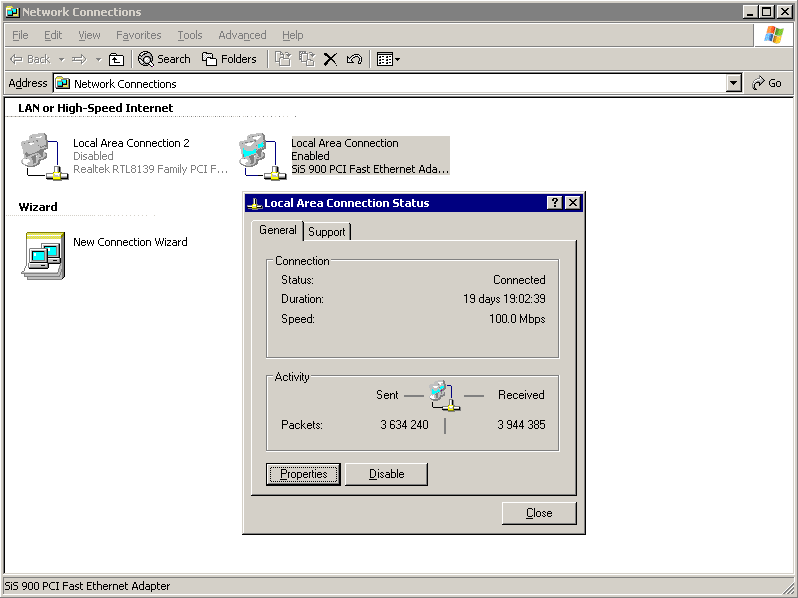
Double-click the Local Area Connection and then click Properties.
-
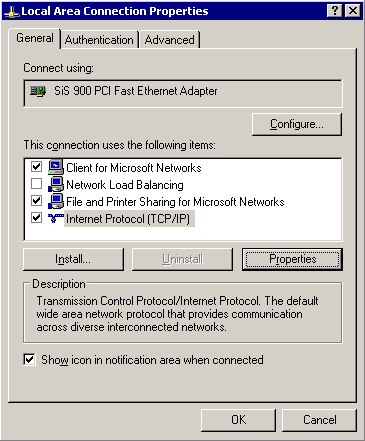
Select the Internet Protocol (TCP/IP) component in the list and click Properties.
-
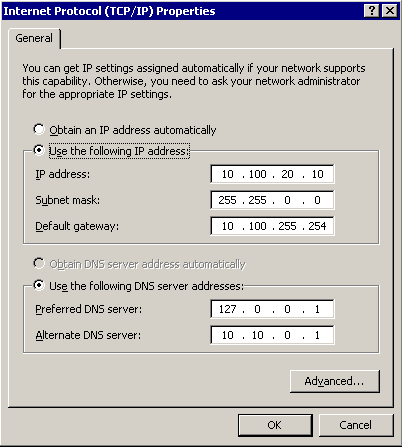
To display the Advanced TCP/IP Settings window, click Advanced.
-
Select the IP Settings tab and in the IP Addresses section, click Add.
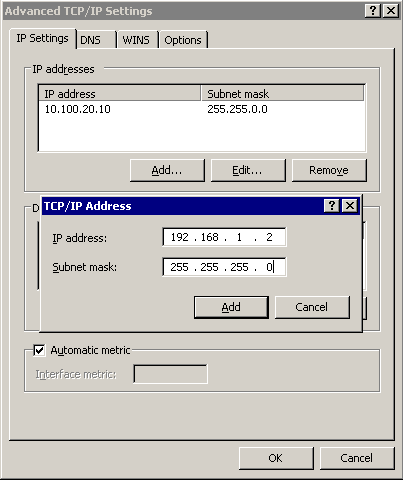
-
Into the IP Address field, enter 192.168.1.2. Into the Netmask field, enter 255.255.255.0.
|
|
Caution:
If your internal network uses the 192.168.1.0/24 IP range, the 192.168.1.1 and 192.168.1.2 addresses might already be in use. In this case, disconnect SSB from the network, and connect directly a computer to its external interface using a standard cross-link cable. |
-
To complete the procedure, click Add.
Purpose
This procedure describes how to assign an alias IP address to a network interface on Linux platforms.
Steps
To assign an alias IP address to a network interface on Linux platforms
-
Start a terminal console (for example gnome-terminal, konsole, xterm, and so on).
-
Issue the following command as root:
ifconfig <ethX>:0 192.168.1.2
where <ethX> is the ID of the network interface of the client, usually eth0 or eth1.
-
Issue the ifconfig command. The <ethX>:0 interface appears in the output, having inet addr:192.168.1.2.
-
Issue the ping -c 3 192.168.1.1 command to verify that SSB is accessible. A similar result is displayed:
user@computer:~$ ping -c 3 192.168.1.1
            PING 192.168.1.1 (192.168.1.1) 56(84) bytes of data.
            64 bytes from 192.168.1.1: icmp-seq=1 ttl=63 time=0.357 ms
            64 bytes from 192.168.1.1: icmp-seq=2 ttl=63 time=0.306 ms
            64 bytes from 192.168.1.1: icmp-seq=3 ttl=63 time=0.314 ms

            --- 192.168.1.1 ping statistics ---
            3 packets transmitted, 3 received, 0% packet loss, time 2013ms
            rtt min/avg/max/mdev = 0.306/0.325/0.357/0.030 ms
Purpose
This section describes how to configure SSB to listen for connections on a custom IP address.
|
|
Caution:
Use this procedure only before the initial configuration of SSB, that is, before completing the Welcome Wizard. For details on changing the IP address or other network settings of a configured SSB system, see Network settings.
If you change the IP address of SSB, make sure that you use this address as the External interface — IP address in Configuring SSB with the Welcome Wizard. |
To configure SSB to listen for connections on a custom IP address
-
Access SSB from the local console, and log in with username root and password default.
-
In the Console Menu, select Shells > Core shell.
-
Change the IP address of SSB:
ip addr add <IP-address>/24 dev eth0
Replace <IP-address> with an IPv4 address suitable for your environment.
-
Set the default gateway using the following command:
ip route add default via <IP-of-default-gateway>
Replace <IP-of-default-gateway> with the IP address of the default gateway.
-
Type exit, then select Logout from the Console Menu.
-
Open the page https://<IP-address-you-set-for-SSB> from your browser and accept the certificate shown. The Welcome Wizard of SSB appears.
