If you have optionally installed the Active Roles Collector and Report Pack as described in Installing the Active Roles Collector and Report Pack, you must configure it to use its data collection and reporting features.
To configure the Active Roles Collector and Report Pack
-
From the Windows Start Menu, launch One Identity Active Roles 7.5.3 > Active Roles 7.5.3 Collector and Report Pack.
-
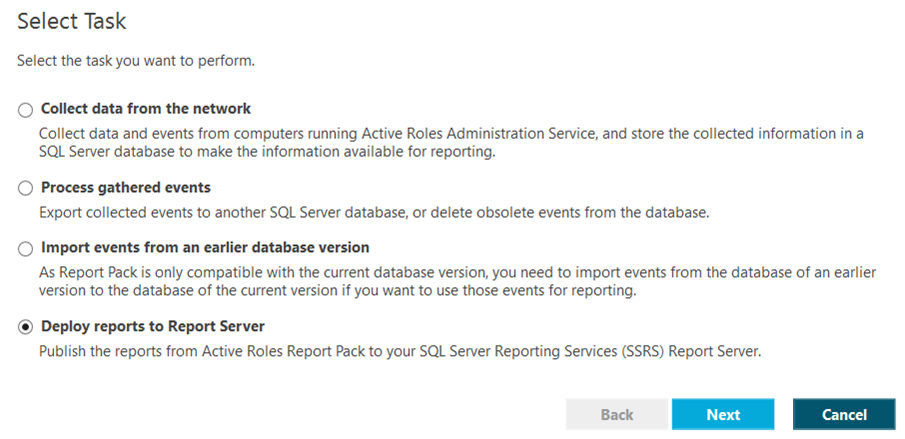
In the Select Task step, select Collect data from the network and click Next.
-
In the Configure Connection step, to specify a new data collection database, click Specify next to the Database field.
-
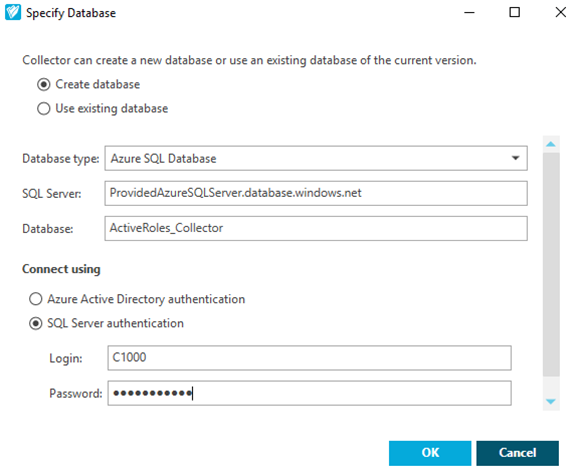
In the Specify Database step, select Create Database and configure the following settings.
-
Database Type: Select Azure SQL Database.
-
SQL Server: Enter the name of the Azure SQL server provided by One Identity.
-
Database: Enter ActiveRoles_Collector.
-
Connect using: Select SQL Server authentication and enter the Azure SQL login credentials provided by One Identity to the Login and Password fields.
To continue configuration, click OK. The database will be created in the Azure SQL instance of your Active Roles SaaS tenant. When the database is created, the Database field of the Configure Connection step will be automatically populated.
-
-
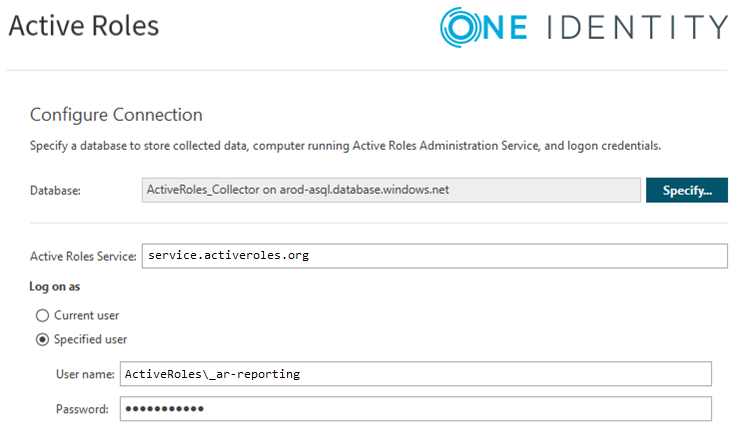
In the Configure Connection step, specify the Active Roles Service server name in the Active Roles Service field, then select Log on as > Specified user and provide the login details of the Active Roles Reporting domain service account credentials created as a prerequisite for Installing the Active Roles Collector and Report Pack.
-
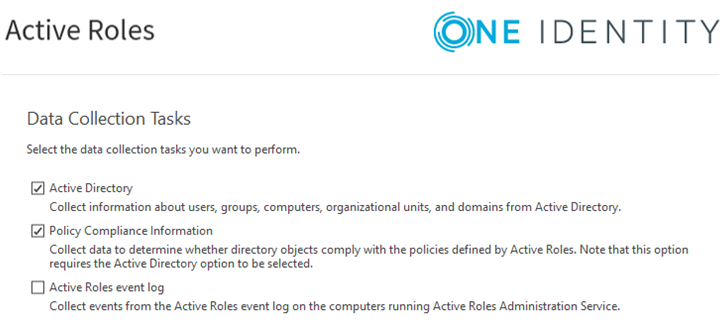
In the Data Collection Tasks step, select Active Directory and Policy Compliance Information as the type of data that the Active Roles Collector and Report Pack will collect.
TIP: You can also select Active Roles event log to collect application event logs with the Active Roles Collector and Report Pack. However, One Identity recommends to use a dedicated Log Management or SIEM solution to gather and archive event logs.
-
In the Data to Collect step, select all categories except Access Templates, and click Next.
NOTE: Selecting all check boxes (including Access Templates) in this step will result in a data collection error as described in Knowledge Base Article 230239 in the One Identity Support Portal.
This error occurs when configuring either an immediate or a scheduled data collection operation (configured with the Now and On a schedule settings of the Select Operation Mode step, respectively). When running an immediate data collection operation, this error is visible on the user interface. When performing a scheduled run, the error is logged only in the collector log file at the following location:
C:\ProgramData\One Identity\Active Roles\Logs\Collector\Collector-Active Roles Collector (<task-name>)-<timestamp>.log
-
In the Select Domains or OUs step, to specify a new domain with the Browse for Container dialog, click Add.
-
In the Browse for Container dialog, select the domain to use and click OK.
NOTE: If the domain to select is missing in this dialog, check the following:
-
Make sure that Use subtree search is selected.
-
Make sure that a domain has already been added to Active Roles as described in Adding the first domain to the Active Roles Console. If no domain has been previously added, this dialog will be empty.
The selected domain will appear in the Select Domains or OUs step.
-
-
In the Select Operation Mode step, under Run Active Roles Collector, select On a schedule and name the mode (for example: Daily Collection).
-
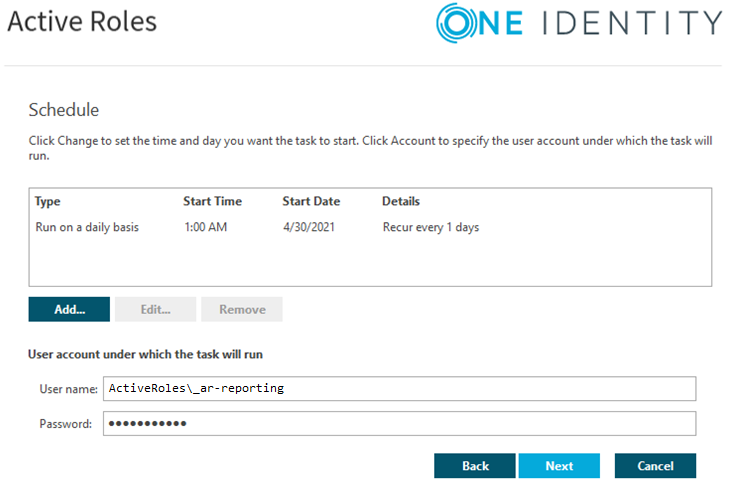
In the Schedule step, to specify a new data collection schedule, click Add.
-
In the Configure Schedule dialog, configure the schedule with the available settings and click OK.
TIP: One Identity recommends configuring a daily schedule that runs data collection in off-peak hours to minimize potential performance issues.
-
When the schedule is configured, it must appear in the Schedule step.
Under User account under which the task will run, specify the Active Roles Reporting domain service account credentials.
-
To close the Active Roles Collector and Report Pack setup, click Finish.
NOTE: The log file of the configured logging operation is stored at the following location by default:
C:\ProgramData\One Identity\Active Roles\Logs\Collector\Collector-<date>-<time>.log
The ProgramData folder of the operating system is hidden by default.
-
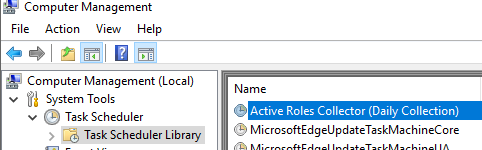
Confirm that the configured collection task is listed in the Windows Task Scheduler. Right-click the Windows Start Menu, and navigate to Computer Management > System Tools > Task Scheduler > Task Scheduler Library. In this example, the task is named Active Roles Collector (Daily Collection).
-
To perform the first data collection run, right-click the Active Roles Collector (Daily Collection) task and select Run.
-
When the task completed successfully, configure Active Roles Collector and Report Pack so that it deploys reports to a report server. Open Active Roles Collector and Report Pack again, and in the Select Task step, select Deploy reports to Report Server.
-
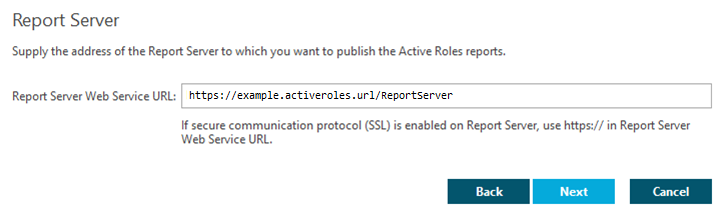
In the Report Server step, specify the Report Server Web Service URL.
TIP: By default, Active Roles Collector and Report Pack may populate the Report Server Web Service URL field with an https:// scheme. Using this scheme if you do not have a valid certificate and SSL enabled for SQL Server Reporting Services will result in a Verification Failed error when Active Roles Collector and Report Pack attempts accessing the Report Web Server service.
To avoid this error, change https:// to http:// in the URL in such cases.
-
In the Data Source step, click Configure Data Source.
-
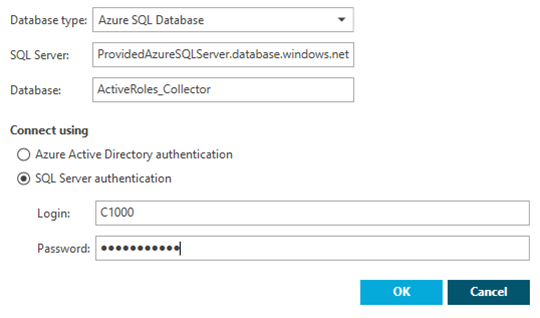
In the Configure Data Source dialog, configure the following settings:
-
Database Type: Select Azure SQL Database.
-
SQL Server: Enter the name of the Azure SQL server provided by One Identity.
-
Database: Enter ActiveRoles_Collector.
-
Connect using: Select SQL Server authentication and enter the Azure SQL login credentials provided by One Identity to the Login and Password fields.
When ready, click OK to return to the Data Source step. The Database field will display the configured data source.
-
-
Active Roles Collector and Report Pack will then start publishing the report definitions. Use the progress bar to check the publish status. When the process is completed:
-
To close the Active Roles Collector and Report Pack, click Finish.
-
To check the log of the procedure, click View log.
NOTE: The log file of the configured logging operation is stored at the following location by default:
C:\ProgramData\One Identity\Active Roles\Logs\Collector\Collector-<date>-<time>.log
The ProgramData folder of the operating system is hidden by default.
-
-
To validate whether Active Roles is present in the domain and that reporting works as configured, open the SQL Reporting Services web portal with the /Reports path of your Active Roles server (http://<FQDN-of-server>/Reports). Navigate to Active Roles > 7.5.3 > Active Directory Assessment > Domains > Domain Summary, and verify that the page is populated with data reports.
NOTE: Starting from Active Roles 7.4.4, Internet Explorer is no longer supported by the Active Roles Web Interface. Therefore, One Identity recommends using one of the following supported browsers when using any web-based Active Roles 7.5.3 interfaces:
-
Mozilla Firefox 36 (or newer)
-
Google Chrome 61 (or newer)
-
Microsoft Edge 79 (or newer), based on Chromium
-
-
To open the settings of the SQL Reporting Services web portal, click
> Site Settings at the top right corner of the page.
-
To assign administrator privileges to the Active Roles administrators (configured in First-time configuration of Active Roles On Demand) for the configured Active Roles report, navigate to Security > Add group or user.
-
In the Group or user field, enter the name of the Active Roles Administrators AD group (for example, ARAdmins). Under Role, select the System Administrator role. To close the dialog, click OK.
-
In the SQL Reporting Services web portal, confirm that the configured administrator group is now listed as System Administrator.


TIP: Even if the Configure Data Source > Database type option of the Active Roles Collector and Report Pack is set to Azure SQL Database, the SQL Reporting Services portal will identify it as Microsoft SQL Server.
This has no impact on the data collection operation, but you can still change the server type designation with the following steps:
-
On the SQL Reporting Services web interface, navigate to Active Roles > Shared Data Sources > Manage Active Roles 7.5.3 Report Data > Properties.
-
Under Connection, change the Type from Microsoft SQL Server to Microsoft Azure SQL Database.