Installing Defender VPN Integrator
To install Defender VPN Integrator
- Run the DefenderVPNIntegrator.exe file supplied in the Defender distribution package.
- Complete the wizard that starts to install the Defender VPN Integrator.
You may be prompted to restart your computer. When you complete the installation, Defender VPN Integrator runs as a service.
If an earlier version of Defender VPN Integrator is installed on your computer, you first need to uninstall the earlier version. Depending upon your version of the Windows operating system, use Programs and Features or Add or Remove Programs in Control Panel to uninstall the earlier version of Defender VPN Integrator. After uninstall, you may be prompted to restart your computer. When finished, run DefenderVPNIntegrator.exe to install the new version of Defender VPN Integrator.
Configuring Defender VPN Integrator
The Defender VPN Integrator does not include a configuration interface. For this reason, you have to make all configuration changes in the pgwc.ini configuration file which you can find in the following location:
%ProgramFiles%\One Identity\Defender\VPN Integrator
A number of sample .ini files are supplied with new installation. You will need to rename the .ini file suitable for your VPN Client to pgwc.ini. If you make any changes to the pgwc.ini file, log off from the computer and then log back on again for the changes to take effect.
You may need to modify the pgwc.ini file to work with your particular VPN client, for example, the Window title= line should include the title displayed on your VPN client window.
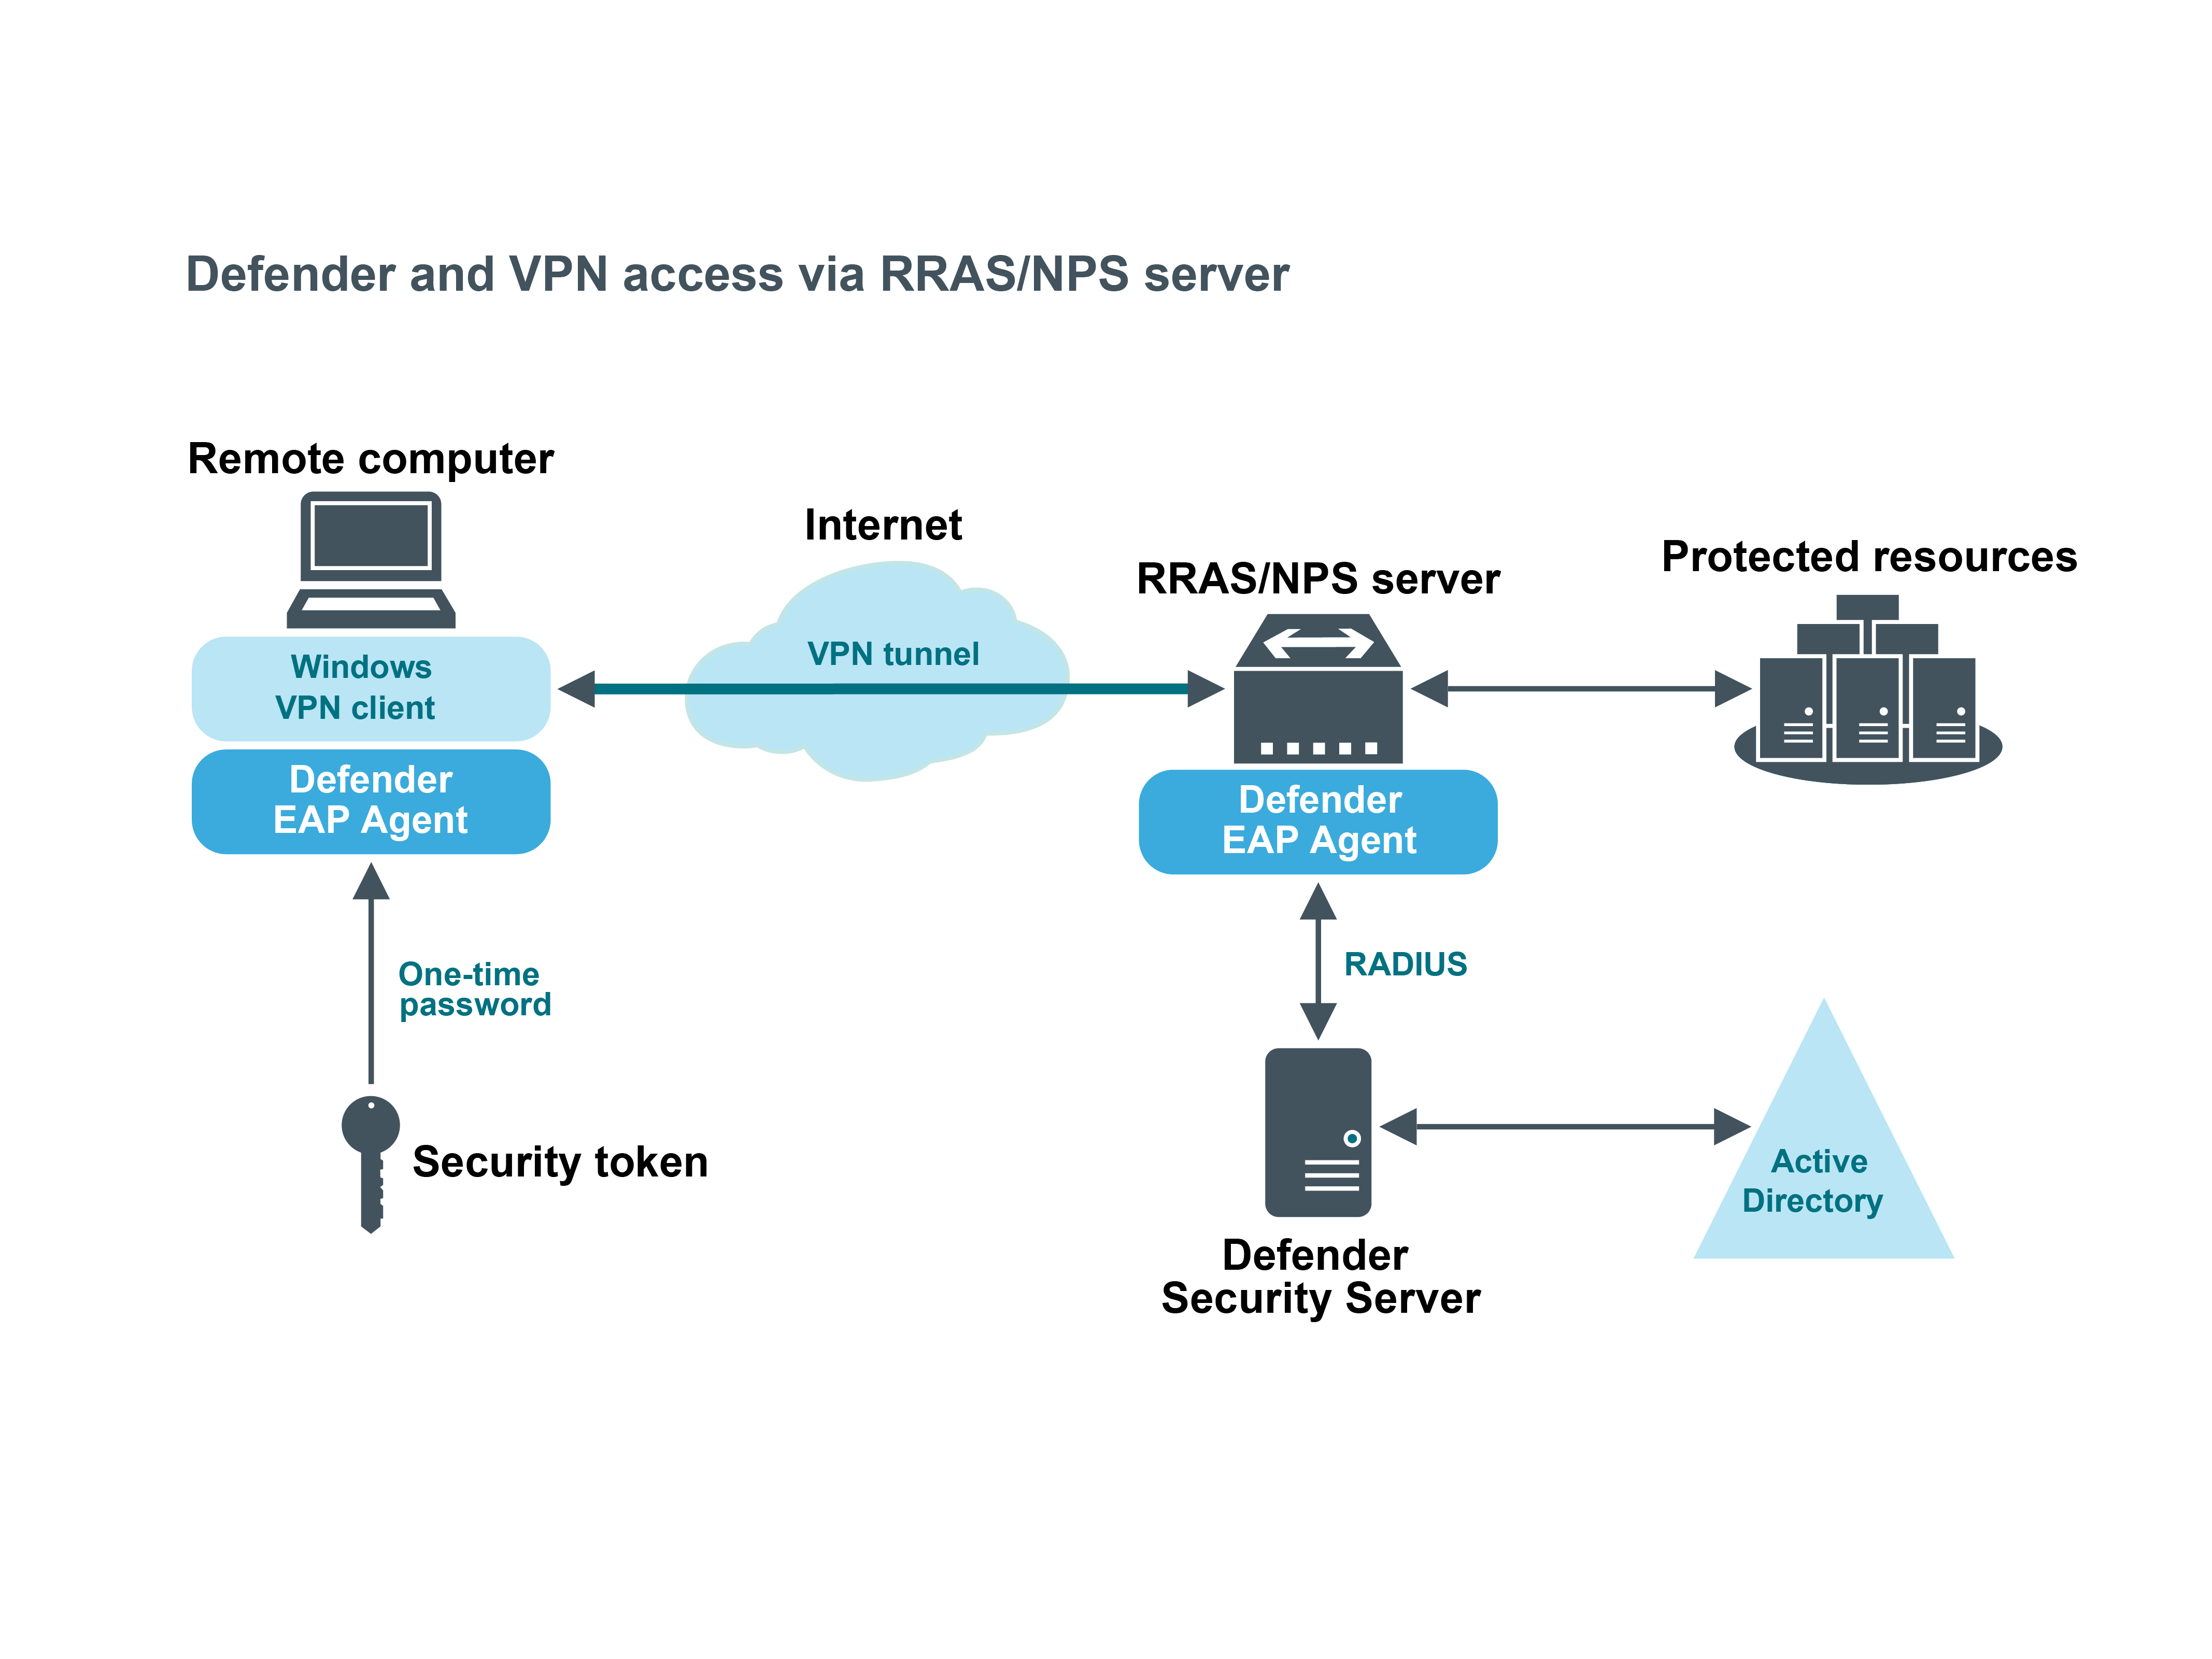
Defender EAP Agent
A VPN is an extension of a private network that encompasses links across shared or public networks like the Internet. VPN connections leverage the IP connectivity of the Internet using a combination of tunneling and encryption to securely connect two remote points, such as a remote worker and their office base.
Extensible Authentication Protocol (EAP) is a general protocol for authentication that also supports multiple authentication methods, such as Kerberos, token cards, one-time passwords, certificates, public key authentication, and smart cards.
Defender utilizes the EAP protocol to integrate its two-factor authentication into the existing user authentication process. The Defender EAP Agent supports Microsoft Remote Access clients and servers for both dial-up and VPN (PPTP and L2TP/IPSec) (implemented as an extension to PPP).
The Defender EAP Agent must be installed on the VPN server and VPN client computer.
Deploying Defender EAP Agent
To benefit from using two-factor authentication over the EAP protocol, you need to install the Defender EAP Agent on the Network Policy Server and on the VPN client computer. Then, you need to configure the Network Policy Server and the VPN client computer for working with the Defender EAP Agent.
To deploy the Defender EAP Agent, complete the following steps:
