You can use Defender to secure access to websites hosted on Microsoft Web Server (IIS). For that you need to use the Defender component called the ISAPI Agent.
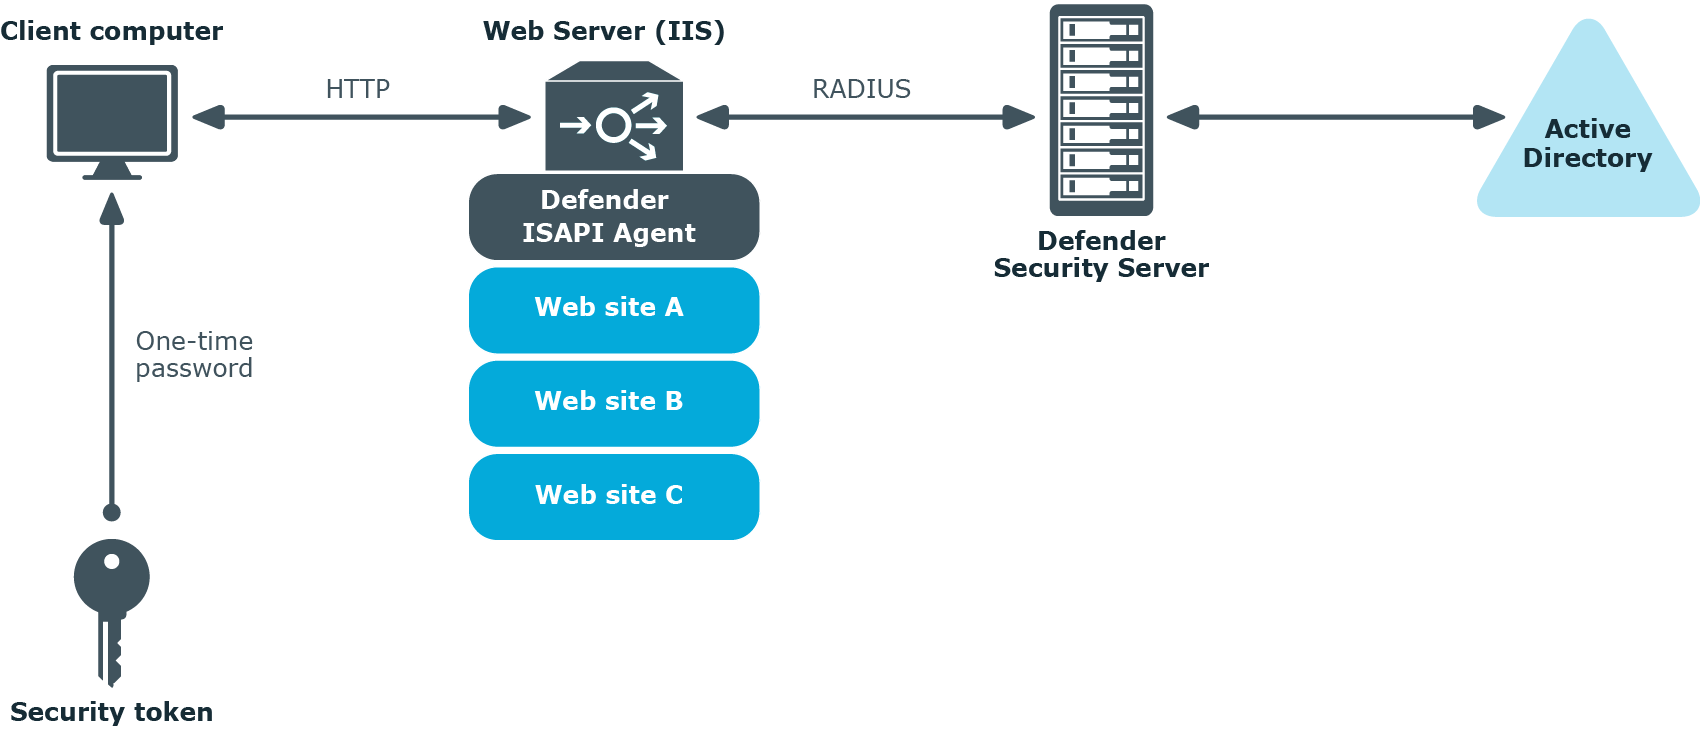
The ISAPI Agent acts as an ISAPI filter and requires users to authenticate via Defender in order to get access to the websites hosted on IIS.
To configure ISAPI Agent
- On the computer where the ISAPI Agent is installed, run the Defender ISAPI Agent Configuration tool.
- In the dialog box that opens, specify the ISAPI Agent settings, and then click OK.
The dialog box looks similar to the following:
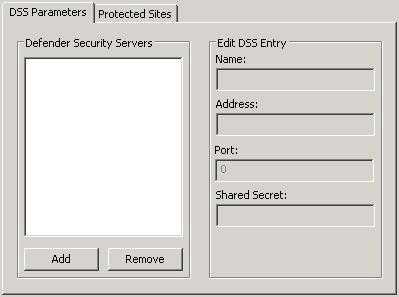
DSS Parameters tab
On this tab, specify the Defender Security Servers to which you want the ISAPI Agent to connect. You can use the following elements:
- Defender Security Servers Use this area to set up a list of the Defender Security Servers to which you want the ISAPI Agent to connect.
- Add Adds a new entry to the list. After adding a new entry, edit its properties in the Edit DSS Entry area.
- Remove Removes the selected entry from the list.
- Edit DSS Entry Use this area to specify or edit the name, address, port number, and shared secret of the Defender Security Server to which you want the ISAPI Agent to connect.
- Name Type the name of the Defender Security Server you want to use for user authentication.
- Address Type the IP address of the Defender Security Server.
- Port Type the communication port number configured on the access node you want the ISAPI Agent to use.
- Shared Secret Type the shared secret configured on the access node you want the ISAPI Agent to use.
Protected Sites tab
On this tab, select the check boxes next to the websites you want to protect with Defender. By default, Defender protects the whole website. If you want to protect only some parts of the website, use the default.acl file located in the ISAPI Agent installation folder. This file contains two sections where you can list parts that should and should not be protected. When specifying the website’s parts, use relative URLs.
To access protected website
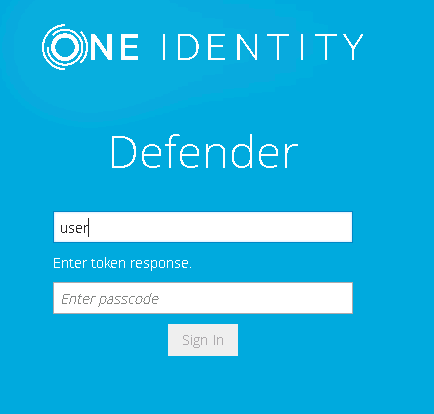
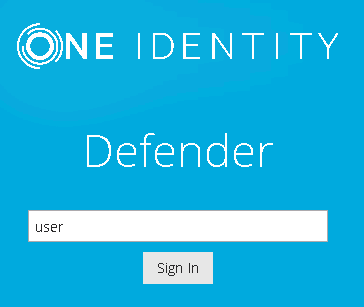
- Using any supported browser, access the protected website. On the Login page, enter your user name and click Sign in.
- In the example below, users are required to authenticate themselves by entering their passcode. The authentication type depends on how the Defender policy has been configured. For example, if Defender is configured to use a token policy, the Enter Synchronous Response prompt will be displayed.
- If users have entered a valid response, they will be authenticated and permitted to access the website.