
Building a cluster
Build a cluster by promoting a Safeguard for Privileged Sessions (SPS) node to the role of the Central Management node, and then join other nodes to your cluster.
Prerequisites
Enable the cluster interface on all nodes that you want to be part of your cluster. For details on how to do that, see Enabling cluster management.
To build a cluster
-
Promote a node to be the Central Management node:
-
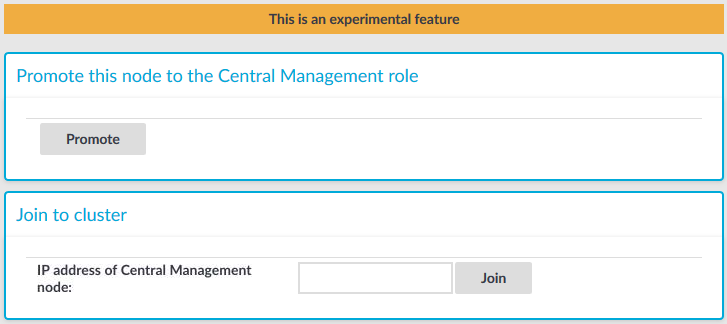
Navigate to Basic Settings > Cluster management > Promote this node to the Central Management role.
Figure 89: Basic Settings > Cluster management — Promote node to become Central Management node in cluster
-
Click Promote.
NOTE: This is an action that you cannot undo or modify.
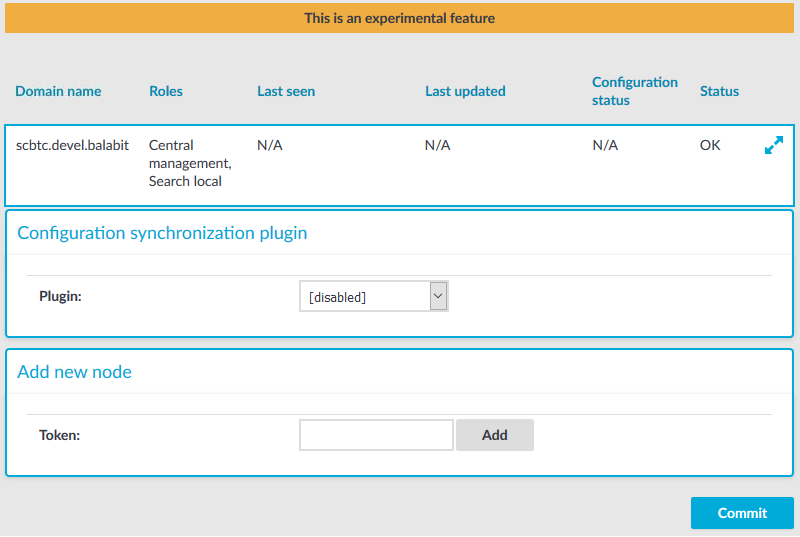
The Central Management node you have just added is displayed.
Figure 90: Basic Settings > Cluster management — View Central Management node in cluster
You can also promote a node through the REST API. For details, see "Promote a Safeguard for Privileged Sessions node to be the Central Management node in a new cluster" in the REST API Reference Guide.
-
-
Join additional nodes to your cluster:
Caution: Configuration options that you set on a node before joining it to the cluster will be overwritten by the configuration of the Central Management node. For example, policies and protocol-specific settings will be overwritten once you assign the Managed Host role to the node. Managed Host roles periodically fetch the configuration of the Central Management node and merge it into their own. This is called configuration synchronization.
To avoid the loss of policies and settings that are specific to your Managed Host node, use a configuration synchronization plugin. Such plugins enable you to limit the scope of configuration synchronization.
For more information, see Configuration synchronization across nodes in a cluster.
-
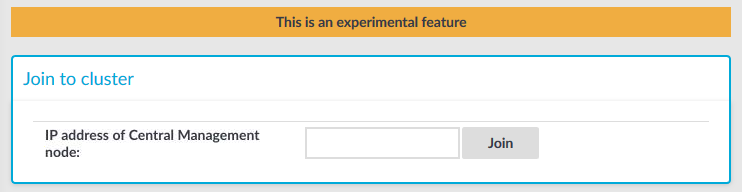
On the node that you want to join to the cluster, navigate to Basic Settings > Cluster management.
Figure 91: Basic Settings > Cluster management — Join node to cluster
-
In the IP address of Central Management node field, enter the IP address of the Central Management node.
-
Click Join.
NOTE: This is an action that you cannot undo. After clicking Join, you will still be able to change the IP address. However, you will not be able to promote this node to be the Central Management node.
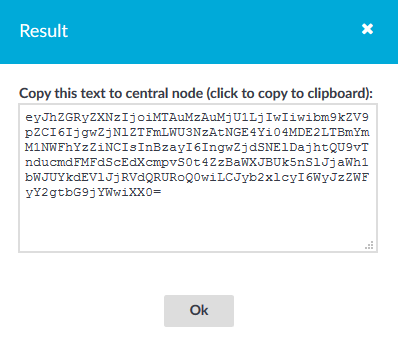
A dialog box with the token of the node pops up.
Figure 92: Token of node to join to cluster
-
Copy the token, and click Ok.
-
On the Central Management node, navigate to Basic Settings > Cluster management > Add new node.
-
Paste the token in the Token field.
-
Click Add.
The node you have added is displayed in the list of nodes on the Central Management node.
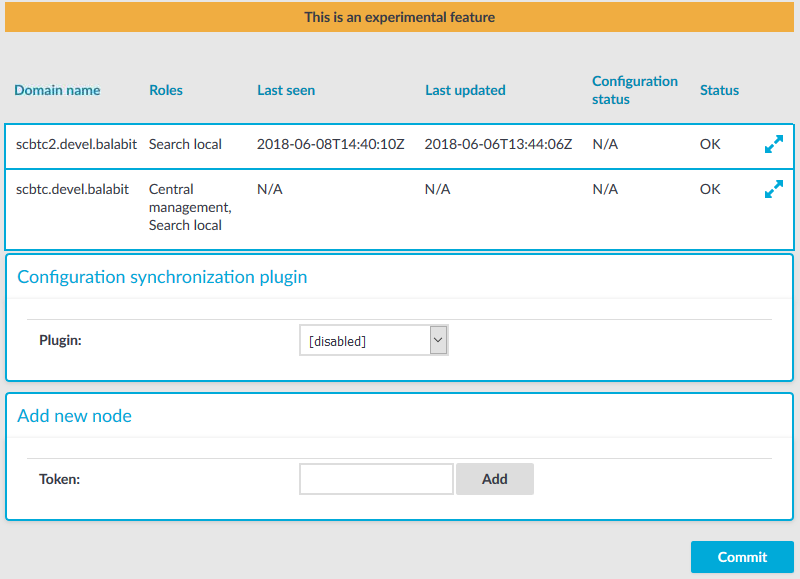
Figure 93: Basic Settings > Cluster management — Nodes added to cluster
If you want to centrally manage the configuration of the node(s) you have joined to the cluster, assign the Managed Host role to them. For details on how to do that, see Assigning roles to nodes in your cluster.
You can join additional nodes to your cluster through the REST API, too. For details, see "Join node(s) to the cluster" in the REST API Reference Guide.
-


Assigning roles to nodes in your cluster
By default, nodes do not have any roles assigned to them. The only exception is the Central Management node, which you specifically promoted to fulfill that role. To assign a role to a node in the cluster, complete the following steps.
To assign roles to nodes in your cluster
-
On the web interface of your Central Management node, navigate to Basic Settings > Cluster management. This page displays all nodes of a cluster.
-
Click
next to the node that you want to assign a role to. The available roles are displayed.
-
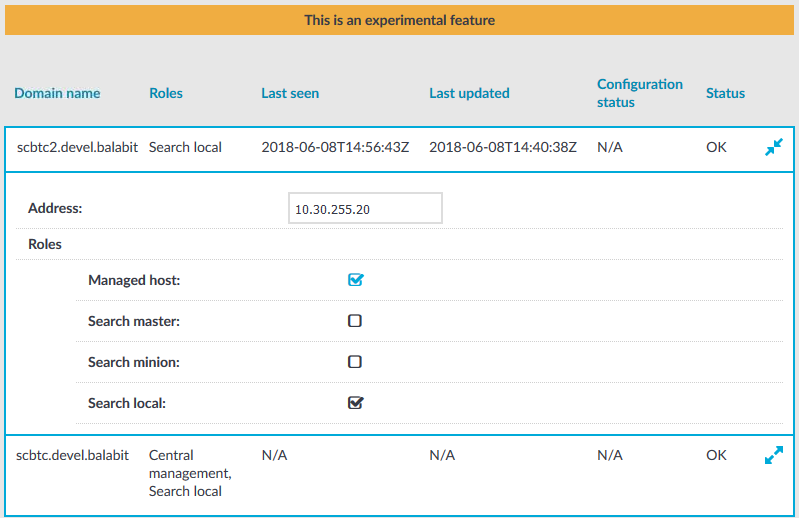
Select the role that you want to assign to the node. For details on what each role means, see Cluster roles.
Caution: Configuration options that you set on a node before joining it to the cluster will be overwritten by the configuration of the Central Management node. For example, policies and protocol-specific settings will be overwritten once you assign the Managed Host role to the node. Managed Host roles periodically fetch the configuration of the Central Management node and merge it into their own. This is called configuration synchronization.
To avoid the loss of policies and settings that are specific to your Managed Host node, use a configuration synchronization plugin. Such plugins enable you to limit the scope of configuration synchronization.
For more information, see Configuration synchronization across nodes in a cluster.
NOTE: Regarding search roles:
- Ensure that each node has a search role and only one search role.
- You must assign the Search Master role before you can assign Search Minion roles.
Figure 94: Basic Settings > Cluster management — Assign role to node
-
Click
.
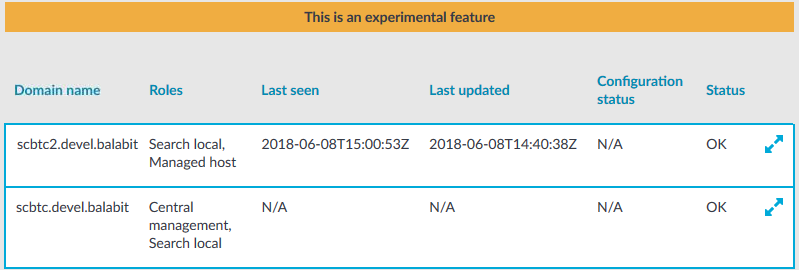
The role you assigned is now displayed next to the node, under Roles.
Figure 95: Basic Settings > Cluster management — Role is assigned to node
You can assign roles to your nodes through the REST API, too. For details, see "Assign a role to a node" in the REST API Reference Guide.
Configuration synchronization across nodes in a cluster
Nodes fetch their configuration from the Central Management node, and merge it into their own configuration. Depending on their role, nodes may merge the whole configuration into their own (Managed Host nodes), or only the cluster-specific parts (nodes with no roles assigned). Whenever a configuration change is made on the Central Management node and the change is committed, it is synchronized to all nodes in the cluster as soon as the nodes fetch the latest configuration from the Central Management node.
Configuration synchronization has some implications for the SSH keys (if any) that have been recorded on your nodes before they were joined to the cluster. For details, see Configuration synchronization and SSH keys.
In some cases, you may want to keep certain parts of the configuration on your nodes outside the scope of configuration synchronization. In that case, use a configuration synchronization plugin. For more information, see Using a configuration synchronization plugin.
The following configuration settings are never overwritten by configuration synchronization, even when not using a configuration synchronization plugin:
- settings related to networking (Basic Settings > Network)
- settings related to local services (Basic Settings > Local Services)
- settings related to the management of SPS (Basic Settings > Management)
- settings related to the license of SPS (Basic Settings > System > License)
Configuration synchronization and SSH keys
The only SSH keys present on Managed Host nodes will always be the ones that have been recorded by the Central Management node. This is because the SSH keys stored on the Central Management node get synced to the Managed Host nodes during configuration synchronization. This means that the SSH keys recorded on the Managed Host nodes before they were joined to the cluster are overwritten by the keys stored on the Central Management node.
The Central Management records new SSH keys in the following cases:
- The Central Management node is configured to Accept key for the first time and a new key is automatically recorded when the Central Management node interacts with a server for the first time.
- A new key is recorded on the Central Management node on the SSH Control > Server Host Keys page and this change is committed.
These are the keys that get synced to your Managed Host nodes.