
The SMB/CIFS archive method connects to a share on the target server with Server Message Block protocol. SMB/CIFS is mainly used on Microsoft Windows Networks.
|
|
NOTE:
Backup and archive policies only work with existing shares and subdirectories. If a server has a share at, for example, archive and that directory is empty, when the user configures archive/ssb1 (or similar) as a backup/archive share, it will fail. |


-
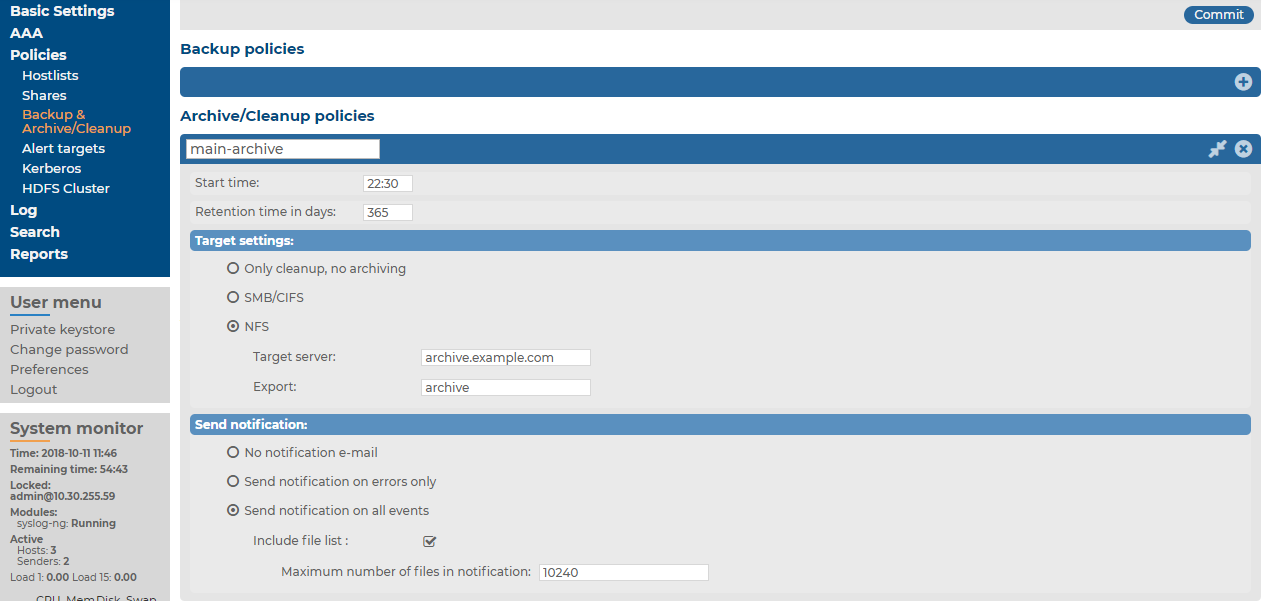
Navigate to Policies > Backup & Archive/Cleanup and click
 in the Archive/Cleanup policies section to create a new archive policy.
Figure 43: Policies > Backup & Archive/Cleanup > Archive/Cleanup Policies — Configure cleanup and archiving
-
Enter a name for the archive policy.
-
Enter the time when the archive process should start into the Start time field in HH:MM format (for example 23:00).
-
Select Target settings > SMB/CIFS.
NOTE: From SSB version 5.2.0, SSB only supports SMB 2.1 and later. Make sure that your operating system with the Samba share that you want to mount, supports SMB 2.1 or later. Otherwise, SSB cannot mount the remote share.
-
Enter the username used to logon to the remote server into the Username field, and corresponding password into the Password field. For anonymous login, enter anonymous as username, and leave the Password field empty.
NOTE: SSB accepts passwords that are not longer than 150 characters. The following special characters can be used: !"#$%&'()*+,-./:;<=>?@[]^-`{|}
-
Enter the name of the share into the Share field.
SSB saves all data into this directory, automatically creating the subdirectories. Archives of log files are stored in the data, configuration backups in the config subdirectory.
-
Enter the domain name of the target server into the Domain field.
-
Fill the Retention time in days field. Data older than this value is archived to the external server.
NOTE: The archived data is deleted from SSB.
-
To receive e-mail notifications, select the Send notification on errors only or the Send notification on all events option. Notifications are sent to the administrator e-mail address set on the Management tab, and include the list of the files that were backed up.
NOTE: This e-mail notification is different from the one set on the Alerting & Monitoring tab. This notification is sent to the administrator's e-mail address, while the alerts are sent to the alert e-mail address (see Configuring system monitoring on SSB).
-
Click
 .
. -
To assign the archive policy to the logspace you want to archive, see Archiving or cleaning up the collected data.