Importing the configuration of SSB
The configuration of SSB can be imported from the Basic Settings > System page. Use the respective action buttons to perform the desired operation.
Figure 60: Basic Settings > System — Importing the SSB configuration

|

|
Caution:
It is possible to import a configuration exported from SSB 2.0 or 3.0 into SSB 6.0, but it is not possible to restore an 1.1 or 1.0 backup into 6.0. |
To import the configuration of SSB
-
Navigate to Basic Settings > System > Import configuration.
-
Click Choose File and select the configuration file to import.
-
Enter the password into the Decryption password field and click Upload.
|

|
NOTE:
SSB accepts passwords that are not longer than 150 characters. The following special characters can be used: !"#$%&'()*+,-./:;<=>?@[]^-`{|} |
|

|
Caution:
When importing an older configuration, it is possible that there are logspaces on SSB that were created after the backing up of the old configuration. In such case, the new logspaces are not lost, but are deactivated and not configured. To make them accessible again, you have to:
-
Navigate to Log > Logspaces and configure the logspace. Filling the Access Control field is especially important, otherwise the messages stored in the logspace will not be available from the Search > Logspaces interface.
-
Adjust your log path settings on the Log > Paths page. Here you have to re-create the log path that was sending messages to the logspace. |
Accessing the SSB console
This section describes how to use the console menu of SSB, how to enable remote SSH access to SSB, and how to change the root password from the web interface.
Using the console menu of SSB
Connecting to the syslog-ng Store Box locally or remotely using Secure Shell (SSH) allows you to access the console menu of SSB. The console menu provides access to the most basic configuration and management settings of SSB. It is mainly used for troubleshooting purposes, the primary interface of SSB is the web interface.
|

|
NOTE:
Detailed host information is displayed in the shell prompt:
The format of the bash prompt is: (firmware_type/HA_node/hostname)username@HA_node_name:current_working_directory#
For example: (core/master/documentation-ssb)root@ssb1:/etc#
-
firmware_type is either boot or core
-
HA_node is either master or slave
-
hostname is the FQDN set on the GUI
-
username is always root |
The console menu is accessible to the root user using the password set during completing the Welcome Wizard.
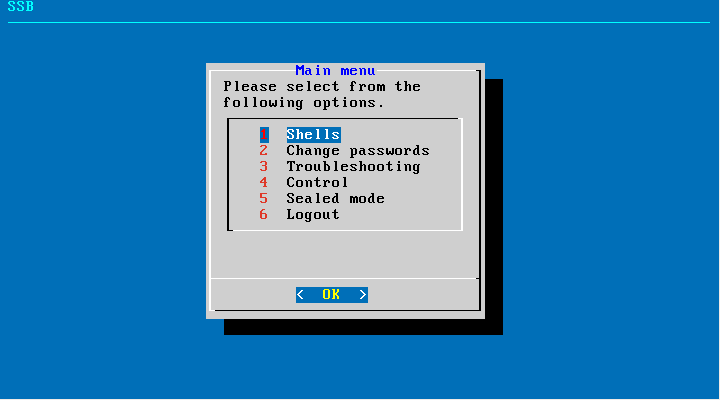
Figure 61: The console menu

The console menu allows you to perform the following actions:
-
Change the passwords of the root and admin users.
-
Access the local shells of the core and boot firmwares. This is usually not recommended and only required in certain troubleshooting situations.
-
Access the network-troubleshooting functions and display the available log files.
-
Reboot and shut down the system.
-
Enable and disable sealed mode. For details, see Sealed mode.
-
Set the IP address of the HA interface.
This option is not available on virtual appliances, or if your SSB license does not include the HA option. If High Availability (HA) operation mode is required in a virtual environment, use the HA function provided by the virtual environment.
|

|
NOTE:
Note that logging in to the console menu automatically locks the SSB interface, meaning that users cannot access the web interface while the console menu is used. The console menu can be accessed only if there are no users accessing the web interface. The connection of web-interface users can be terminated to force access to the console menu. |
Enabling SSH access to the SSB host
Exclusively for troubleshooting purposes, you can access the SSB host using SSH. Completing the Welcome Wizard automatically disables SSH access. To enable it again, complete the following steps:
|

|
Caution:
Accessing the SSB host directly using SSH is not recommended nor supported, except for troubleshooting purposes. In such case, the One Identity Support Team will give you exact instructions on what to do to solve the problem. |
Enabling the SSH server allows you to connect remotely to the SSB host and login using the root user. The password of the root user is the one you had to provide in the Welcome wizard. For details on how to change the root password from the web interface, see Changing the root password of SSB.
To enable SSH access to the SSB host
-
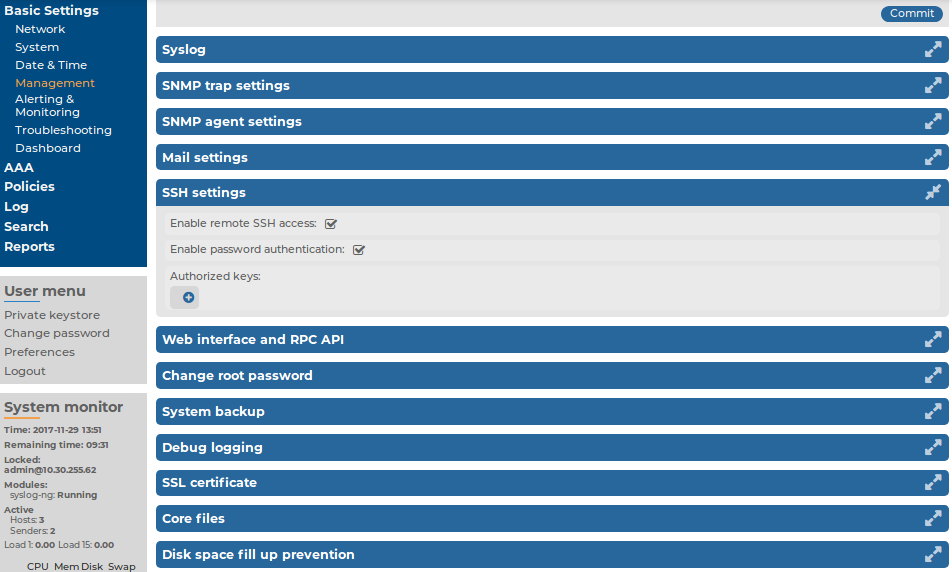
Navigate to Basic Settings > Management > SSH settings.
Figure 62: Basic Settings > Management > SSH settings — Enabling remote SSH access to SSB

-
Select the Enable remote SSH access option.
|

|
NOTE:
Remote SSH access is automatically disabled if Sealed mode is enabled. For details, see Sealed mode. |
-
Set the authentication method for the remote SSH connections.
-
To enable password-based authentication, select the Enable password authentication option.
-
To enable public-key authentication, click  in the Authorized keys field, click
  and upload the public keys of the users who can access and manage SSB remotely via SSH.
-
Click  .
.
The SSH server of SSB accepts connections only on the management interface if the management interface is configured. If the management interface is not configured, the SSH server accepts connections on the external interface. If possible, avoid enabling the SSH server of SSB when the management interface is not configured. For details on enabling the management connection, see Configuring the management interface.


 in the Authorized keys field, click
  .
.