Customizing your view
Any time you see a view with column headers, you can customize it to present the information to best suit your needs.
To change the sort criteria:
Note: An arrow in the column heading identifies the sort criteria and order, ascending or descending, being used to display information.
- Click the column heading to be used for the sort criteria.
- The sort order is in ascending order. To change it to descending order, click the heading a second time.
- To specify a secondary sort order, press the SHIFT key and then click the heading of the column to be used for the secondary sort order.
To resize a column
- Place your cursor on the boundary between column headings (your cursor changes to a double-arrow).
- Click and hold the left mouse button dragging the column boundary to the desired size.
To change the order of the columns
- Use the left mouse button to click the heading to be moved (the column heading pops off the grid).
- Drag that column to the desired location (arrows indicate where you are placing the selected column).
To add and remove columns
- Right-click the column header, and select Column Chooser.
- Select the column and drag it to the desired location in the column header.
- Close the Customization dialog by clicking the X.
To group by columns
Note: Grouping data creates a collapsed view that can be expanded to view the detailed information that applies to that group.
- Right-click the column header and select Show Group By Box.
-
Select the required column and drag it to the Group by box located above the header row.
Note: You can also right-click an individual column header and select Group By This Column. Selecting this command moves the selected header to the Group by box above the header row.
You can select to group by additional headings to create a hierarchy of groupings.
- To remove a grouping, right-click the heading in the Group by box located above the header row and select UnGroup or drag the heading back into the column header row.
Toggle layout options
Use the Toggle layout options task to show or hide the Layout controls at the top of the displayed view. The Layout controls allow you to select a pre-defined layout for displaying data. All views have a "default" layout, and some views have additional views available to filter the content. If you customize a view, you can also save the custom layout for use at a later time. Once a layout is saved, it appears in the Layout drop-down menu.
To change the layout being displayed
-
To display a different layout, select the layout using the Layout drop-down menu.
The new layout appears in the current view.
To save or remove a custom layout
- To save the currently displayed layout (custom layout):
- Click the
 Save Layout As button.
-
Enter a description name for the layout on the Save Layout As dialog and click OK.
The new layout appears in the Layout drop-down menu.
- To delete a previously saved layout:
- Select the layout using the Layout drop-down menu.
- Click the
 Delete Layout button.
-
Select Yes on the Delete Layout Confirmation dialog.
The layout is removed from the Layout drop-down menu.
- To redisplay the default layout or another layout, select the desired layout using the Layout drop-down menu.
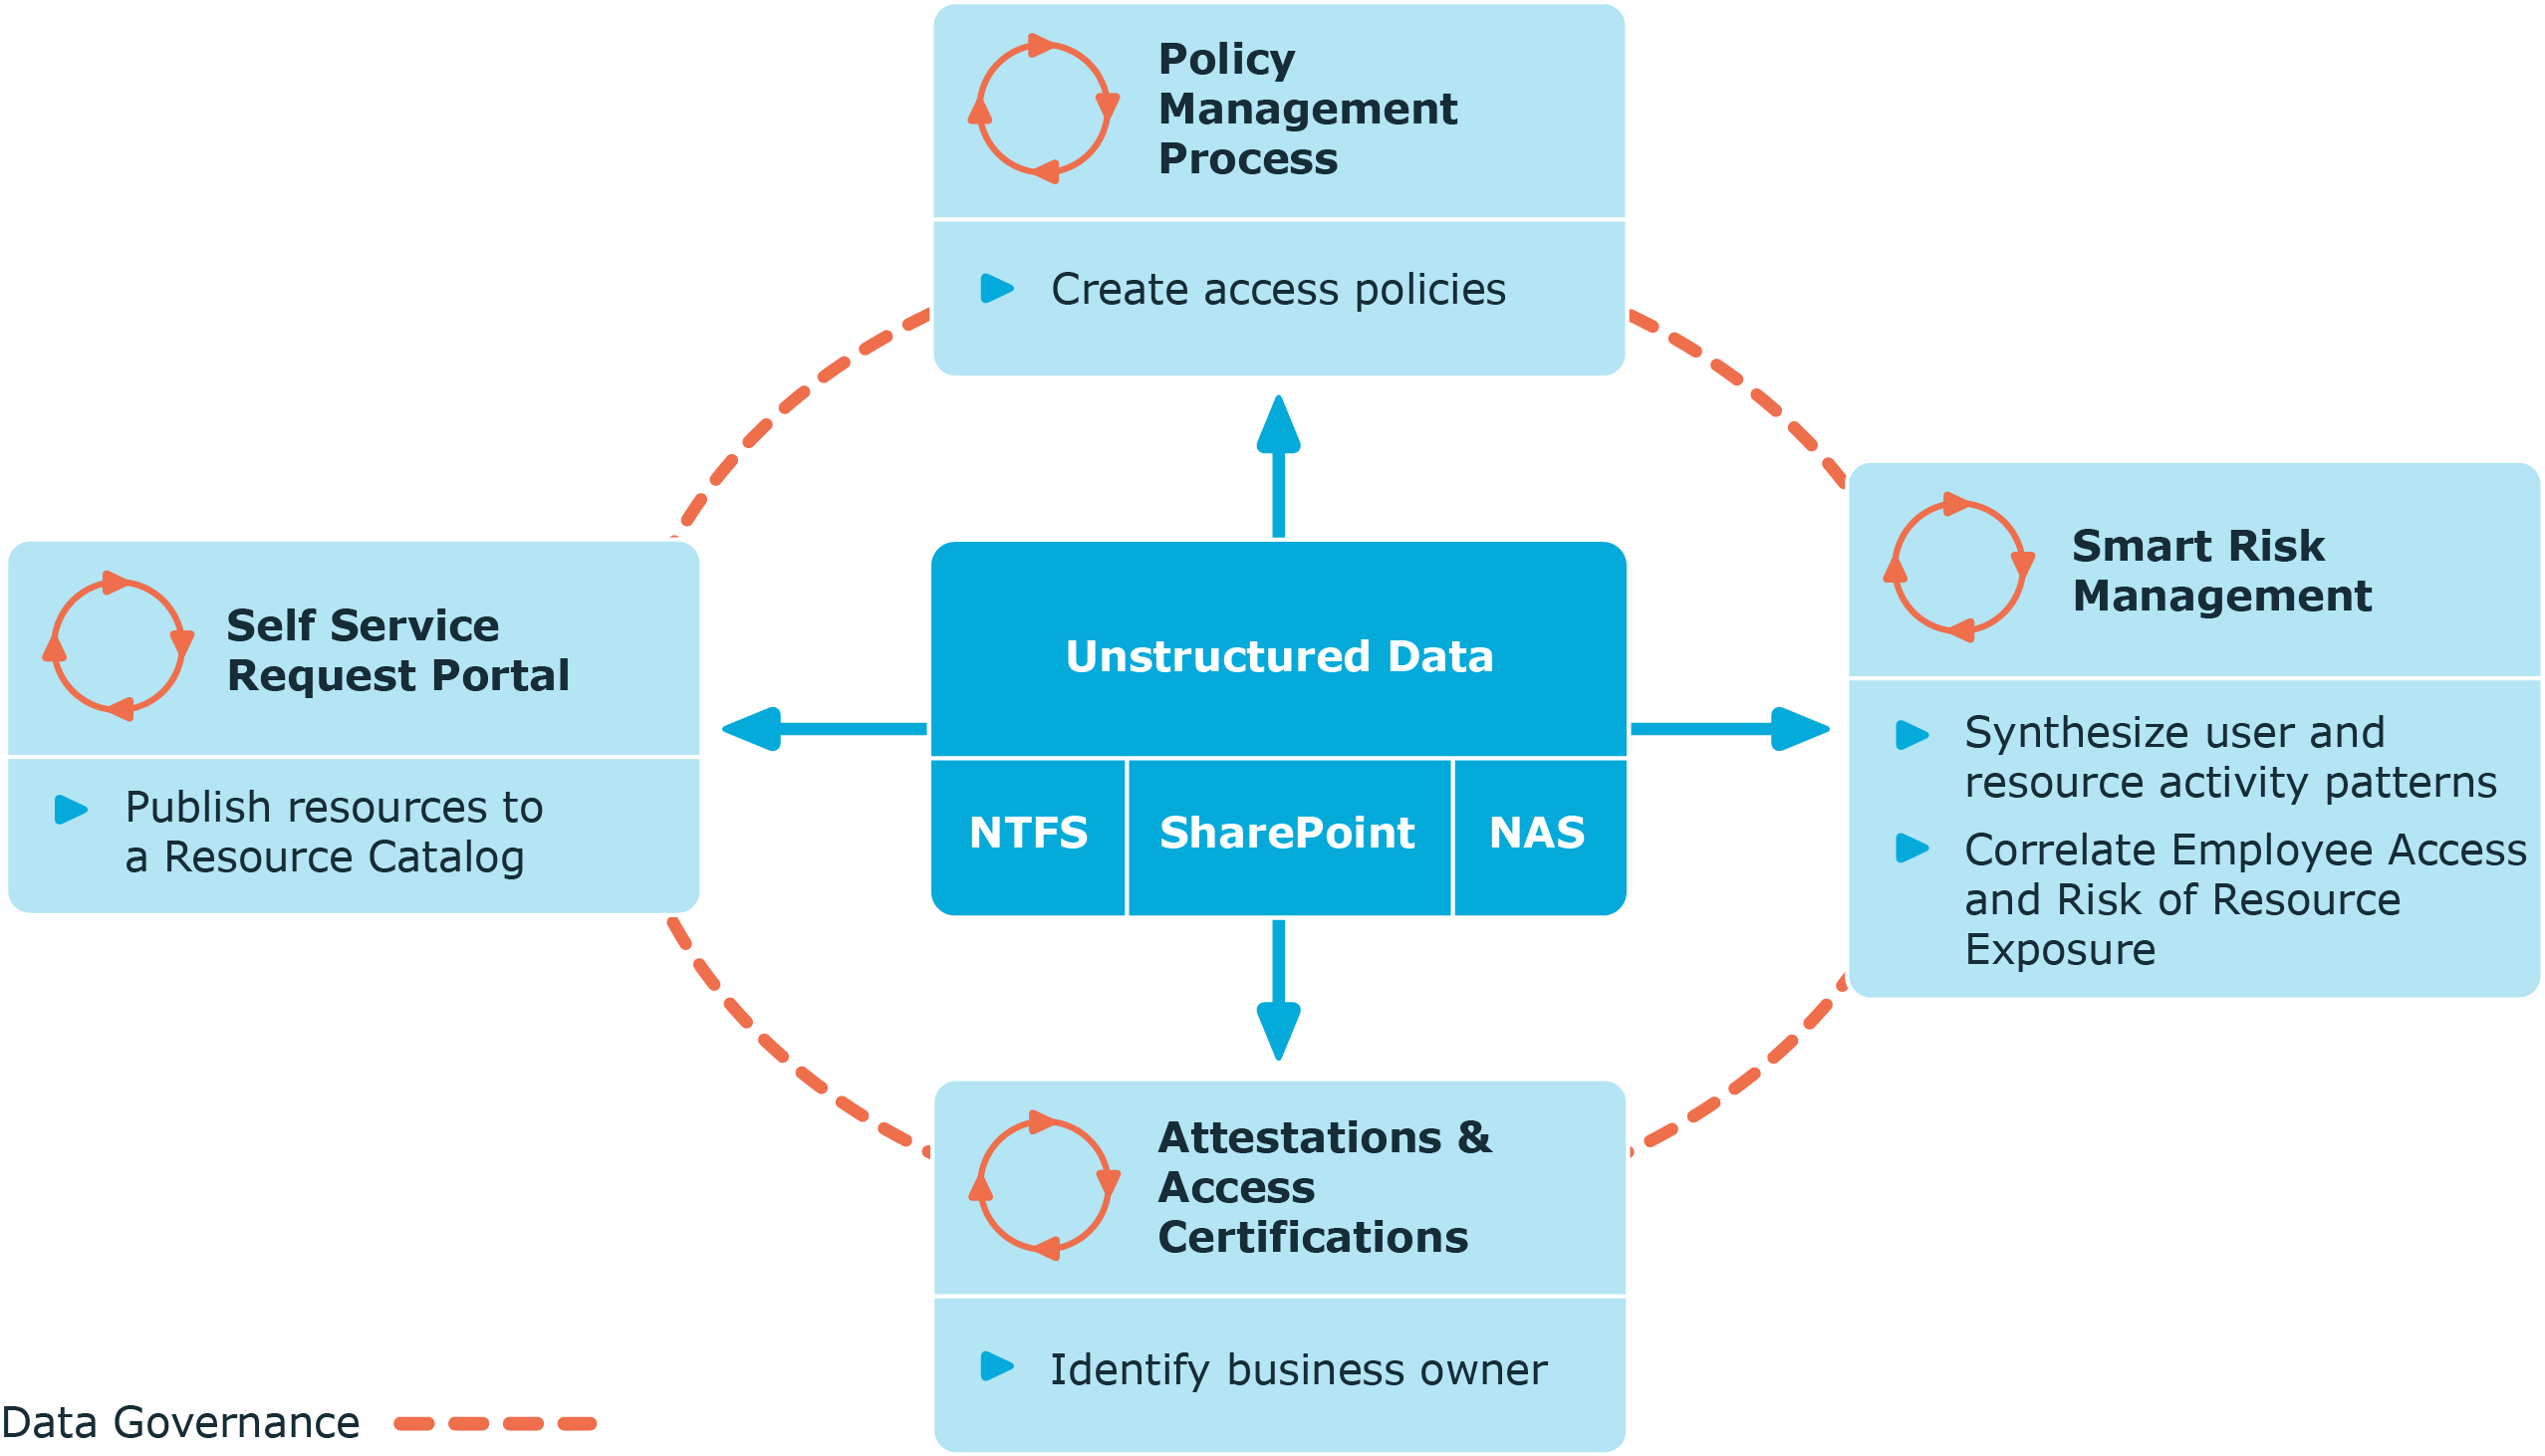
Administering Data Governance Edition
Data Governance Edition overview
Control over your organization’s data is vital to eliminating issues such as security breaches, loss of sensitive information, or non-compliance with external and internal guidelines. Data Governance Edition provides a systematic approach to managing data access, preserving data integrity, and providing content owners with the tools and workflows to manage their own data resources, removing reliance on IT administrators.
Ultimately, you need a process in place that allows you to:
- Ensure that your business runs efficiently with access to correct information on demand.
- Understand the access levels, patterns, and usage to build and maintain a governance strategy.
- Comply with organizational security and compliance policies.
- Bring accountability to contain damage.
- Review the usage patterns of sensitive information.
- Identify and assign business owners.
- Enable attestations from business owners to the validity of the data and its use.
The governance of unstructured data is accomplished through workflows that cross both the Manager and the web portal. The following diagram identifies the key processes in securing and controlling access to your organization’s data.
Figure 1: Data Governance Edition key processes