To apply the procedure outlined here, you will need physical access to a monitor and keyboard.
-
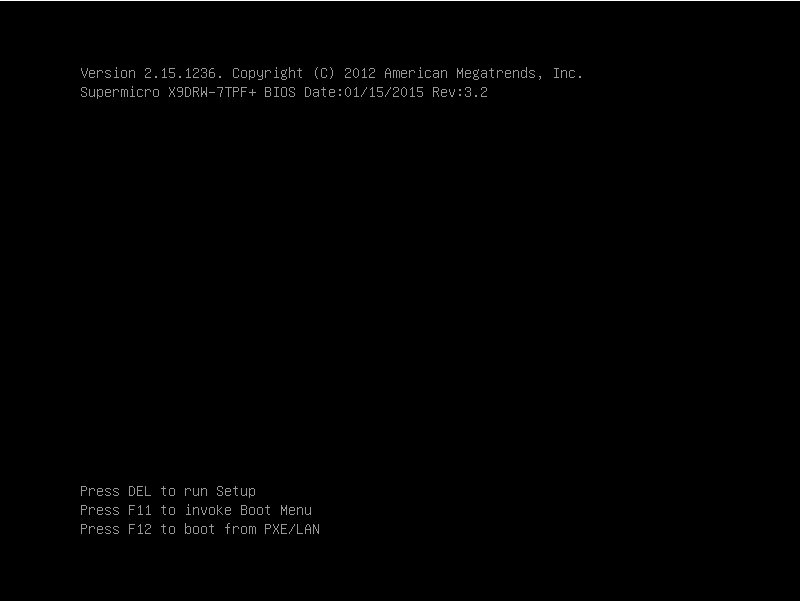
Press the DEL button when the POST screen comes up while the appliance is booting.
Figure 178: POST screen during booting
-
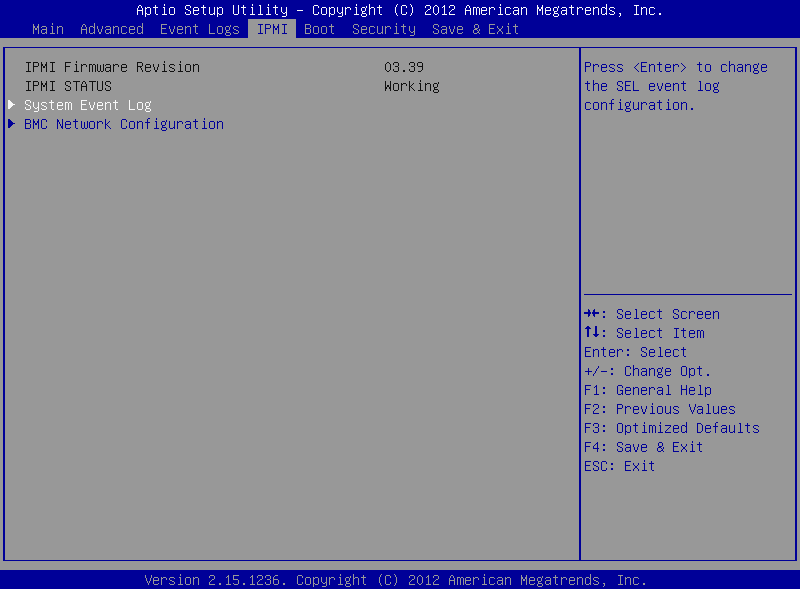
In the BIOS, navigate to the IPMI page.
-
On the IPMI page, select BMC Network Configuration, and press Enter.
Figure 179: IMPI page > BMC Network Configuration option
-
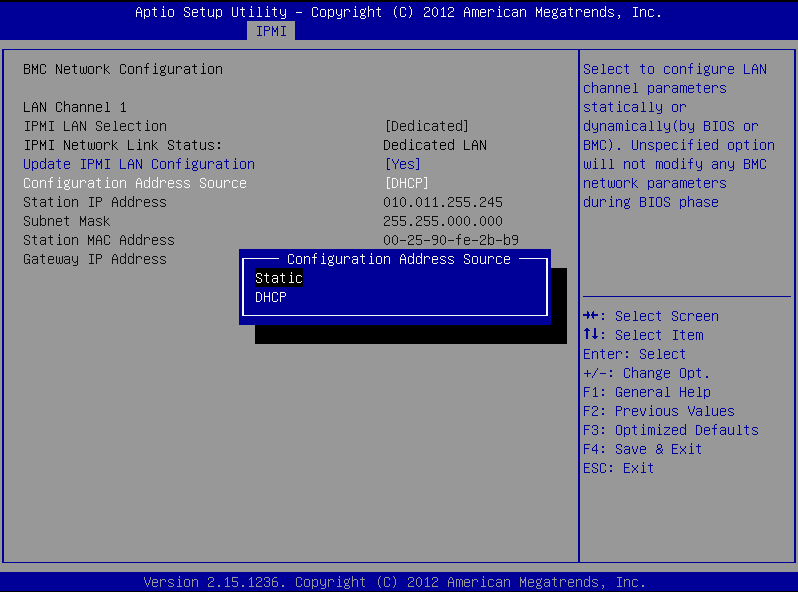
On the BMC Network Configuration page, select Update IPMI LAN Configuration, press Enter, and select Yes.
Figure 180: BMC Network Configuration page > Update IPMI LAN Configuration
-
Stay on the BMC Network Configuration page, select Configuration Address Source, press Enter, and select Static.
Figure 181: BMC Network Configuration page > Configuration Address Source
-
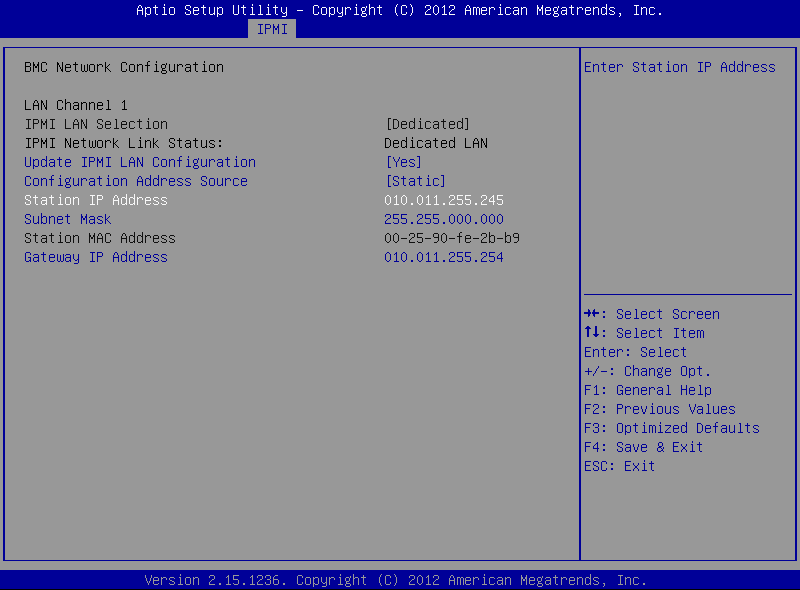
Still on the BMC Network Configuration page, configure the Station IP Address, Subnet Mask, and Gateway IP Address individually.
Figure 182: BMC Network Configuration page > Station IP Address, Subnet Mask, Gateway IP Address
-
Press F4 to save the settings, and exit from the BIOS.
About a minute later, you will be able to log in on the IPMI web interface.