
Additional software
When you install Cloud Access Manager using the Autorun, as described in Installing Cloud Access Manager, the following software is automatically installed. This software is required for support purposes only.
- Microsoft .NET
- Windows Identity Foundation v3.5 (Pre 2012)
- LocalDB (if Proof of Concept installation)
- Microsoft System CLR Types for SQL Server 2012
- Microsoft SQL Server 2012 Management Objects
The UI/STS msi will install using Deployment Image Servicing and Management (DISM), (command line in brackets):
- IIS (/online /enable-feature /featurename:IIS-WebServerRole/featurename:IIS-StaticContent /featurename:IIS-DefaultDocument /featurename:IIS-DirectoryBrowsing /featurename:IIS-HttpErrors /featurename:IIS-ISAPIExtensions /featurename:IIS-ISAPIFilter /featurename:IIS-HttpLogging /featurename:IIS-RequestFiltering /featurename:IIS-HttpCompressionStatic /featurename:IIS-ManagementConsole)
- IIS, Server Core (/online /enable-feature /featurename:IIS-WebServerRole/featurename:IIS-StaticContent /featurename:IIS-DefaultDocument /featurename:IIS-DirectoryBrowsing /featurename:IIS-HttpErrors /featurename:IIS-ISAPIExtensions /featurename:IIS-ISAPIFilter /featurename:IIS-HttpLogging /featurename:IIS-RequestFiltering /featurename:IIS-HttpCompressionStatic /featurename:IIS-ManagementService)
- HTTP Activation, 2008 R2 (/online /enable-feature /featurename:NetFx3 /featurename:IIS-NetFxExtensibility /featurename:WAS-ProcessModel /featurename:WAS-WindowsActivationService /featurename:WAS-NetFxEnvironment /featurename:WAS-ConfigurationAPI /featurename:WCF-HTTP-Activation)
- HTTP Activation, 2008 R2 Server Core (/online /enable-feature /featurename:NetFx3-ServerCore /featurename:IIS-NetFxExtensibility /featurename:WAS-ProcessModel /featurename:WAS-WindowsActivationService /featurename:WAS-NetFxEnvironment /featurename:WAS-ConfigurationAPI /featurename:WCF-HTTP-Activation)
- HTTP Activation, 2012 and above (/online /enable-feature:WCF-HTTP-Activation45 /all)
- WCF Services, 2012 and above (/online /enable-feature:WCF-Services45)
- ASP .NET 4.5, 2012 and above (/online /enable-feature: NetFx4Extended-ASPNET45 /all)
If you want to install this software using a local path, rather than the default internet sourcing use the DismSource switch to specify where the Cloud Access Manager bootstrapper will instruct the DISM tool to look for the required files. For example, if the installation CD is in drive D then you could specify:
“Cloud Access Manager Setup.exe" DismSource=d:\sources\sxs
As an example, this will result in a call to DISM similar to the following:
dism.exe /online /enable-feature:Windows-Identity-Foundation /source:d:\sources\sxs
Installing Cloud Access Manager
To install Cloud Access Manager
- On the Security Token Service (STS) host, either mount the hotfix ISO or extract the hotfix ZIP file to a temporary location.
-
Start the Autorun and navigate to the Install section.
NOTE: The Autorun cannot be used for Cloud Access Manager STS and Proxy host installations running Server Core installations of Microsoft Windows Server. You must run the installer files directly from the command line.
- Click Install on the Cloud Access Manager IIS Components.
- Accept the License Agreement. Click Next.
-
Click Production Installation.
-
Choose the account to run the STS components, enter the username and password of an Active Directory domain account. This account does not require special administrative privileges but a dedicated service account is recommended, ideally with Password never expires set.
NOTE: The account specified must exist prior to installation of Cloud Access Manager. The account credentials entered must be successfully verified before you can proceed with the installation.
-
Click Install to deploy the components required for the STS host.
NOTE: The STS host requires Microsoft .NET framework version 4.5. If this is not already installed on the host, the installer will download and install .NET framework from the internet.


-
When the installation is complete, click Launch to start the configuration wizard.
NOTE: On a Server Core installation you will need to access the configuration wizard from a separate machine. The last page of the Cloud Access Manager install wizard will show the URL for the configuration page.
-
The configuration wizard can take a while to open when accessed for the first time. This is due to Internet Information Services (IIS) initializing and starting the web applications. Please wait while Internet Explorer opens and displays the Cloud Access Manager Welcome page.
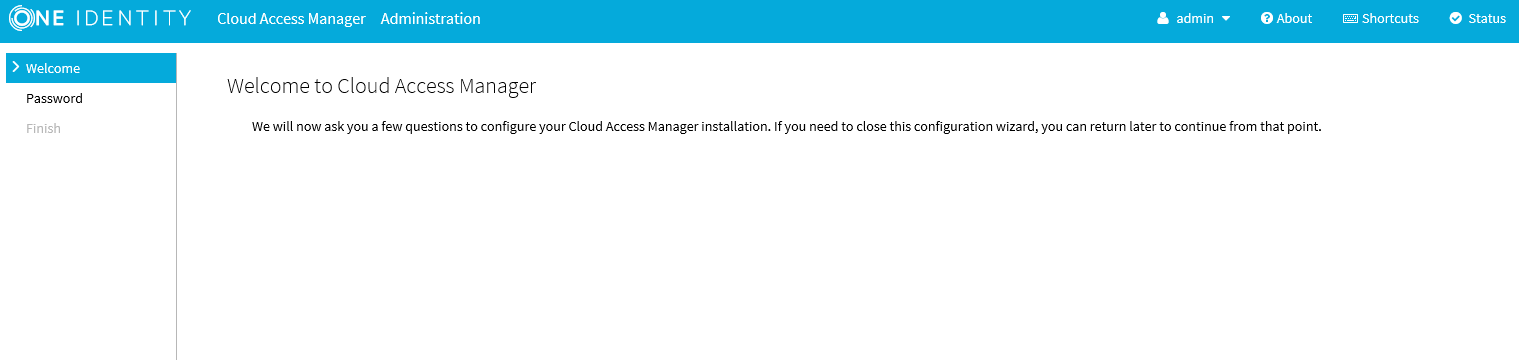
- When the configuration wizard has loaded, click Next.
- Choose and enter a shared secret and recovery password. You will need to enter the shared secret defined on this page during the installation of the proxy host, you will install the proxy host later in the installation procedure. The recovery password can be used to access the Cloud Access Manager Administration interface, using the Fallback link in the Start Menu, in the event that Active Directory authentication is unavailable. Click Next.
- Enter credentials that have administrative privileges for the MicrosoftSQL Server instance, typically a member of the administrators group, that will be used by Cloud Access Manager. The credentials will be used to create a new database for Cloud Access Manager. Click Next.
- Click Download Proxy Installer and save the installer to a temporary location on the STS host. When the download is complete, transfer the installer to the proxy host.
- Switch to the proxy host and double-click the proxy installer Cloud Access Manager Proxy Setup.exe to start the proxy install.
-
Accept the License Agreement and then click Next.
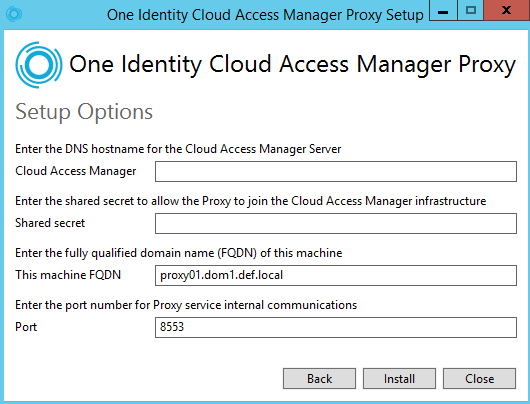
- Enter the hostname of the STS host specified earlier, and the shared secret specified in Step 11. Click Install.
- The proxy installation will now start. When complete, click Close.
-
Return to the STS host. In the Cloud Access Manager browser window, click Next on the Install the Proxy page.
- Enter a hostname to use for your Cloud Access Manager portal. This should be a hostname within the wildcard DNS subdomain created for the Cloud Access Manager Proxy. For example, if you created a wildcard DNS subdomain called webapps within your domain company.com, then you may want to use www.webapps.company.com or portal.webapps.company.com or any other hostname that ends in .webapps.company.com. This hostname is what your users and administrators will use to access the Cloud Access Manager portal.

-
Click Next.
- Cloud Access Manager will now configure the required components. When the configuration is complete, click Finish.
This installation of a typical two host production deployment of Cloud Access Manager is now complete.
Configuring Cloud Access Manager
Now that you have successfully installed Cloud Access Manager, you need to:
- Configure a front-end authentication method to tell Cloud Access Manager how to authenticate and authorize users
- Add a web application
- Manage your SSL certificate.
Please refer to the One Identity Cloud Access Manager Configuration Guide for further information.
Cloud Access Manager backup and restore
The following sections describe how to perform a complete backup and restore of Cloud Access Manager.