With the Safeguard Desktop Player application, you can replay audit trails that contain graphical X11 sessions (the contents of the X11 Forward channel of the SSH protocol). You can replay X11 sessions similarly to other audit trails, but consider the following points:
-
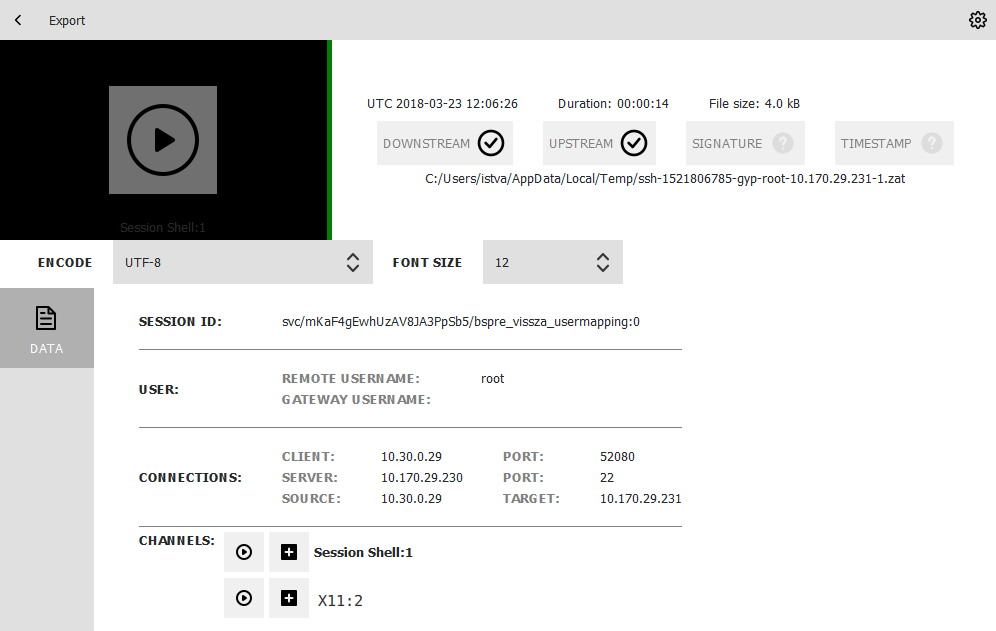
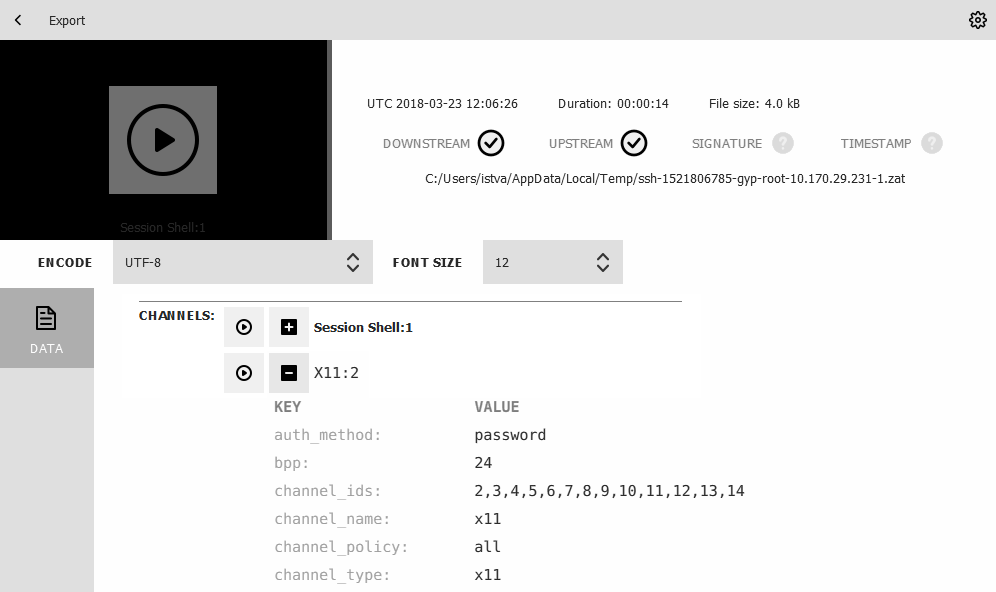
X11 sessions can contain several different X11 channels. For example, some applications open a separate channel for every window they display. The Safeguard Desktop Player application automatically merges these channels into a single channel, to make reviewing the sessions easier. Since these audit trails can contain SSH terminal channels as well, you can choose between replaying the SSH sessions and the X11 session in the CHANNELS > X11 section of the audit trail data.
-
If you need the list of X11 channels that the audit trail contains, they are listed in CHANNELS > X11 > channel_ids section of the audit trail data.
-
The Safeguard Desktop Player stores the fonts used to display the texts in the audit trail in the <desktop-player-installation-folder>/fonts folder.
Exporting transferred files from SCP, SFTP, HTTP, and RDP audit trails
You can export the files that the user transferred in SCP, SFTP, and HTTP sessions as well as through the RDP clipboard. You can export such files from the audit trails using the command line or the Safeguard Desktop Player GUI.
NOTE: Exporting transferred files through the RDP clipboard is a feature that has been tested with Microsoft-supported clients.
This section describes how to export the files that you transferred, using the command line, in one of the following sessions:
To export the files that you transferred in an SCP, SFTP, HTTP, or RDP session using the command line
Start a command prompt and navigate to the installation directory of Safeguard Desktop Player.
By default, the installation directories on the different operating systems are the following:
-
On Microsoft Windows platforms: C:\Documents and Settings\<username>\Software\Safeguard\Safeguard Desktop Player\
-
On Linux: ~/SafeguardDesktopPlayer
-
On MacOS: /Applications/Safeguard Desktop Player.app/Contents/Resources/
NOTE: By default, the Desktop Player only exports complete files. If you want to export partially transferred files as well, use the adp --export-files command.
-
List the channels in the audit trail, and find the one you want to extract files from. Note down the ID number of this channel as it will be required later on (it is 3 in the following example).
If the audit trail is encrypted, use the --key <keyfile.pem:passphrase> option. Repeat the option if the audit trail is encrypted with multiple keys. Include the colon (:) character even if the key is not password-protected. Example output:
Channel information : ssh-session-exec-scp:3
-
Export the files from the audit trail. Use the ID number of the channel from the previous step.
Windows: adp --task indexer --channel 3 --file <path/to/audit-trail.zat> --export-files <folder/to/save/files/>
Linux or MacOS: adp --task indexer --channel 3 --file <path/to/audit-trail.zat> --export-files <folder/to/save/files/>
If the audit trail is encrypted, use the --key <keyfile.pem:passphrase> option. Repeat the option if the audit trail is encrypted with multiple keys. Include the colon (:) character even if the key is not password-protected.
-
Check the output directory for the exported files.

 .
.
 , save the
  in the Safeguard Desktop Player interface window.