One Identity Manager uses so called 'processes' for mapping business processes. A process consists of process steps, which represent processing tasks and are joined by predecessor/successor relations. This functionality allows flexibility when linking actions and sequences to object events.
So-called process tasks are used to perform single elementary tasks at system level, for example, adding a directory. A process component consists of one or more process tasks and its parameters. Process components are defined in the tables Jobcomponent, Jobtask and Jobparameter along with their process tasks and parameters. Predefined configurations are maintained by the schema installation and cannot be edited apart from a few properties.
Processes are modeled using process templates. A process generator (Jobgenerator) is responsible for converting script templates in processes and process steps into a concrete process in the ’Job queue’.
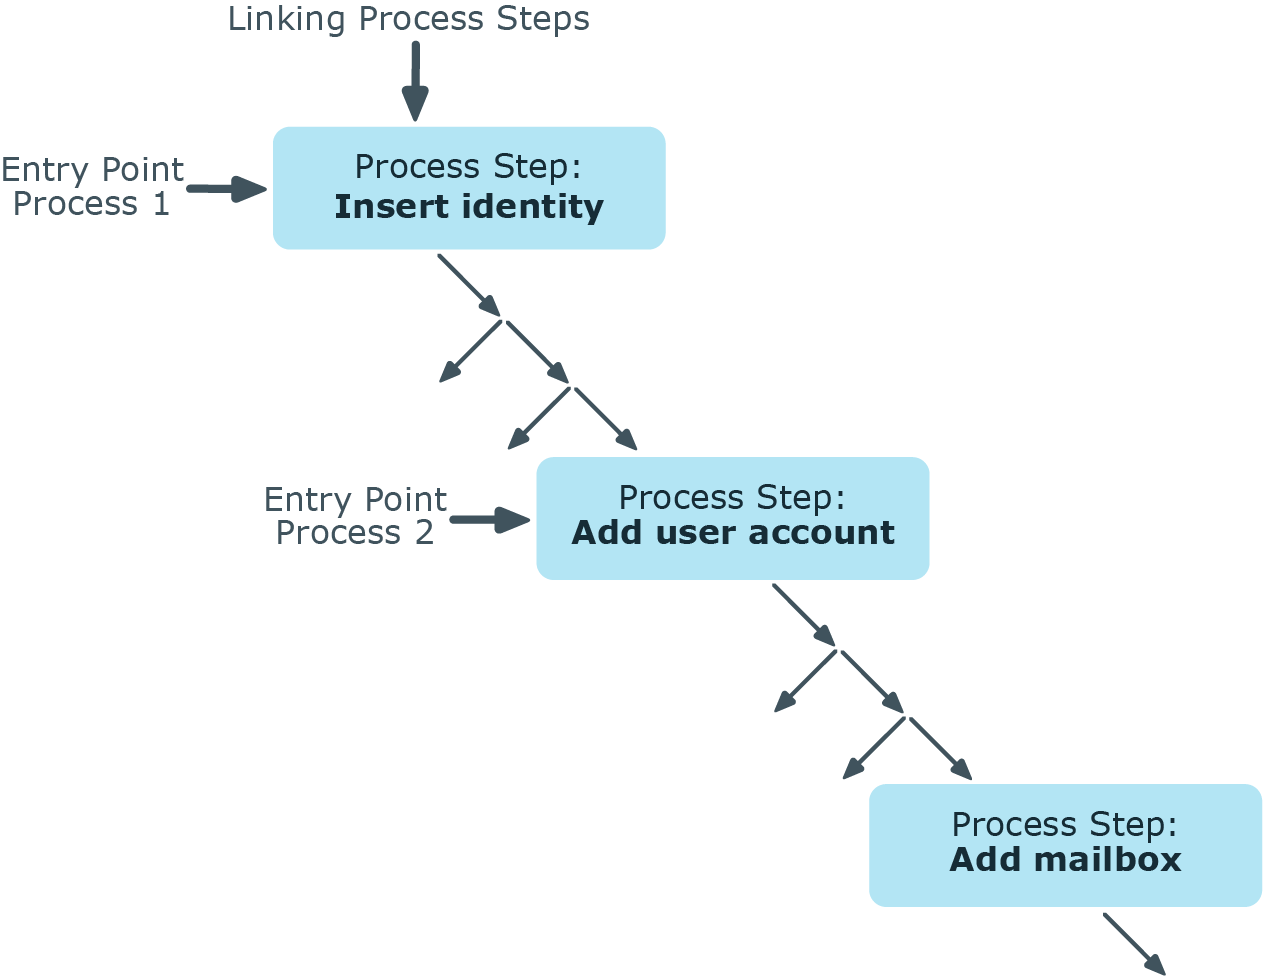
The following illustration shows a chain of process steps with which you can add an identity, set up an Active Directory user account for them and finally add a mailbox.
You can reproduce this sequence in a process. However, you can also define entry points for other processes. The entry point of process 1 results in the creation of an identity with an Active Directory user account and mailbox. The entry point of process 2 only results in the creation of an Active Directory user account with a mailbox.
Figure 24: Creating a single process by linking process steps
Related topics
You can edit processes in the Designer using the Process Editor. In the Process Editor, a process is combined with its process steps in a process document. The process is displayed and controlled by means of special control elements.
Figure 25: Illustrating a process in the Process Editor
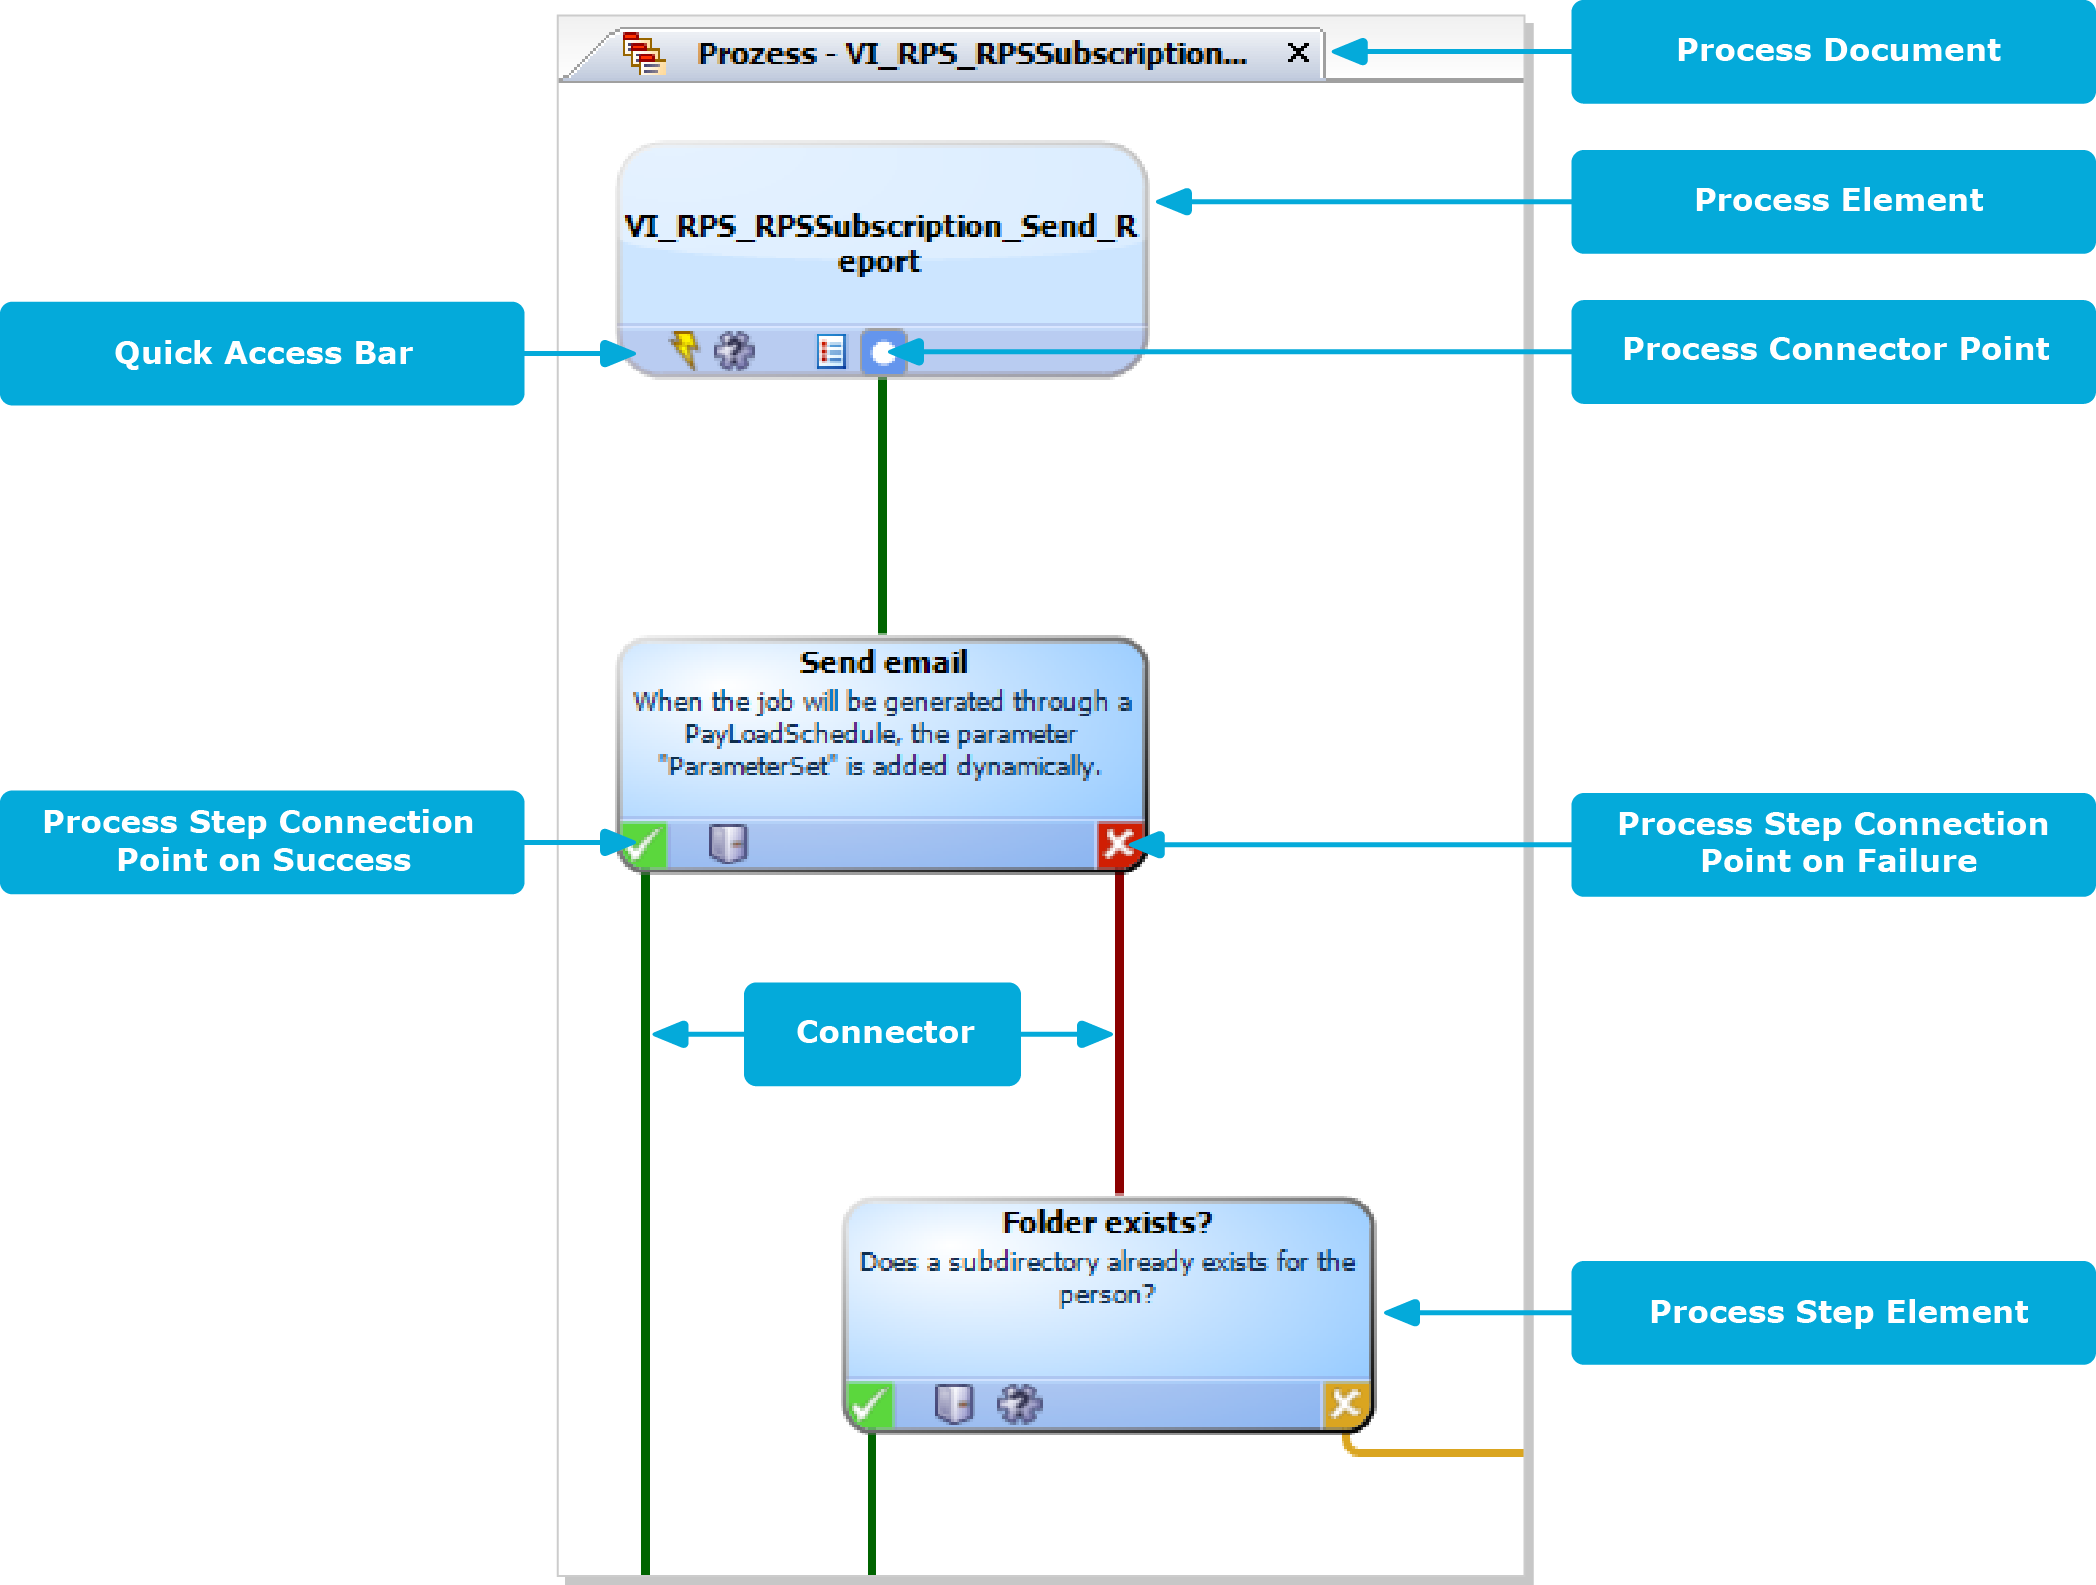
When you add a new process, an initial process document with one process element is created. When you add a process step, the associated process step element is created.
Individual elements are linked to each other with a connector. Activate the connection points with the mouse.
-
To create a connection, click on a connection point, hold down the left mouse button and pull a connector to the second connection point.
-
To delete a connection, select a connection end-point again by clicking with the mouse. Confirm the security prompt with OK.
Double-click on the process or process step element to open the respective edit view, where you can make your changes.
Each element has a tooltip. A process element's tooltip displays the name and description of the process. A process step element's tooltip displays the name and description of the process step as well as the description of the process task used.
Each element contains a quick access menu bar. The icons represent special properties of processes or process steps. The icon's tooltip shows more detailed information about a property. Double-click on a icon to open the edit view of the process or process step and jump to the corresponding property.
Table 69: Quick access icons
|

|
Events are defined. |
|

|
Process is not generated. |
|

|
Process in wait mode on error. |
|

|
Processing is split. The connection point on error and the connector to the subsequent process step are colored yellow. |
|

|
Runtime errors are ignored. The connection point is colored gray on error. No process step is possible on error. |
|

|
If an error occurs, no more process steps are handled for this process. |
|

|
A generating condition exists. |
|

|
Process information is enabled. |
|

|
A script for selecting a server or server mask is entered. |
|

|
Messaging on error and on success is enabled. |
|

|
The process or process steps are customized. More information about the customizations is shown in a tooltip. |
Some important properties are shown by the color of the element.
Table 70: Colors of elements
|
Blue |
Default. |
|
Yellow |
The verification test resulted in a warning or information. |
|
Red |
The verification test failed. |
|
Gray |
The process is disabled. |
You can drag and drop elements in the process document. Use Arrange in the context menu to reset the elements to their default positions. The position of each element is transferred to the One Identity Manager database when the entire process is saved. The layout is therefore available to all users when you restart the Designer.
IMPORTANT: The process and process steps are not created until the entire process is saved in the One Identity Manager database. After this, other users can use the Process Editor to make changes to the process.However, it cannot be generated yet. The process has to be compiled before it can be generated.
You can modify default processes to meet your requirements, if necessary. To add further process step to a process, create a custom process.
The following steps are required to set up a process
-
Create up a process.
-
Specify which events to trigger.
-
Create the process steps.
-
Edit the parameters.
-
Test the process.
-
Compiles the process.
Related topics
To edit an existing process
-
In the Designer, select the process in the Process Orchestration category.
-
Start the Process Editor with the Edit process task.
The process is opened in the Process Editor.
To create a new process
- In the Designer, select the Process Orchestration category.
- Start Process Editor using the Create a new process task.
This makes a new element for the process and opens it in the Process Editor.
Related topics
