立即与支持人员聊天
与支持团队交流

Identity Manager 8.2.1 - Configuration Guide

About this guide One Identity Manager software architecture Customizing the One Identity Manager default configuration Customizing the One Identity Manager base configuration One Identity Manager schema basics Editing the user interface
Object definitions for the user interface User interface navigation Forms for the user interface Statistics in One Identity Manager Extending the Launchpad Task definitions for the user interface Applications for configuring the user interface Icons and images for configuring the user interface Using predefined database queries
Localization in One Identity Manager Process orchestration in One Identity Manager
Mapping processes in One Identity Manager Setting up Job servers
The One Identity Manager Service functionality Tracking changes with process monitoring Conditional compilation using preprocessor conditions Scripts in One Identity Manager
Visual Basic .NET scripts usage Notes on message output Notes on using date values Tips for using Windows PowerShell scripts Using dollar ($) notation Using base objects Calling functions Pre-scripts for use in processes and process steps Using session services Using #LD-notation Script library Support for processing scripts in the Script Editor Creating and editing scripts in the Script Editor Copying scripts in the Script Editor Testing scripts in the Script Editor Testing script compilation in the Script Editor Overriding scripts Permissions for running scripts Editing and testing script code with the System Debugger Extended debugging in the Object Browser
One Identity Manager query language Reports in One Identity Manager Adding custom tables or columns to the One Identity Manager schema Web service integration One Identity Manager as SCIM 2.0 service provider SOAP Web Service One Identity Manager as SPML provisioning service provider Processing DBQueue tasks One Identity Manager Service configuration files

Editing processes with the Process Editor

You can edit processes in the Designer using the Process Editor. In the Process Editor, a process is combined with its process steps in a process document. The process is displayed and controlled by means of special control elements.

Figure 26: Illustrating a process in the Process Editor

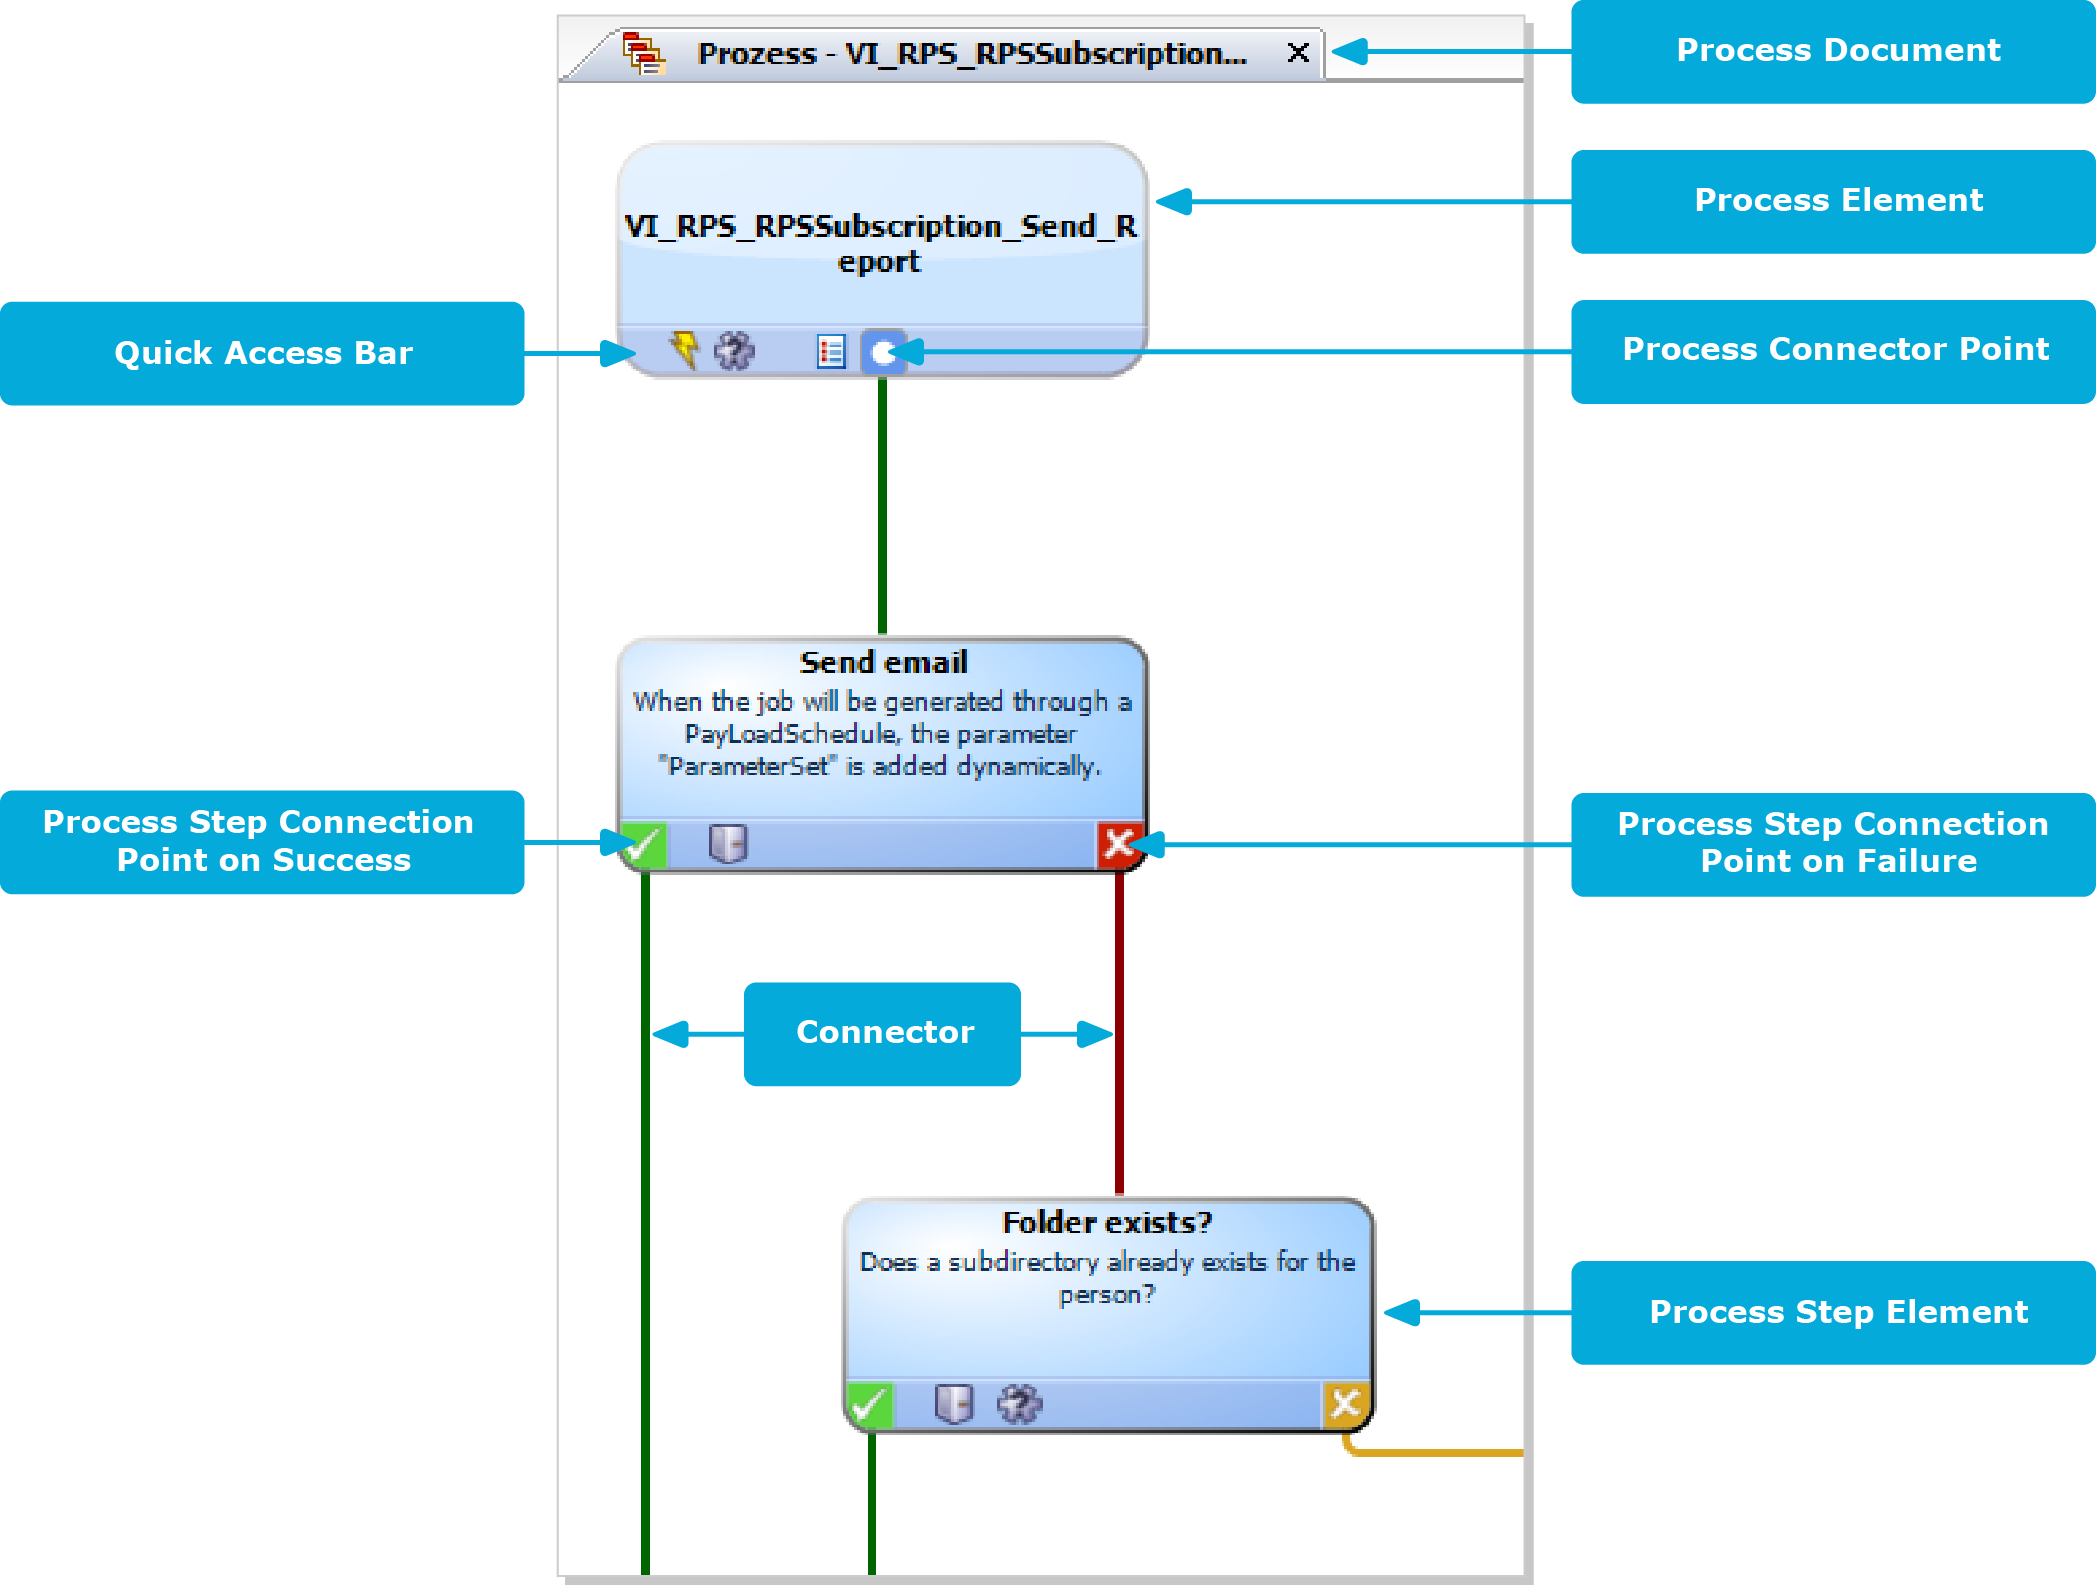
When you add a new process, an initial process document with one process element is created. When you add a process step, the associated process step element is created.

Individual elements are linked to each other with a connector. Activate the connection points with the mouse.

  • To create a connection, click on a connection point, hold down the left mouse button and pull a connector to the second connection point.

  • To delete a connection, select a connection end-point again by clicking with the mouse. Confirm the security prompt with OK.

Double-click on the process or process step element to open the respective edit view, where you can make your changes.

Each element has a tooltip. A process element's tooltip displays the name and description of the process. A process step element's tooltip displays the name and description of the process step as well as the description of the process task used.

Each element contains a quick access menu bar. The icons represent special properties of processes or process steps. The icon's tooltip shows more detailed information about a property. Double-click on a icon to open the edit view of the process or process step and jump to the corresponding property.

Table 69: Quick access icons
Icon Meaning

Events are defined.

Process is not generated.

Process in wait mode on error.

Processing is split. The connection point on error and the connector to the subsequent process step are colored yellow.

Runtime errors are ignored. The connection point is colored gray on error. No process step is possible on error.

If an error occurs, no more process steps are handled for this process.

A generating condition exists.

Process information is enabled.

A script for selecting a server or server mask is entered.

Messaging on error and on success is enabled.

The process or process steps are customized. More information about the customizations is shown in a tooltip.

Some important properties are shown by the color of the element.

Table 70: Colors of elements
Color Meaning

Blue

Default.

Yellow

The verification test resulted in a warning or information.

Red

The verification test failed.

Gray

The process is disabled.

You can drag and drop elements in the process document. Use Arrange in the context menu to reset the elements to their default positions. The position of each element is transferred to the One Identity Manager database when the entire process is saved. The layout is therefore available to all users when you restart the Designer.

Defining processes

IMPORTANT: The process and process steps are not created until the entire process is saved in the One Identity Manager database. After this, other users can use the Process Editor to make changes to the process.However, it cannot be generated yet. The process has to be compiled before it can be generated.

You can modify default processes to meet your requirements, if necessary. To add further process step to a process, create a custom process.

The following steps are required to set up a process

  1. Create up a process.

  2. Specify which events to trigger.

  3. Create the process steps.

  4. Edit the parameters.

  5. Test the process.

  6. Compiles the process.

Related topics

Creating and editing processes

To edit an existing process

  1. In the Designer, select the process in the Process Orchestration category.

  2. Start the Process Editor with the Edit process task.

    The process is opened in the Process Editor.

To create a new process

  1. In the Designer, select the Process Orchestration category.
  2. Start Process Editor using the Create a new process task.

    This makes a new element for the process and opens it in the Process Editor.

Related topics

Copying processes

To copy a process, a wizard is provided.

To copy a process

  1. In the Designer, select the process in the Process Orchestration category.

  2. Start the Process Editor with the Edit process task.

  3. Select Process > Copy item from the menu.

  4. Specify the copy options on the home page of the wizard.

    Table 71: Copy options
    Option Meaning

    Rename process steps

    If you set this option, the wizard allows you to rename the individual process steps.

    Copy events

    Enable this option so that events assigned to this process are also copied.

    Disable source process

    Use this option to specify whether to disable the source process after it is copied. If you enable this option, the Do not generate option is enabled for the source process.

    Disable copied process

    Use this option to specify whether to disable the process after it is copied. If you enable this option, the Do not generate option is enabled for the copied process.

  5. On the Copy options page, specify the name of the new process.

  6. (Optional) On the Define process step name page, name the individual process steps.

    You can change these by clicking on the new process step name.

    NOTE: This step is only available if you have set the Rename process steps copy option.

  7. To start the copying process, click Finish on the last page of the wizard.

    The process is opened in Process Editor and can be further edited.

Related topics
相关文档

The document was helpful.

选择评级

I easily found the information I needed.

选择评级