The following describes how to upgrade a standalone One Identity Safeguard for Privileged Sessions (SPS) node to version 7.1.1.
-
If you want to upgrade an SPS high-availability cluster, see Upgrading an SPS high-availability cluster to 7.1.1.
-
If you want to upgrade an SPS central search or central management cluster, see Upgrading an SPS central cluster to 7.1.1.
Prerequisites:
Read the following warnings before starting the upgrade process.
|
|
Caution:
|

To upgrade a standalone SPS node to version 7.1.1
-
Complete the prerequisites described in Prerequisites for upgrading SPS and upgrade SPS to the latest revision of the current version.
-
Login to your support portal.
You need a new license file for every LTS release. If there is no license file for One Identity Safeguard for Privileged Sessions 7.1.1 under your account, contact our Licensing Team and Request a license key for a new version.
-
Download the SPS 7.1.1 firmware ISO file from the Downloads page.
On the support portal, navigate to Support > Download Software > One Identity Safeguard for Privileged Sessions and download the latest install cdrom ISO file under Application.
-
Verify the integrity of the SPS 7.1.1 firmware ISO file with the hash available on the Downloads page.
CAUTION:Do NOT upgrade until you verify the integrity of the ISO file.
Verifying the integrity and authenticity of the ISO file is to make sure that it is not corrupted and it has not been tampered with by any other party. Verifying the ISO file guarantees that it has been officially released by One Identity.
NOTE: You can use the following utilities for hash verification (optional):
- On Unix systems: sha256sum.
- On Windows: Get-FileHash.
On Windows:
- On your PC, navigate to the folder where you downloaded the ISO file.
- Press and hold the Shift key.
-
Right-click in the folder and select Open PowerShell window here.
-
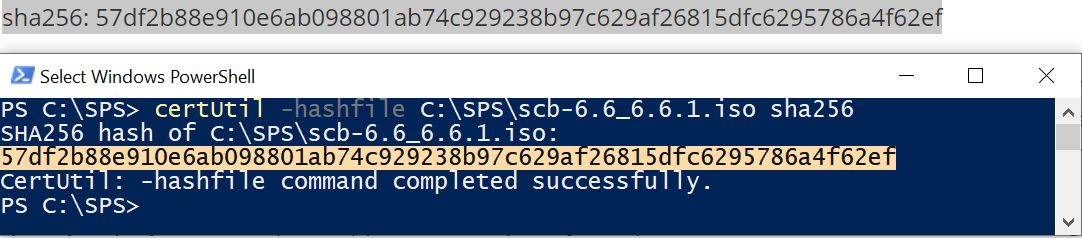
In the PowerShell window, enter the certUtil -hashfile <path\to\sps.iso> sha256 command.
Figure 1: Example hash of the downloaded ISO file
-
Compare the hash of the file to the hash available on the Downloads page page: under Application, click One Identity Safeguard for Privileged Sessions install cdrom.
Figure 2: Example hash from the Support Portal
-
If the two hashes match, continue the upgrading process.
-
Upload the latest 7.1.1 firmware ISO file to your SPS. For details, see "Upgrading One Identity Safeguard for Privileged Sessions (SPS)" in the Administration Guide.
-
Click Test for the new firmware to check if your configuration can be upgraded to version 7.1.1. If the test returns any errors, correct them before continuing the upgrade process. If you encounter any problems, contact our Support Team.
Select After reboot.
-
If the upgrade test is successful, activate the firmware.
-
Recommended step. To help troubleshoot potential issues following the upgrade, collect and save system information (create a support bundle) now.
Navigate to Basic Settings > Troubleshooting > Create support bundle and choose Create support bundle.
-
Navigate to Basic Settings > System.
Caution: Do NOT click Reboot cluster during the upgrade process unless explicitly instructed.
Click System Control > This node > Reboot to reboot the machine. SPS will start with the new firmware and upgrade its configuration, database, and other system components. During the upgrade process, SPS displays status information and other data on the local console and on the web interface of SPS, at any of the Listening addresses configured at Basic settings > Local Services > Web login (admin and user).
NOTE: If you are upgrading to version 7.1.1 from version 5.0.x, status information is displayed on the web interface only after the first boot to version 7.1.1. So during the upgrade to version 7.1.1, you will not be able to see any upgrade logs on the web interface.
Caution: If the connection database is large and contains information about several thousands of sessions, the upgrade process can take about 15-20 minutes or more, depending on the actual hardware.
Caution: After the reboot in 7.1.1, SPS will start importing large amounts of data from metadb. This process can take about 30-40 minutes or more. During the import process, the REST base search might not function properly, since the data to search in might still be incomplete.
-
After the reboot, login to the web interface.
Caution: In case the SPS web interface is not available within 30 minutes of rebooting SPS, check the information displayed on the local console and contact our Support Team.
If you experience any strange behavior of the web interface, first try to reload the page by holding the SHIFT key while clicking the Reload button of your browser to remove any cached version of the page.
NOTE: In the unlikely case that SPS encounters a problem during the upgrade process and cannot revert to its original state, SPS performs the following actions:
-
Initializes the network interfaces using the already configured IP addresses.
-
Enables SSH-access to SPS, unless SPS is running in sealed mode. That way it is possible to access the logs of the upgrade process, which helps the Support Team to diagnose and solve the problem. Note that SSH access will be enabled on every active interface, even if management access has not been enabled for the interface.
-
-
Navigate to Basic Settings > System > Version details and verify that SPS is running version 7.1.1 of the firmware. If not, it means that the upgrade process did not complete properly and SPS performed a rollback to revert to the earlier firmware version. In this case, complete the following steps:
-
Navigate to Basic Settings > Troubleshooting > Create support bundle and click Create support bundle.
-
Save the resulting ZIP file.
-
contact our Support Team and send them the file. They will analyze its contents to determine why the upgrade was not completed and assist you in solving the problem.
-
-
(Optional) If SPS was in a domain before the upgrade, navigate to RDP Control -> Domain membership and make sure that your domain-related settings are correct. In case of correct settings, you will see the following:
-
Fully qualified domain name (realm name): Host joined currently configured domain successfully.
-
Currently joined domains: <name.of.the.joined.domain>
This is important because in rare cases, the appliance might fall out from the domain after an upgrade, and a manual rejoin might be required based on its status.
-
-
Upgrade your Credential Store or other plugins to the latest version. You can download official plugins from Downloads page and upload them to SPS on the Basic Settings > Plugins > Upload/Update Plugins page.
-
Upgrade your Safeguard Desktop Player installations to the latest version. For details, see Upgrading the Safeguard Desktop Player.
-
Upgrade your external indexer installations to the latest version. For details, see Upgrading the external indexer.