Chat now with support
Chat mit Support

Safeguard Remote Access Hosted - Administration Guide

Introduction Prerequisites Limitations Getting started Administrator-side use cases User-side use cases Appendix Glossary

Creating and signing in to a One Identity Starling account

This section describes the process of creating and signing in to a One Identity Starling account.

One Identity Starling requires you to have a One Identity Starling organization and account to access the services.

Once you have created and accessed an organization and account, the title bar is used to manage them.

Creating a new organization

To begin using One Identity Starling and its associated services, you must first create an organization.

To create an organization and account

  1. Open the One Identity Starling site (https://www.cloud.oneidentity.com/).

  2. From the One Identity Starling home page, click TRY STARLING.

  3. Select which data center you would like to access: United States (for the United States data center) or European Union (for the European Union data center).

  4. Review the legal notice and to accept the use of cookies, click Accept. This will allow One Identity Starling to store your information for future logins.

  5. In the Email address field, enter the email address that will be associated with the account. The email address must be less than 64 characters for the local part and for each domain part (the full email must be less than 255 characters). You need access to the specified email account to complete your registration and any future communications regarding your organization and account will be sent to this email address.

    NOTE: If the incorrect data center has been stored, select the displayed name of the currently stored data center to reselect your data center region. This will restart the process for storing your login information.

  6. Click Next.

    NOTE: At this point, One Identity Starling checks whether your email address belongs to a fully configured Azure AD work account. If that is the case, some of the following steps might be different.

    If you have an Azure AD tenant registered but not fully configured, you will need to use an account not dependent upon Azure AD when signing up for One Identity Starling.

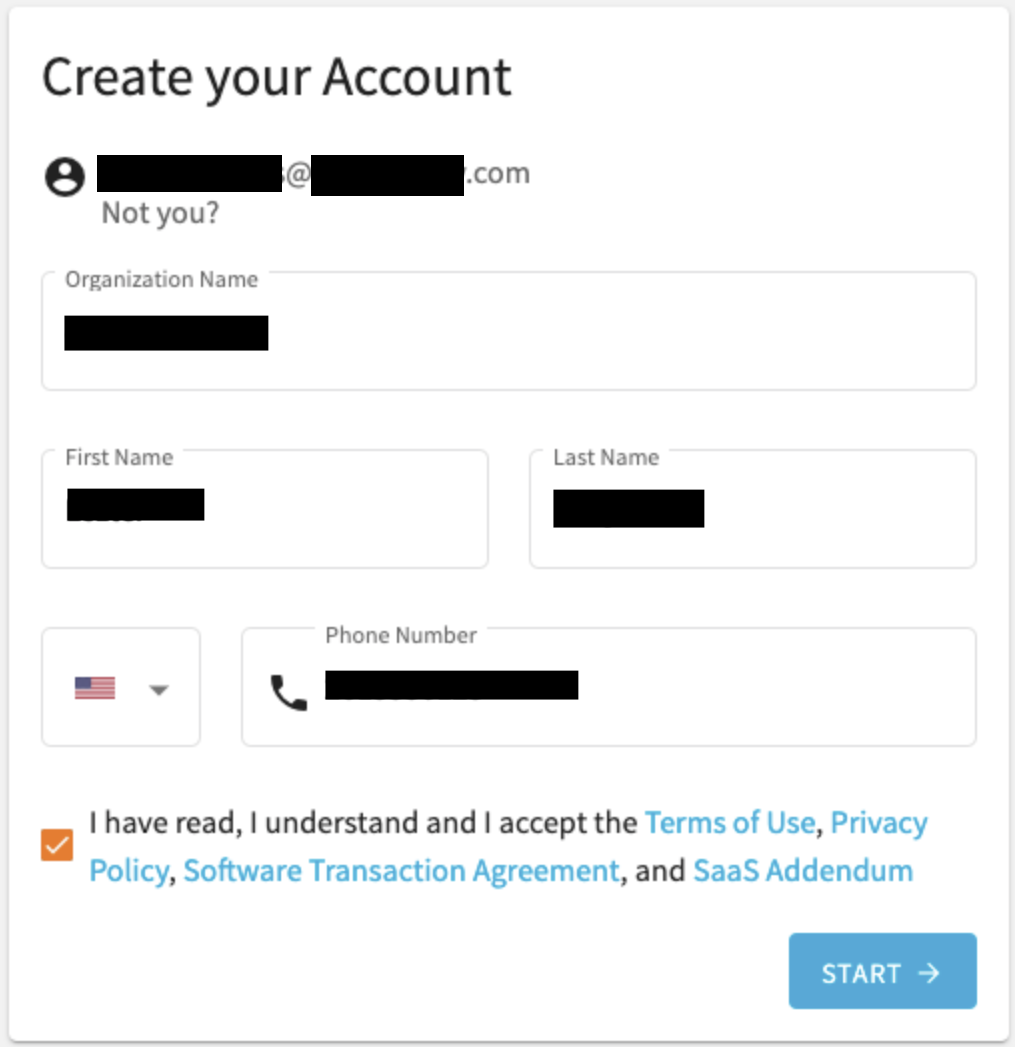
  7. In the Organization Name field, enter the name of your organization (up to 100 characters long).

    Figure 2: Try Starling - Creating your account

  8. In the First Name field, enter the first name of the account holder (up to 64 characters long).

  9. In the Last Name field, enter the last name of the account holder (up to 64 characters long).

  10. In the Create Password field, enter a password for your account. The password must consist of 8 to 16 characters and include three of the following items: uppercase letter, lowercase letter, number, or symbol.

  11. Enter a phone number for the account.

  12. Read through the Terms of Use, Privacy Policy, Software Transaction Agreement, and SaaS Addendum. If you agree, select the check box.

  13. To send a verification email, after entering all your information and accepting the terms and conditions, click START. It could take a few minutes for the email to appear in your inbox.

  14. Once the verification email has arrived, click the Complete your registration link within the email to open the login page of One Identity Starling.

  15. Enter your credentials to access One Identity Starling.

Signing in to One Identity Starling

The following procedure applies to users that are accessing a One Identity Starling account not associated with an existing work account.

To sign in to One Identity Starling

  1. From the One Identity Starling home page (https://www.cloud.oneidentity.com/), click Sign in to Starling.

  2. The next steps will depend on whether or not you have previously stored login information.

    • If signing in to One Identity Starling using a browser that has not previously stored your login information:

      1. Select which data center you would like to access: United States (for the United States data center) or European Union (for the European Union data center).

      2. Review the legal notice and accept the use of cookies by clicking Accept. This will allow One Identity Starling to store your information for future login attempts.

      3. Enter your email address, then select Next.

        NOTE: If the incorrect data center has been stored, select the displayed name of the currently stored data center to reselect your data center region. This will restart the process for storing your login information.

      4. To sign in to One Identity Starling, enter your password, then click SIGN IN.

    • If signing in to One Identity Starling using a browser that has previously stored your login information:

      1. Review your email address and region, then select Next.

        NOTE: If the incorrect data center has been stored, select the displayed name of the currently stored data center to reselect your data center region. This will restart the process for storing your login information.

      2. Once One Identity Starling has confirmed there is no work account associated with your email address, a password prompt will appear. FIXME: When using this snippet in-line as a snippetText there is no new line between the two paragraphs. Solution: Split this snippet into two snippets.To sign in to One Identity Starling, enter your password, then click SIGN IN.

DNS connectivity requirements for Starling products

One Identity Safeguard Remote Access (SRA) uses the following DNS names to connect and integrate with One Identity Starling products:

For SRA web interface and default HTTP settings:

  • remote-access.cloud.oneidentity.com

  • remote-access.cloud.oneidentity.eu

For SRA public API, which is required for One Identity Safeguard for Privileged Passwords (SPP) and One Identity Safeguard for Privileged Sessions (SPS) integration:

  • remote-access-api.cloud.oneidentity.com

  • remote-access-api.cloud.oneidentity.eu

NOTE: All endpoints are accessible only through HTTPS and at port 443.

Verwandte Dokumente

The document was helpful.

Bewertung auswählen

I easily found the information I needed.

Bewertung auswählen