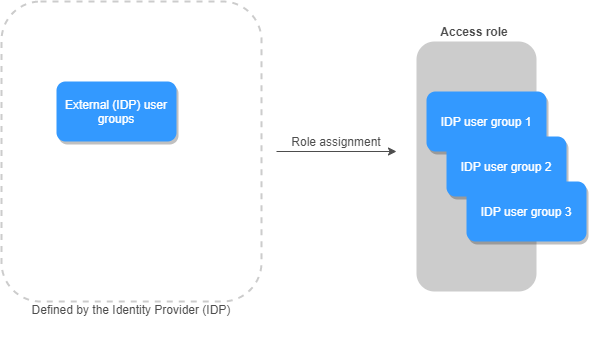
Use role assignment to organize your users and resources into groups based on access rights.
There are two ways to access One Identity Safeguard Remote Access (SRA):
-
When you are an Administrator, you can access SRA with a One Identity Starling account.
-
When you are a User, you can access either via your One Identity Starling account and with a User role, or enter with an Azure Active Directory (AAD) user account directly (as if you were a One Identity Starling user).
Access can be granted only to AAD groups, not to individual users. This can be achieved by assigning the Access role to AAD groups over connections. When a user logs in with AAD directly, SRA looks up their group memberships and lists only those connections where the Access role was assigned to one of the user's groups.
NOTE: Role-based access control is possible only when users log in with their AAD user account directly. When users log in with their One Identity Starling account, all connections are available for connecting.
Figure 19: Role assignment - organizing user and resource groups
To assign the Access role to a new group
-
Navigate to the Connections panel and click the  (Options) on the connection card.
-
Select Role assignment. The Edit access for <IP-address-of-target-server> side sheet will open on the right. The Access field displays all groups that have access to that connection.
-
Click Add new group. A side sheet will open.
-
Start typing a group name in the Group name search bar to find the groups you want to grant access rights to this connection. The search results will appear as you type (for example Group name, Group ID, Tenant ID). The search expression works both for a whole or a partial group name. You can select up to 15 groups.
Figure 20: Connection tile > > Role assignment > Add new group — Finding your groups
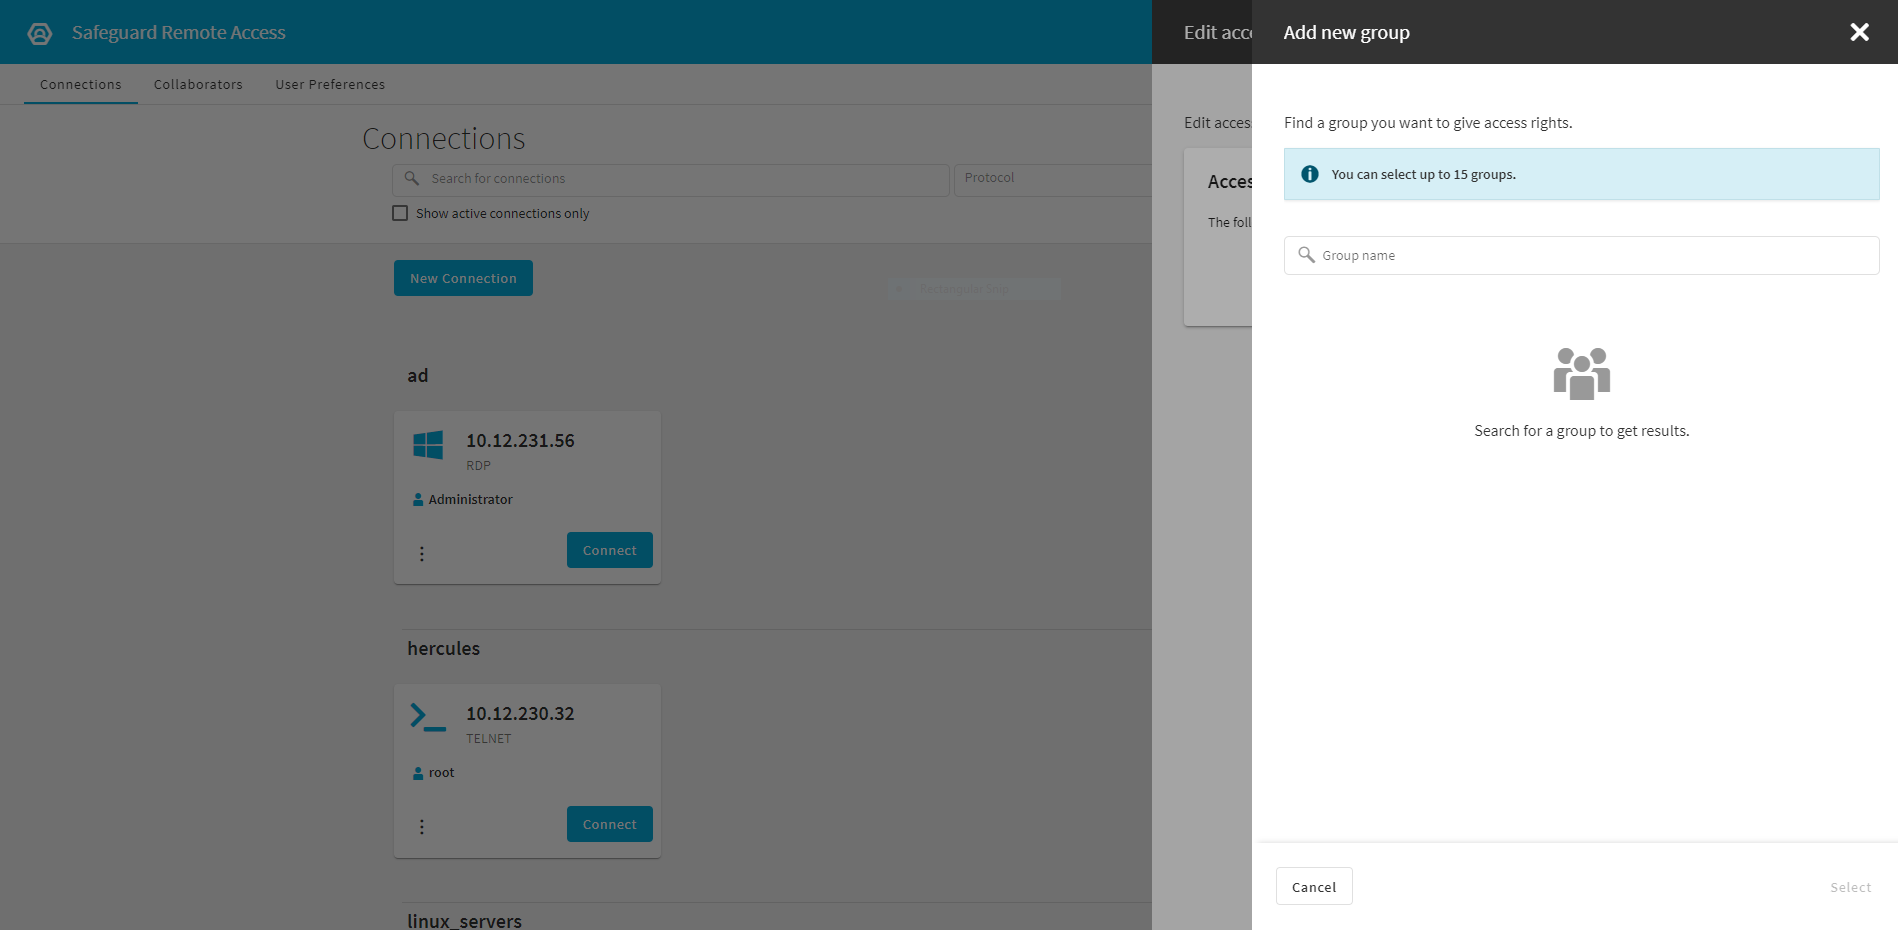
Figure 21: Connection tile > > Role assignment > Add new group — Adding a new group

-
Click Select.
To remove role assignment for a group
-
Find the group whose role assignment you want to remove and click the trashbin icon next to it. A confirmation dialog will appear.
-
Confirm your delete request.
Role-based access control (RBAC) is used to define which user groups have access to which resources and workflows in One Identity Safeguard Remote Access (SRA). RBAC is not enabled automatically when you group roles and connections in SRA. You must enable it manually.
For the RBAC functionality to work, at least one Azure Active Directory must be registered and consented under Starling Settings > Manage Directories in One Identity Starling.
Figure 22: Starling Settings > Directory Services > Manage Directories
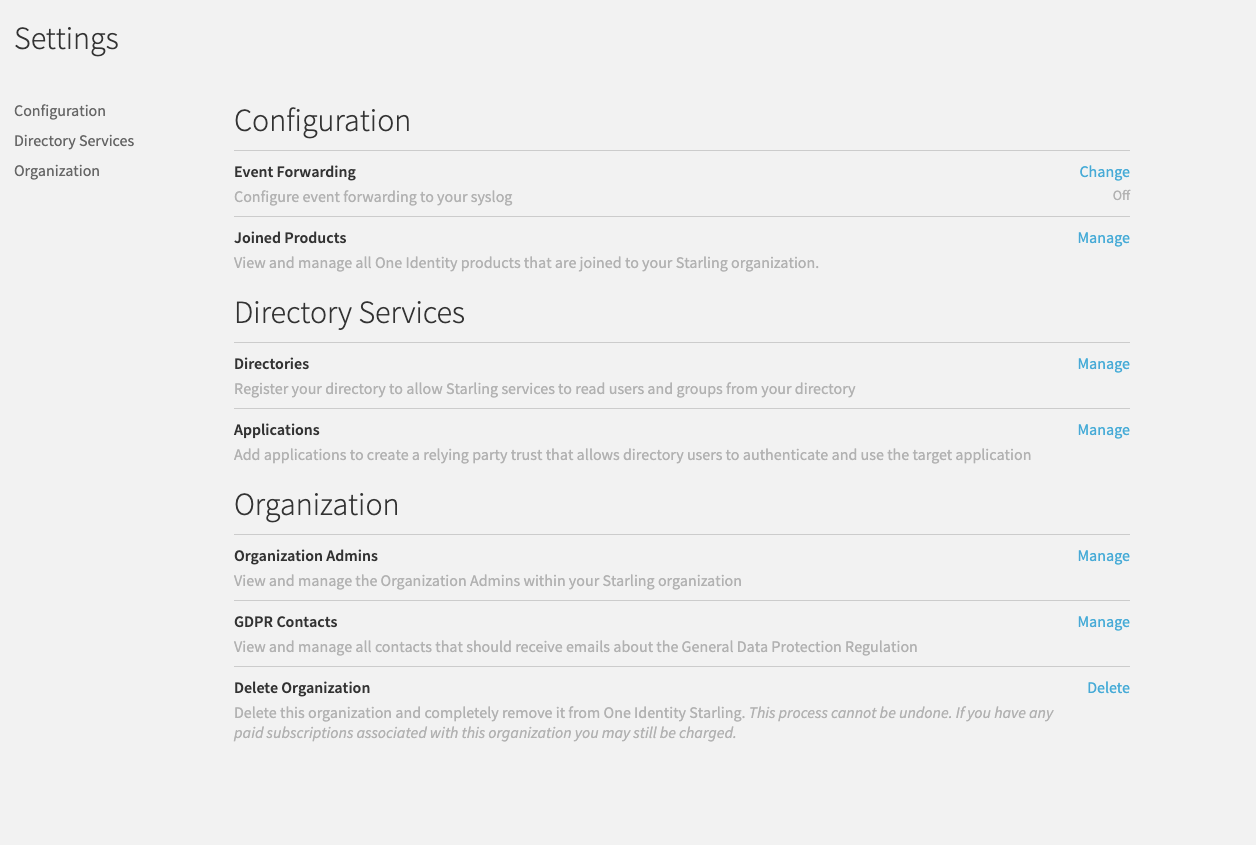
Figure 23: Manage Directories > Register Directory — Registering active directories to your One Identity Starling organization.
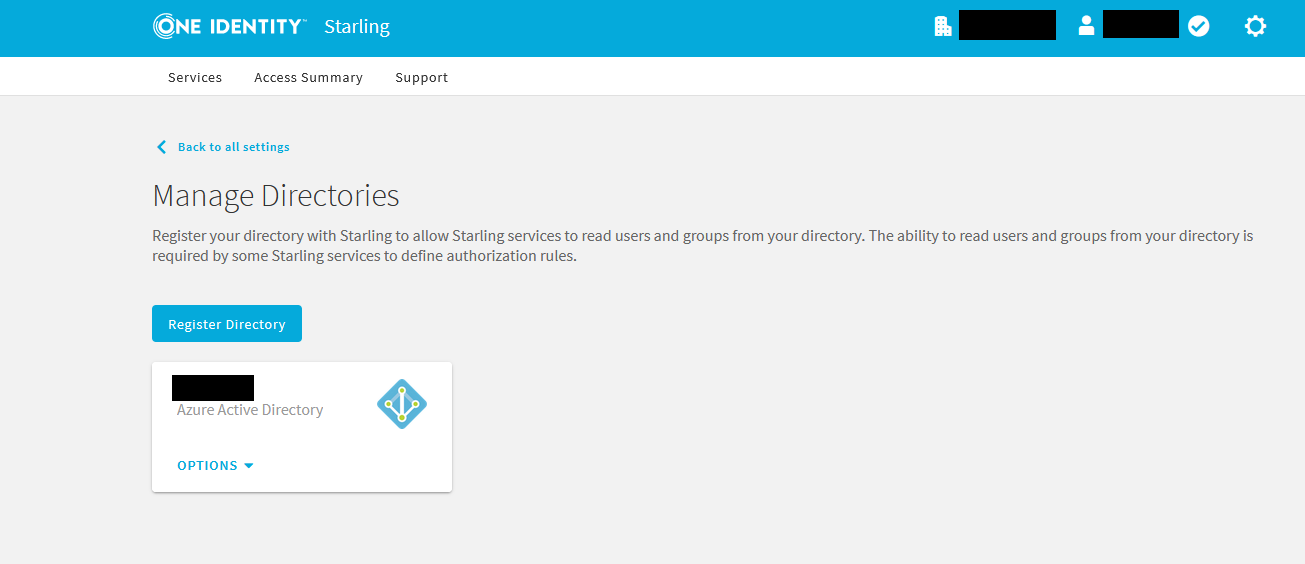
To register or remove active directories, the user must be a One Identity Starling organization admin.
If no Active Directory is registered in One Identity Starling, the role assignment functionality will be unavailable for both administrators and users. You can check this by opening the (Options) menu of a connection card. If RBAC in unavailable, the Role assignments menu item will be grayed out.
NOTE: As RBAC is a central feature, when enabled, it applies to all groups created later. When you disable RBAC, all groups governed by this feature lose access to SRA. If you want to remove access rights from certain groups, that must be done one by one.
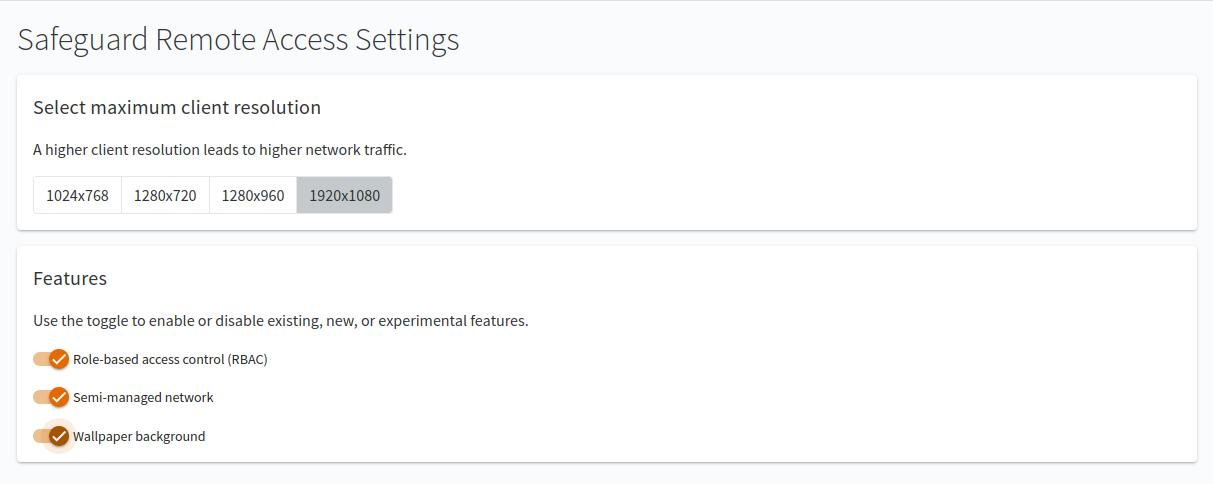
To enable role-based access control in SRA
-
Navigate to the Settings side sheet by clicking the  (Settings) icon in the top right corner.
-
Find Features > Role-based access control (RBAC).
-
To enable RBAC, slide the toggle.
NOTE: Disabling the RBAC functionality with the toggle affects only regular users. Administrators can still access RBAC functionalities when the Role-based access control (RBAC) toggle is disabled.
Improve your network performance and latency with the semi-managed network functionality of One Identity Safeguard Remote Access (SRA). Depending on your network configuration, you may have one or multiple One Identity Safeguard for Privileged Sessions (SPS) nodes available. With semi-managed network, you can select which SPS node to use in your network when you initiate a connection.
To initiate a connection with a specific SPS node
-
Navigate to the SRA Connections panel and find the connection tile you want to work with.
-
Open the dropdown menu of that connection tile's Network field and search for the name of the SPS node you want to use for initiating this connection.
Figure 24: Connections > The connection tile of your choice > Network — Selecting a SPS node for your session
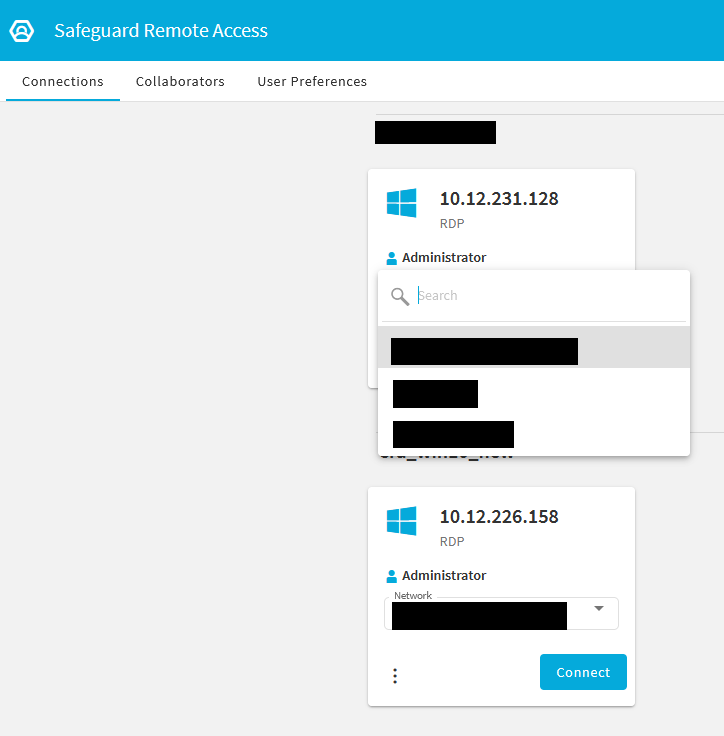
NOTE: Your selection will not be saved for future reference. You must set your preferences every time you initiate a new connection.
-
Click Connect.
By default, SRA will select an SPS node randomly from the available pool of SPS nodes in your network. If you only have one SPS node configured in your network, then that node will be automatically selected, with its name in the Network field grayed out and the drop-down unavailable.
To enable the semi-managed network functionality
-
Navigate to the Settings side sheet by clicking the (Settings) icon in the top right corner.
-
Find Features > Semi-managed network.
-
To enable the semi-managed network functionality, slide the toggle.
With the Wallpaper background setting enabled, you can set a custom background for your RDP sessions.
To enable Wallpaper Background
-
Navigate to the Settings side sheet by clicking the (Settings) icon in the top right corner.
-
Find Features > Wallpaper background.
-
To enable the wallpaper background functionality, slide the toggle.
NOTE: When enabling Wallpaper background, the BG info will also be displayed in all your RDP sessions.
