Each target server can serve multiple connections. Connections consist of two elements:
You can group these connections based on various attributes, such as the applied protocol (RDP, SSH, or TELNET), the SPS connection policy name, or the address of the target server.
To add a new connection to an existing target server
-
On the Connections panel, click New Connection.
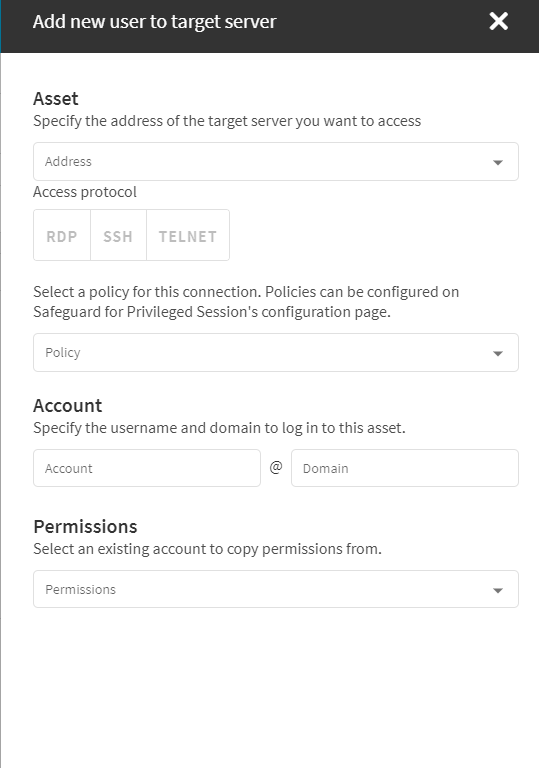
Figure 16: Connections > New Connection > Add new user to target server - Adding a new connection
-
The Add new user to target server side sheet is split into three sections, as connections consist of assets, accounts and permissions.
-
Click Create.
You can speed up adding your user-specific connections to the One Identity Safeguard Remote Access (SRA) Connections panel by importing them from a CSV file.
Successfully imported connections are automatically grouped under the respective connection policies.
For information about adding new connections manually, see Adding a new connection to an existing target server.
Limitations
-
Only CSV file format is supported for upload, with a maximum size of 10 MB.
-
SRA only accepts commas as delimiters in the CSV files.
-
Expected columns for the CSV files:
|
AssetAddress |
Required |
<IPv4-address> | <IPv6-address> | hostname |
|
AccountDomain |
Optional |
|
|
AssetPort |
Required |
<nonnegative integer> |
|
AccountUsername |
Required |
<string> |
|
ConnectionPolicyName |
Required |
<string> |
|
JoinInstanceName |
Required |
<JoinInstanceID> |
|
Protocol |
Required |
rdp | ssh |
|
ServerSelection |
Required |
fix | inband |
CSV file structure
You can use the expected columns and corresponding values of a CSV file in any order you prefer. The following screenshot illustrates the structure and contents of an example CSV file.
Figure 17: Example of CSV file structure and contents

Uploading the CSV file
When you made sure you meet the prerequisites, you can start uploading your CSV file.
To upload the CSV file that contains the connections you want to add
-
Log in to SRA as Admin.
-
Navigate to the SRA Connections panel.
-
Click Import CSV.
-
Select the CSV file you want to upload from your computer, then click Open.
At the bottom of the page, snackbar notifications indicate the current upload state.
For example, Successfully imported 8 connections. Refresh the page to see the results. indicates 8 successfully imported connections.
|

|
CAUTION: If you navigate away from the page while uploading is in progress, you will not see the snackbar notifications about the progress and if the upload was successful. |
NOTE: While uploading the CSV file, Import CSV is grayed out, then enabled again after the upload is complete.
Expected result: The newly imported connections are displayed as tiles under the respective connection policy group on the SRA Connections page.
Troubleshooting
In some cases, the snackbar displays the Successfully imported 0 connections. Refresh the page to see the results. message.
Possible reasons:
-
Your browser does not support file upload.
-
The file upload functionality is switched off in your browser.
-
The file upload functionality is switched on in your browser, but the file size exceeds the limit configured in your browser.
-
You are trying to import the same connections that you have previously imported.
-
The JoinInstanceName value is not valid.
-
There is no connection policy with the specified ServerSelection, AssetAddress, or AssetPort (or any combination of them) in the SPS connection policy configuration.
-
A connection has already been added with the specified AccountUsername and AccountDomain. Therefore, the connection will not be imported to the specified connection policy group.
Configuring client resolution correctly results in a better stream quality.
NOTE: A higher client resolution results in higher network traffic load.
To configure maximum client resolution
-
Click  (Settings) and select Safeguard Remote Access Settings.
-
Find Select maximum client resolution.
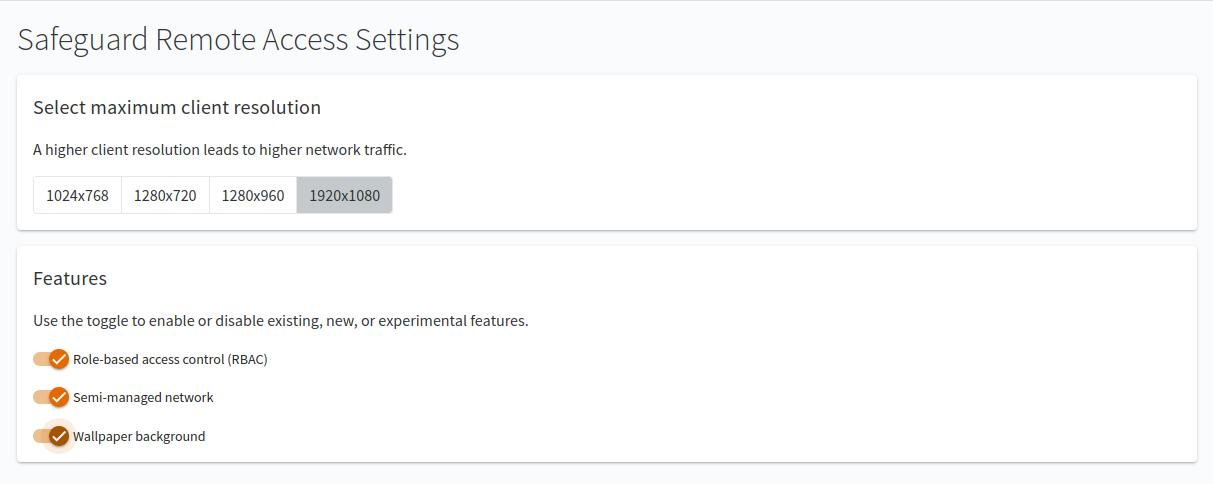
-
Select the preferred client resolution.
The default value is 1024x768.
NOTE: If the administrator sets a client resolution as maximum, that means that the user is free to select any of the available client resolutions up until the maximum resolution. For example, if the maximum client resolution is set to 1280x720, the user can still set the client resolution to 1024x768, but cannot set it higher than 1280x720.
To allow your users to access specific servers through One Identity Safeguard Remote Access (SRA), add them to selected Azure Active Directory (AAD) groups. Adding Azure AD users directly to SRA simplifies the onboarding workflow, as there is no need to set up a One Identity Starling account.
With this approach, employees within an organization can visit https://remote-access.cloud.oneidentity.com, provide their Azure AD username and password and/or other credentials, and gain access to SRA connections permitted to them based on their group membership.
Prerequisites
-
The employees of the organization are provisioned in Azure AD.
-
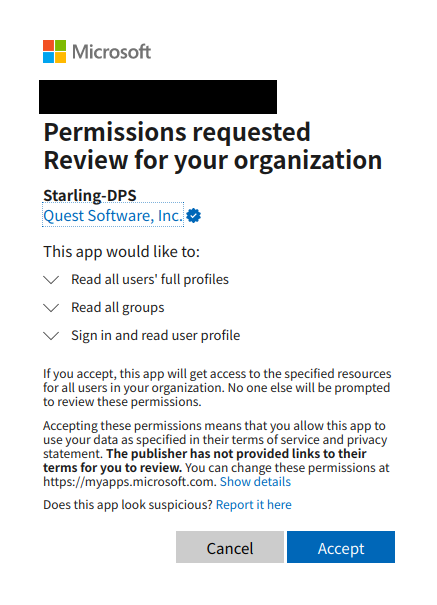
There is a user with Administrator role in that AAD. The Administrator must consent to One Identity Starling having read-only access to Azure AD, specifically to:
Figure 18: Allow One Identity Starling to have access to your Azure Active Directory user groups
To add Azure Active Directory users directly
-
Log into One Identity Starling (https://account.cloud.oneidentity.com/) as an Organization-administrator and also as an Azure Active Directory Administrator.
-
Click (Settings) and manage Directory Services.
-
Click Register Directory and follow the instructions.
-
Go to SRA and start setting up connections with role assignments. For more information, see Granting connection access to AAD users.
-
Enable the role-based access control (RBAC) functionality. For more information, see Enabling role-based access control.
