
Creating configuration backups
To create a configuration backup, assign a backup policy as the System backup policy of SPS.
TIP: To create an immediate backup of SPS's configuration to your machine (not to the backup server), select Basic Settings > System > Export configuration. Note that the configuration export contains only the system settings and configuration files (including changelogs). System backups includes additional information like reports and alerts
When exporting the configuration of SPS, or creating configuration backups, always use encryption. Handle the exported data with care, as it contains sensitive information, including credentials. For details on encrypting the configuration, see "Encrypting configuration backups with GPG" in the Administration Guide.
To encrypt your configuration backups, see Encrypting configuration backups with GPG.
Prerequisites
You have to configure a backup policy before starting this procedure. For details, see Data and configuration backups.
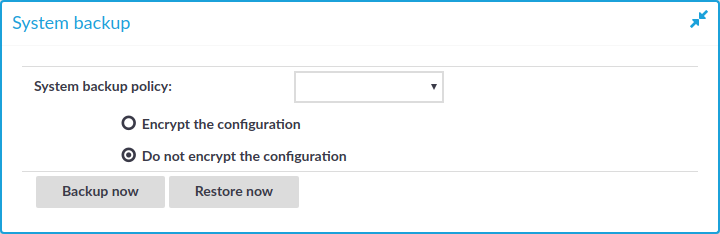
To create a configuration backup
-
Navigate to Basic Settings > Management > System backup.
Figure 65: Basic Settings > Management > System backup — Configuring system backups
-
Select the backup policy you want to use for backing up the configuration of SPS in the System backup policy field.
-
Click
.
-
Optional: To start the backup process immediately, click Backup now. The Backup now functionality works only after a backup policy has been selected and committed.
Creating data backups
To configure data backups, assign a backup policy to the connection.
NOTE:
When exporting the configuration of SPS, or creating configuration backups, always use encryption. Handle the exported data with care, as it contains sensitive information, including credentials. For details on encrypting the configuration, see "Encrypting configuration backups with GPG" in the Administration Guide.
Prerequisites
-
Configure the system backup. Restoring a data backup works only if a matching system configuration and metadata is available, that is, if a system backup is restored first. For details, see Creating configuration backups.
-
Configure a backup policy before starting this procedure. For details, see Data and configuration backups.
To configure data backups
-
Navigate to [Your chosen protocol] Control > Connections.
-
Select the connection you want to back up.
-
Select a backup policy in the Backup policy field.
-
Click
-
Optional: To start the backup process immediately, click Backup or Backup ALL. The Backup and Backup ALL functionalities work only after a backup policy has been selected and committed.
Encrypting configuration backups with GPG
You can encrypt the configuration file of SPS during system backups using the public-part of a GPG key. The system backups of SPS contain other information as well (for example, databases), but only the configuration file is encrypted. Note that system backups do not contain audit-trail data.
When exporting the configuration of SPS, or creating configuration backups, always use encryption. Handle the exported data with care, as it contains sensitive information, including credentials. For details on encrypting the configuration, see "Encrypting configuration backups with GPG" in the Administration Guide.
For details on restoring configuration from a configuration backup, see Restoring One Identity Safeguard for Privileged Sessions (SPS) configuration and data.
NOTE: It is not possible to directly import a GPG-encrypted configuration into SPS, it has to be decrypted locally first.
Prerequisites
You have to configure a backup policy before starting this procedure. For details, see Data and configuration backups.
You need a GPG key which must be permitted to encrypt data. Keys that can be used only for signing cannot be used to encrypt the configuration file.
To encrypt the configuration file of SPS during system backup
-
Navigate to Basic Settings > Management > System backup.
-
Select Encrypt configuration.
-
Click
.
-
To upload a key file, click Browse, select the file containing the public GPG key, and click Upload. SPS accepts both binary and ASCII-armored GPG keys.
-
To copy-paste the key from the clipboard, copy it, paste it into the Key field, then click Set.
-
-
Click
Archiving and cleanup
Archiving transfers data from SPS to an external storage solution, cleanup removes (deletes) old files. Archived data can be accessed and searched, but cannot be restored (moved back) to the SPS appliance.
To configure archiving and cleanup, you first have to create an archive/cleanup policy. Archive/cleanup policies define the retention time, the address of the remote backup server, which protocol to use to access it, and other parameters. SPS can be configured to use the SMB/CIFS and NFS protocols to access the backup server:
-
To configure a cleanup policy that does not archive data to a remote server, see Creating a cleanup policy.
-
To configure archiving using SMB/CIFS, see Creating an archive policy using SMB/CIFS.
-
To configure archiving using NFS, see Creating an archive policy using NFS.
|
|
Caution:
Hazard of data loss Never delete an Archive Policy if data has been archived with it. This will make the already archived data inaccessible. Do not "remake" an Archive Policy (that is, deleting an Archive Policy and then creating another one with the same name but different parameters). This will make data inaccessible, and identifying the root cause of the issue complicated. If you want to change the connection parameters (that is when you perform a storage server migration), you must make sure that the share contents and file permissions are kept unmodified and there are no archiving or backup tasks running. On the other hand, if you want to add a new network share to your archives, proceed with the following steps:
It is also safe to extend the size of the network share on the server side. |

The different protocols assign different file ownerships to the files saved on the remote server. The owners of the archives created using the different protocols are the following:
-
SMB/CIFS: The user provided on the web interface.
-
NFS: root with no-root-squash, nobody otherwise.
|
|
Caution:
SPS cannot modify the ownership of a file that already exists on the remote server. |
Once you have configured an archive/cleanup policy, assign it to the connection you want to archive. For details, see Archiving or cleaning up the collected data.
Data about archived connections can be automatically deleted from the connection database. For details, see Configuring cleanup for the One Identity Safeguard for Privileged Sessions (SPS) connection database.