
Change password
If you are a local user or an administrator, you can change your password for the web interface using the User menu > Change password option.
To change the password for SPS
-
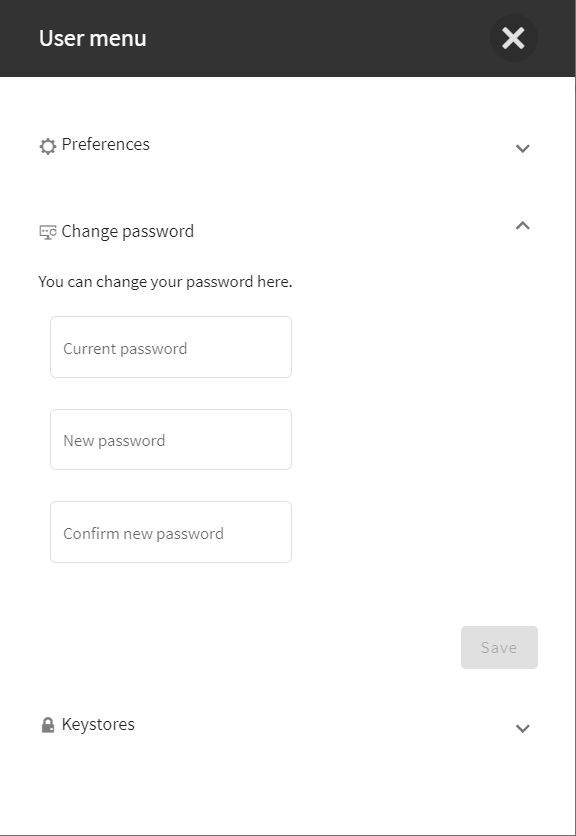
Navigate to User menu > Change password.
Figure 40: User menu > Change password — Changing the password
-
Enter your current password in the Current password field.
-
Create a new, strong password and enter it in the New password field.
NOTE: One Identity Safeguard for Privileged Sessions (SPS) accepts passwords that are not longer than 150 characters. Letters A-Z, a-z, numbers 0-9, the space character, as well as the following special characters can be used: !"#$%&'()*+,-./:;<>=?@[]\^-`{}_|
NOTE: If possible, use a random password generator.
To create a strong password:
-
Use special characters
-
Use long passwords
-
Mix uppercase and lowercase letters
For strong passwords, do not use:
-
Personal information in the passwords
-
Sequential letters or numbers
-
The word password as the password
-
Keyboard paths (for example, qwerty)
-
-
Enter your new password again in the Confirm new password field.
-
Click Save.
Network settings
The Basic Settings > Network tab contains the network interface and naming settings of One Identity Safeguard for Privileged Sessions (SPS).
Interfaces
Figure 41: Basic Settings > Network > Interfaces
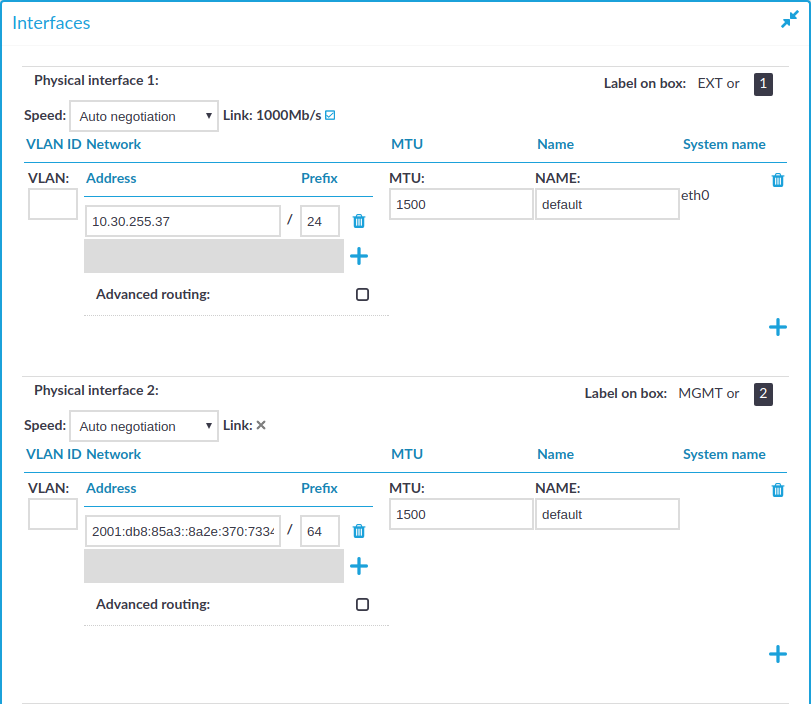

Lists all of the logical interfaces (VLAN IDs, IP addresses, netmasks, and names) assigned to the three physical interfaces of SPS. For more information on managing logical interfaces, see Managing logical interfaces.
In addition, it is also possible to set the Maximum Transmission Unit (MTU) for each network interface (VLAN or network interface card) individually. The default value is 1500.
Speed is displayed for every physical interface. To explicitly set the speed of the interface, select the new value from the Speed field. Modifying the speed of an interface is recommended only for advanced users.
You can add interface-specific network routes using the Advanced routing option of each interface. Otherwise, use the Routing table option to manage networking routes.
Routing table
Figure 42: Basic Settings > Network > Routing table
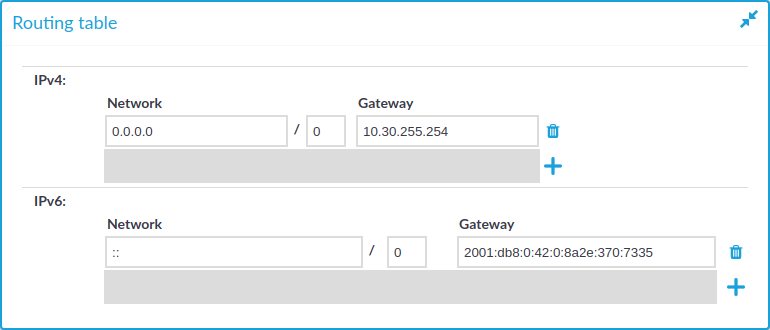
When sending a packet to a remote network, SPS consults the routing table to determine the path it should be sent. If there is no information in the routing table then the packet is sent to the default gateway. Use the routing table to define static routes to specific hosts or networks. You have to use the routing table if SPS interfaces are connected to multiple subnets.
Click the 

For detailed examples, see Configuring the routing table.
IP forwarding
Figure 43: Basic Settings > Network > IP forwarding
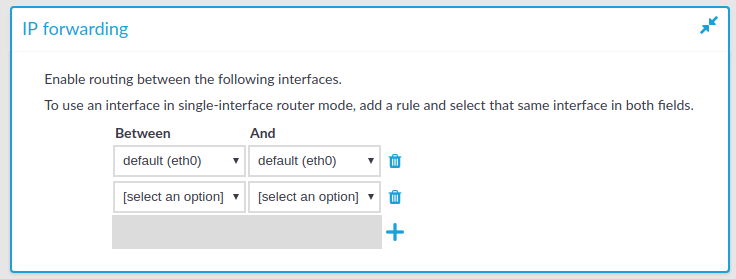
You can enable routing between logical interfaces, which allows you to direct uncontrolled traffic through SPS. For more information, see Routing uncontrolled traffic between logical interfaces.
To mimic the functionality of the deprecated Router mode, configure a logical interface for each physical interface you want to connect, and enable IP forwarding between them.
Naming
Figure 44: Basic Settings > Network > Naming

-
Hostname: Name of the machine running SPS.
-
Nick name: The nickname of SPS. Use it to distinguish the devices. It is displayed in the core and boot login shells.
-
DNS search domain: Name of the domain used on the network. When resolving the domain names of the audited connections, SPS will use this domain to resolve the target hostname if the appended domain entry of a target address is empty.
-
Primary DNS server: IP address of the name server used for domain name resolution.
-
Secondary DNS server: IP address of the name server used for domain name resolution if the primary server is unaccessible.
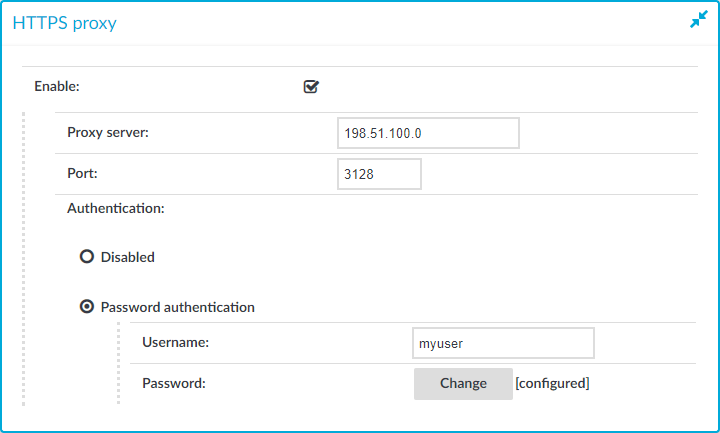
HTTPS proxy
The HTTPS proxy settings must be configured if your company policies do not allow devices to connect directly to the web. Once configured, SPS uses the configured proxy server for outbound web requests to external integrated services, such as Join to Starling or SPS plugins.
Figure 45: Basic Settings > Network > HTTPS proxy
-
Proxy server: The IP address or DNS name of the proxy server.
-
Port: The IP address or DNS name of the proxy server.
NOTE:If different ports are specified in the Proxy server and the Port field, the Port field takes precedence.
-
Username: The user name used to connect to the proxy server.
NOTE:The username and password are only required if your proxy server requires them to be specified.
-
Password: The password required to connect to the proxy server.
NOTE:The username and password are only required if your proxy server requires them to be specified.
Configuring user and administrator login addresses
You can configure two separate login addresses for accessing the web interface of One Identity Safeguard for Privileged Sessions (SPS):
-
Web login (admin and user): On this address, users can, depending on their access privileges, modify the configuration of SPS, and perform authentication-related activities (gateway authentication, 4-eyes authorization).
-
Web login (user only): The configuration of SPS cannot be viewed or altered from this address. Users (even ones with administrator privileges) can only perform gateway authentication and 4-eyes authorization.
NOTE: For more information on gateway authentication and 4-eyes authorization, see Advanced authentication and authorization techniques.
Both login addresses can be configured to restrict connections to a configured set of IP addresses only.
NOTE:
When configuring HTTP or SSH connections, avoid using the IP address configured for administrator or user login on One Identity Safeguard for Privileged Sessions (SPS) .
The login addresses are, by default, protected against brute-force attacks. For more information on the Protect against brute-force attacks option, see section Protecting against brute-force attacks.
To configure two separate login addresses for accessing the web interface of SPS
-
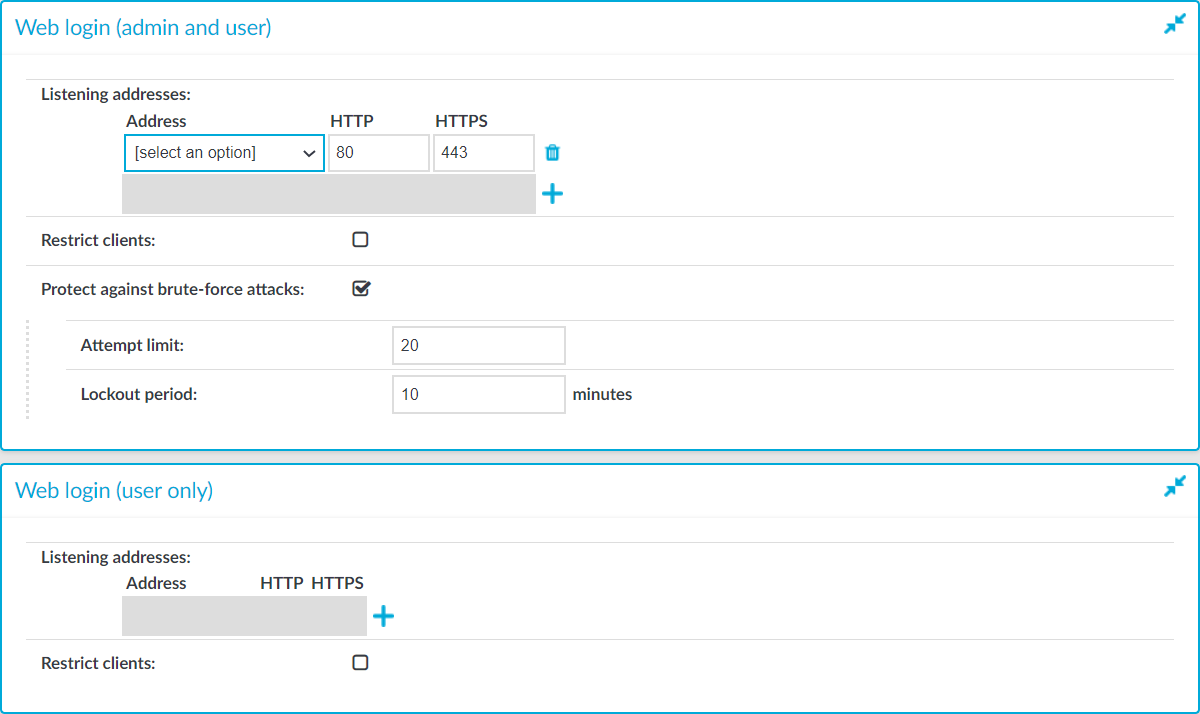
Navigate to Basic Settings > Local Services > Web login.
Figure 46: Basic Settings > Local Services > Web login — Configuring web login address
-
Choose
-
Enter the IP address to use for connecting to SPS's user interface into the Address field.
The available addresses correspond to the interface addresses configured in Basic Settings > Network > Interfaces. Only IPv4 addresses can be selected.
-
Enter the port number for HTTP connections into the HTTP field.
-
Enter the port number for HTTPS connections into the HTTPS field.
-
(Optional) To permit access to the SPS web interface only from selected subnets or IP addresses, select Restrict clients, click
Caution: Permit administrative access to SPS only from trusted networks. If possible, monitored connections and administrative access to the SPS web interface should originate from separate networks.
After comitting the changes, the web interface will be available only from the configured subnets or IP addresses.
Use an IPv4 address.
-
(Optional) Protect against brute-force attacks: modify the values of Attempt limit, Lockout period, or both, according to your security requirements.
NOTE: You can configure the Protect against brute-force attacks option only under Web login (admin and user), but these settings are inherited by the Web login (user only) settings too.
For detailed information on the Protect against brute-force attacks option, see section Protecting against brute-force attacks.
-
Recommended: configure a separate login address for user connections in Web login (user only). The configuration settings of SPS cannot be viewed or modified from this address.
-
Click
.

Protecting against brute-force attacks
This section provides detailed information on the Protect against brute-force attacks option that is available on SPS, on Basic Settings > Local Services > Web login.
NOTE: You can configure the Protect against brute-force attacks option only under Web login (admin and user), but these settings are inherited by the Web login (user only) settings too.
Operation of the Protect against brute-force attacks option
The web login addresses of administrators and users are, by default, protected against brute-force attacks: after the users reach the configured number of unsuccessful login attempts, SPS denies all following attempts for the configured time. You can turn this off by deselecting the Protect against brute-force attacks option for the web login addresses.
The Protect against brute-force attacks option blocks the user name or the IP address based on the following:
-
If the number of unsuccessful login attempts from the same IP address with any user name exceeds the threshold, the IP address is blocked.
-
If the number of unsuccessful login attempts with a user name from different IP addresses exceeds the threshold, the user name is blocked for all IP addresses.
The rejected authentication attempts that are made during the blocking do not increase the lockout counters.
NOTE: The admin user is also subject to brute-force attack protection.
The default operation of the Protect against brute-force attacks option is that after 20 unsuccessful login attempts, the user name or the IP address is blocked for 10 minutes.
Accepted values:
-
Attempt limit: 1-50 attempts
-
Lockout period: 1-720 minutes
During the blocking, the blocked users receive the Unable to authenticate error message both if valid or invalid credentials are entered.
NOTE: The Unable to authenticate error message does not provide more details about the error and the possible solutions so as not to provide more information if an attacker receives this error message.
Log messages about blocked user names and IP addresses
If a user name or an IP address is blocked, a log event is created, which provides the details about the blocking. The log event contains the following:
-
Cause of the blocking
-
User name
-
IP address
-
Duration of the blocking
Example: log message about a blocked user name
The following example provides the details about the blocking of a user name. The blocked user name is admin and the IP address used is 192.168.1.1. The reason for the blocking is that the user has exceeded the allowed number of unsuccessful authentication attempts. This user is blocked for 300 seconds.
Authentication denied, too many attempts, username is locked out; username='admin', remote_address='192.168.1.1', lockout='300'
Example: log message about a blocked IP address
The following example provides the details about the blocking of an IP address. The user is admin and the blocked IP address is 192.168.1.1. The reason for the blocking is that the allowed number of unsuccessful authentication attempts has been reached from this IP address. This IP address is blocked for 300 seconds.
Authentication denied, too many attempts, remote_addr is locked out; username='admin', remote_address='192.168.1.1', lockout='300'
Unblocking blocked user names and IP addresses
The web lockout counter for a user name or IP address is reset if:
-
The lockout period is over.
-
The server is rebooted.
-
The secondary node becomes active after an HA failover.
-
After the root user clears the list of blocked users/IP addresses on the Troubleshooting page of the text-based physical or SSH console.
NOTE: If you are the root user, on the Troubleshooting page of the text-based physical or SSH console, you can clear the list of blocked user names and IP addresses using the Clear list of blocked users/IPs option. If you clear the list, users and IP addresses that previously were blocked due to exceeding the allowed number of web login attempts can attempt logging in again. Clearing the list does not disable the Protect against brute-force attacks option.
Configuring the Protect against brute-force attacks option
To configure the Protect against brute-force attacks option, on SPS, navigate to Basic Settings > Local Services > Web login.
Figure 47: Basic Settings > Local Services > Web login
For information on how to configure the web login for administrators and users, and as part of it, how to configure the Protect against brute-force attacks option, see section Configuring user and administrator login addresses.