
Filtering
The tables can be filtered for any parameter, or a combination of parameters. To filter the list, enter the filter expression in the input field of the appropriate column, and pressEnter, or click on an entry in the table.
NOTE: When you use filters, the bars display the statistics of the filtered results.
Filtering displays also partial matches. For example, filtering the Author column on the Users & Access Control > Configuration History screen for adm displays all changes performed by users whose username contains the adm string.
You can use the 


To restore the original table, click Clear all filters.
Exporting the results
To save the table of search results as a file, click Export as CSV. This saves the table as a text file containing comma-separated values. Note that if an error occurs when exporting the data, the exported CSV file will include a line (usually as the last line of the file) starting with a zero and the details of the problem, for example 0;description_of_the_error.
|
|
Caution:
Do not use Export as CSV to export large amounts of data, as exporting data can be very slow, especially if the system is under heavy load. |

Customizing columns of the internal search interface
The following describes how to customize the data displayed on the interface.
To customize the data displayed on the interface
-
Navigate to the database you want to browse, for example Users & Access Control > Configuration History.
-
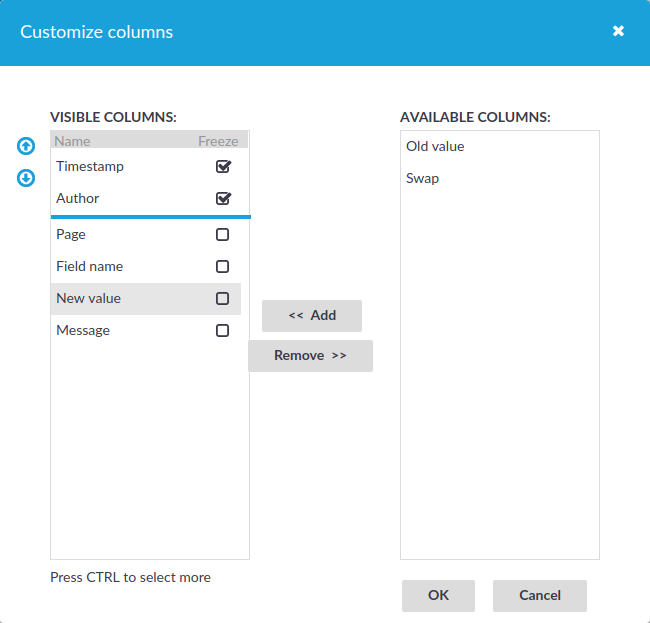
Click Customize Columns. A pop-up window containing the list of visible and available columns is displayed.
Figure 98: Users & Access Control > Configuration History — Customizing columns of the general search interfaces
-
The displayed parameters are enlisted in the Visible columns field. All other available parameters are enlisted in the Available columns field.
-
To add parameters to the Visible columns field, select the desired parameter(s) and click Add.
-
To remove parameters from the Visible columns field, select the desired parameter(s) and click Remove.
-
To freeze columns (to make them permanently visible, even when scrolling horizontally), enable the Freeze option next to the desired parameter.
NOTE: To select multiple parameters, pressCtrlwhile clicking the items.
-
-
Click OK. The selected information is displayed.
Managing One Identity Safeguard for Privileged Sessions (SPS)
The following sections explain the basic management tasks of One Identity Safeguard for Privileged Sessions (SPS.
-
For basic management tasks (reboot and shutdown, disabling traffic), see Controlling One Identity Safeguard for Privileged Sessions (SPS): reboot, shutdown.
- For information on managing a cluster of two or more SPS instances, see Managing Safeguard for Privileged Sessions (SPS) clusters.
-
For managing a High Availability cluster, see Managing a High Availability One Identity Safeguard for Privileged Sessions (SPS) cluster.
-
For instructions on upgrading SPS, see Upgrading One Identity Safeguard for Privileged Sessions (SPS).
-
For instructions on accessing SPS through console and SSH, see Accessing the One Identity Safeguard for Privileged Sessions (SPS) console.
-
For enabling sealed mode (which disables basic configuration changes from a remote host), see Sealed mode.
-
For information on configuring the out-of-band (IPMI) interface, see Out-of-band management of One Identity Safeguard for Privileged Sessions (SPS).
-
For managing certificates used on SPS, see Managing the certificates used on One Identity Safeguard for Privileged Sessions (SPS).