Kerberos authentication settings
The following describes how to perform authentication with Kerberos. One Identity Safeguard for Privileged Sessions (SPS) supports both end-to-end Kerberos authentication, when the client authenticates on SPS gateway and on the target server using Kerberos, and also the half-sided Kerberos scenario when Kerberos is used only on the SPS gateway.
Prerequisites
Before configuring Kerberos authentication on One Identity Safeguard for Privileged Sessions (SPS), make sure you have configured your Kerberos environment correctly and have retrieved the keytab file. For details, see Configuring your Kerberos environment.
To perform authentication with Kerberos
-
Navigate to SSH Control > Authentication Policies.
-
Create a new Authentication Policy.
-
Select the authentication methods to use on the SPS gateway and on the target server.
-
To use Kerberos authentication on the target server, you must use Kerberos authentication both on the SPS gateway and on the target server. Select Gateway authentication method > Kerberos and Relayed authentication methods > Kerberos.
-
To use Kerberos authentication only on the SPS gateway (that is, in the client-side connection), select Gateway authentication method > Kerberos. If required, you can select other gateway authentication methods in addition to Kerberos, and also authentication backends and related to the selected gateway authentication methods.
Select the authentication methods you want to use on the target server in the Relayed authentication methods field.
-
-
Click
.
-
Navigate to SSH Control > Global Options > GSSAPI.
-
Browse for the Kerberos keytab file, and click Upload. The uploaded principals are displayed in Currently uploaded principals.
If a Connection Policy uses an SSH Authentication Policy with Kerberos authentication together with a Usermapping Policy, then SPS stores the user principal as the gateway user, and the target username as the server username in the session database. If you want to allow your users to use a username on the target server that is different from their principal, configure a Usermapping Policy for your SSH connections. For details, see "Configuring usermapping policies" in the Administration Guide.
Click
-
(Optional) If more than one realm is deployed on your network, you have to specify the mapping from the server's DNS domain name to the name of its realm. To map hostnames onto Kerberos realms, click
.
-
Navigate to SSH Control > Connections and configure the SSH connection as follows. For details on configuring connections in general, see Configuring connections.
-
Select Use fixed address or Inband destination selection as Target.
-
Select the Kerberos Authentication policy.
-
Click
-
Server host keys
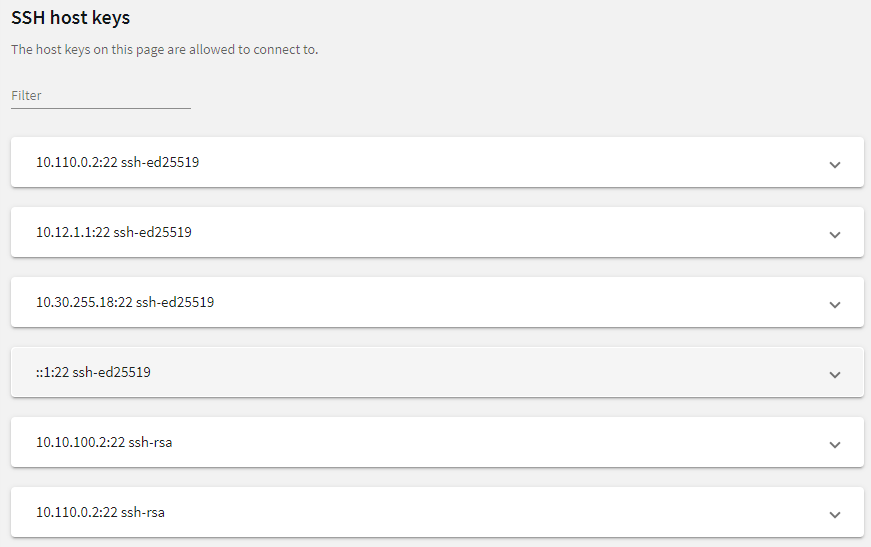
The host keys of the trusted servers can be managed on the SSH Control > Server Host Keys page. When a client tries to connect to a server, One Identity Safeguard for Privileged Sessions (SPS) verifies the host key of the server. SPS allows connections only to the servers listed on this page, unless the Accept key for the first time or the Accept certificate for the first time option is enabled in the connection policy.
Figure 224: SSH Control > Server Host Keys — Server host keys
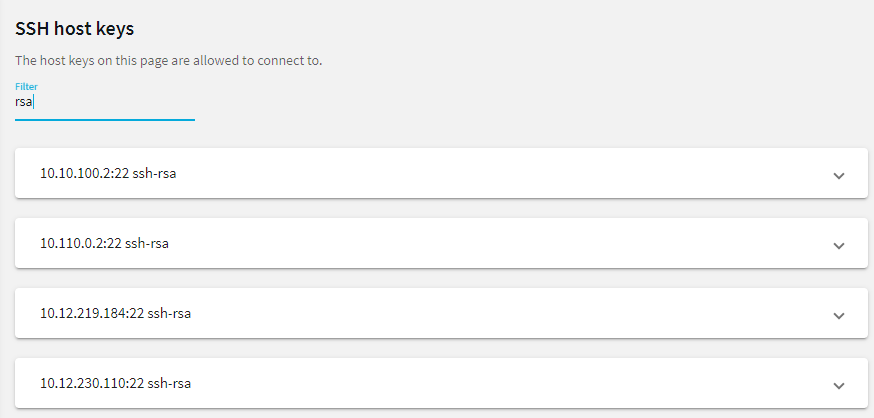
To filter, start typing into the Filter field. For example, enter rsa or an IP address and only relevant results are displayed.
Figure 225: SSH Control > Server Host Keys — Filtered RSA host keys
Automatically adding the host keys of a server to One Identity Safeguard for Privileged Sessions (SPS)
The host keys of the servers can be added either automatically or manually.
To add the host key automatically
-
Navigate to the SSH Control > Connections.
-
Configure a connection: fill the From, To, and Port fields.
You can use IPv4 and IPv6 addresses as well.
-
To configure a transparent connection, enter the IP address of the server into the To field.
-
To configure a non-transparent connection, enter the IP address of SPS into the To field, and the address of the target server into the Target field.
-
-
Click
to display the advanced settings and verify that the Server side host key settings > Plain host key check option is set to Accept key for the first time.
Click
-
Initiate an SSH connection from the client to the server. SPS will automatically record the host key of the server — the server's IP address and the host key will be listed on the SSH Control > Server Host Keys page.
Manually adding the host key of a server
The following describes how to add the host key manually.
To add the host key manually
-
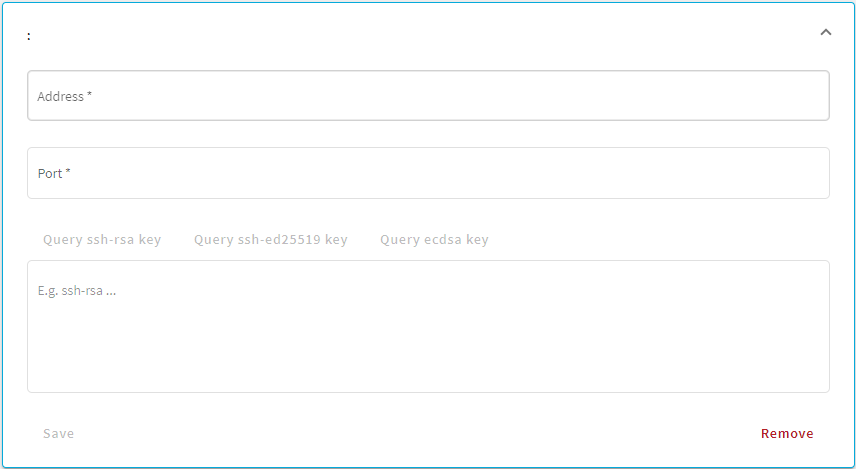
Navigate to the SSH Control > Server Host Keys and click Create new.
Figure 226: SSH Control > Server Host Keys — Create new
-
Enter the IP address and port of the server into the Address and Port fields.
You can use IPv4 and IPv6 addresses as well.
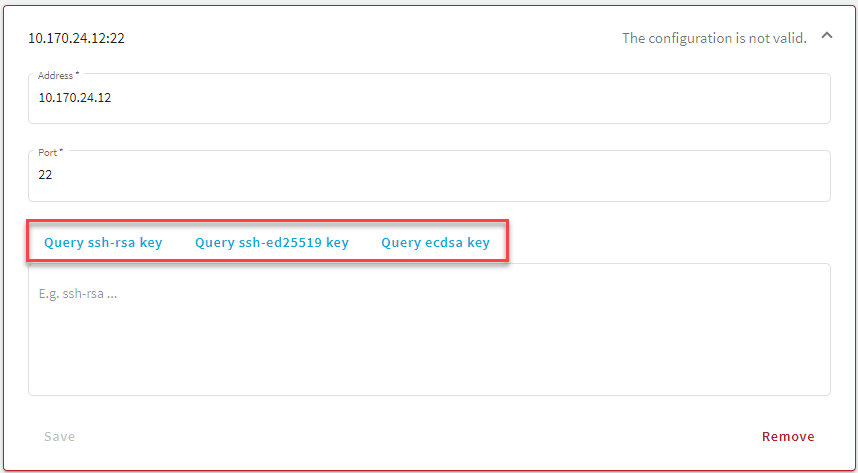
Figure 227: SSH Control > Server Host Keys — Example of active Query fields
-
Once you fill out the Address and Port fields, the Query... fields become active and you can query the public part of the host key of the server.
SPS allows you to use the following SSH host keys:
-
RSA (ssh-rsa), which is the most widely used public-key algorithm for the SSH key. In SPS, uploading RSA SSH host keys are supported in PKCS #1 PEM, PKCS #8 PEM, OpenSSH (openssh-key-v1), and PuTTY private key formats.
NOTE:
One Identity recommends using 2048-bit RSA keys (or stronger).
-
Ed25519 (ssh-ed25519), which offers a better security and faster performance compared to RSA.
In SPS, uploading Ed25519 SSH host keys are supported in PKCS #8 PEM, OpenSSH (openssh-key-v1), and PuTTY private key formats.
-
ECDSA NIST P-256 (ecdsa-sha2-nistp256), which is a variant of the Digital Signature Algorithm (DSA). In SPS, uploading ECDSA SSH host keys are supported in SEC1 PEM, PKCS #8 PEM, OpenSSH (openssh-key-v1), and PuTTY private key formats.
You can have multiple SSH server host keys on SPS for the same server, however, you cannot set more than one key for each type. For example, you can keep your old RSA SSH key and generate a new Ed25519 key but you cannot set two RSA keys.
Alternatively, paste the public part of the host key of the server.
-
-
Click Save.