
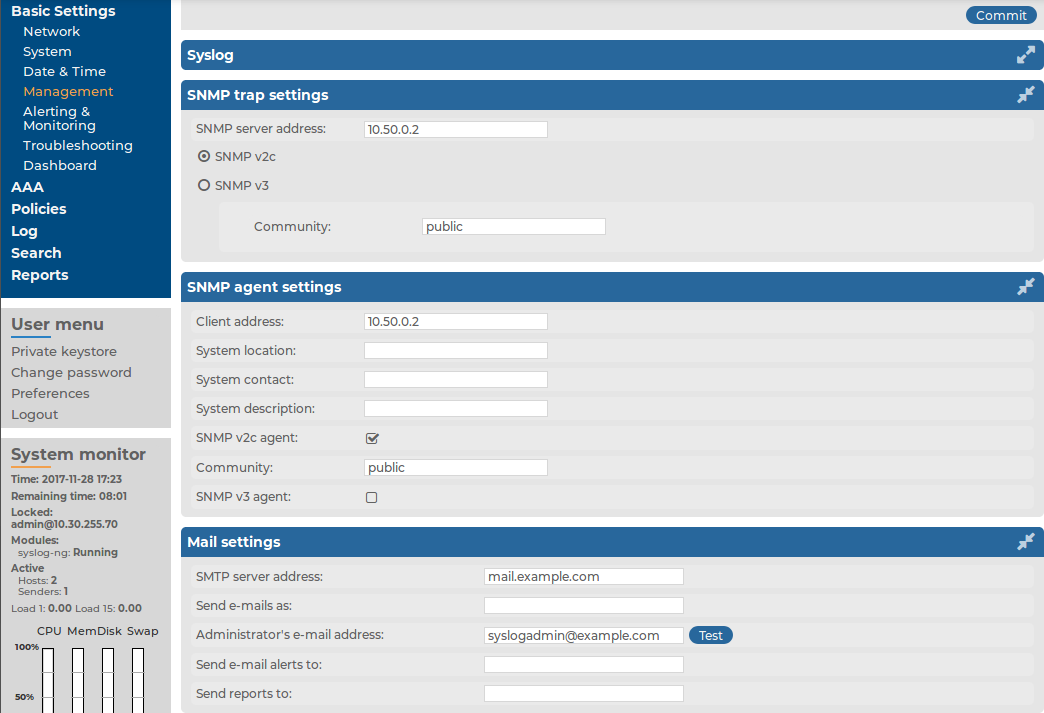
You can configure e-mail and SNMP alerts on the Basic Settings > Management page.
Figure 26: Basic Settings > Management — Configure SNMP and e-mail alerts
You can configure e-mail and SNMP alerts on the Basic Settings > Management page.
Figure 26: Basic Settings > Management — Configure SNMP and e-mail alerts
This section describes how to configure email alerts.
To configure email alerts
Navigate to Basic Settings > Management > Mail settings.
Enter the IP address or the hostname of the mail server into the SMTP server address field.
Figure 27: Basic Settings > Management > Mail settings — Configure e-mail sending

Enter the e-mail address where you want to receive e-mails from into the Send e-mails as field. This can be useful for e-mail filtering purposes. SSB sends e-mails from the address provided here. If no e-mail address is entered, e-mails will be sent from the default e-mail address.
Enter the e-mail address of the administrator into the Administrator's e-mail address field. SSB sends notifications related to system-events (but not alerts and reports) to this address.
Enter the e-mail address of the administrator into the Send e-mail alerts to field. SSB sends monitoring alerts to this address.
Enter the e-mail address the person who should receive traffic reports from SSB into the Send reports to field. For details on reports, see Reports.
|
|
Caution:
To get alert e-mails, provide an e-mail address in this field. Sending alerts fails if these settings are incorrect, since the alerting e-mail address does not fall back to the administrator's e-mail address by default. |
Click  .
.
Click Test to send a test message.
If the test message does not arrive to the server, check if SSB can access the server. For details, see Troubleshooting SSB.
Navigate to Basic Settings > Alerting & Monitoring and select in which situations should SSB send an e-mail alert. For details, see Configuring system monitoring on SSB.
Click .
SSB can send alerts to a central monitoring server via SNMP (Simple Network Management Protocol).
To configure SNMP alerts
Navigate to Basic Settings > Management > SNMP trap settings.
Enter the IP address or the hostname of the SNMP server into the SNMP server address field.
Figure 28: Basic Settings > Management > SNMP trap settings — Configure SNMP alerts
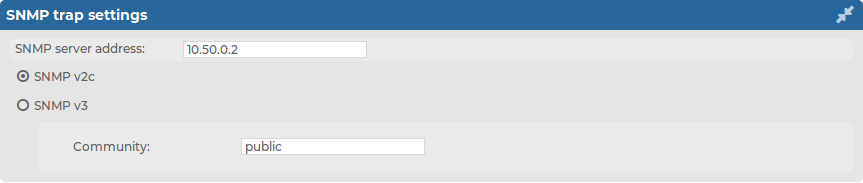
Select the SNMP protocol to use.
To use the SNMP v2c protocol for SNMP queries, select SNMP v2c, and enter the community to use into the Community field.
To use the SNMP v3 protocol, select SNMP v3 and complete the following steps:
Figure 29: Basic Settings > Management > SNMP trap settings — Configure SNMP alerts using SNMPv3
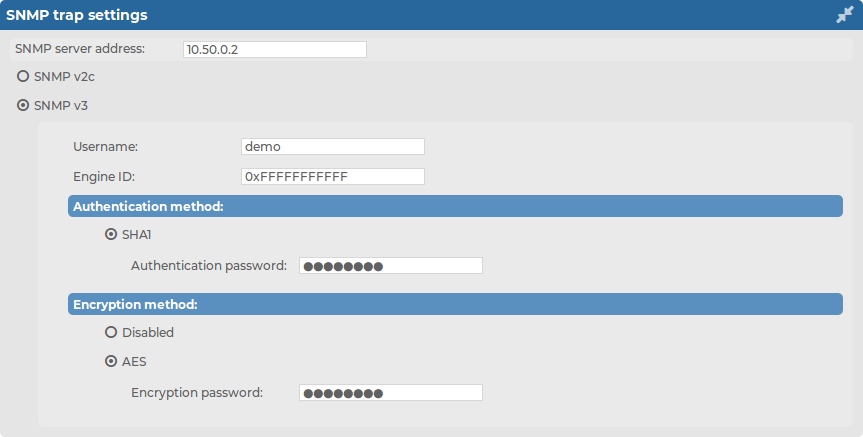
Enter the username to use into the Username field.
Enter the engine ID to use into the Engine ID field. The engine ID is a hexadecimal number at least 10 digits long, starting with 0x. For example 0xABABABABAB.
Select the authentication method (SHA1) to use from the Authentication method field.
Enter the password to use into the Authentication password field.
Select the encryption method (Disabled or AES) to use from the Encryption method field.
The supported AES method is AES-128.
In the case of AES, enter the encryption password to use into the Encryption password field.
|
|
NOTE:
SSB accepts passwords that are not longer than 150 characters. The following special characters can be used: !"#$%&'()*+,-./:;<=>?@[]^-`{|} |
Click .
Navigate to Basic Settings > Alerting & Monitoring and select in which situations should SSB send an SNMP alert. For details, see Configuring system monitoring on SSB.
Click .
External SNMP agents can query the basic status information of SSB.
To configure which clients can query this information
Navigate to Basic Settings > Management > SNMP agent settings.
Figure 30: Basic Settings > Management > SNMP agent settings — Configure SNMP agent access
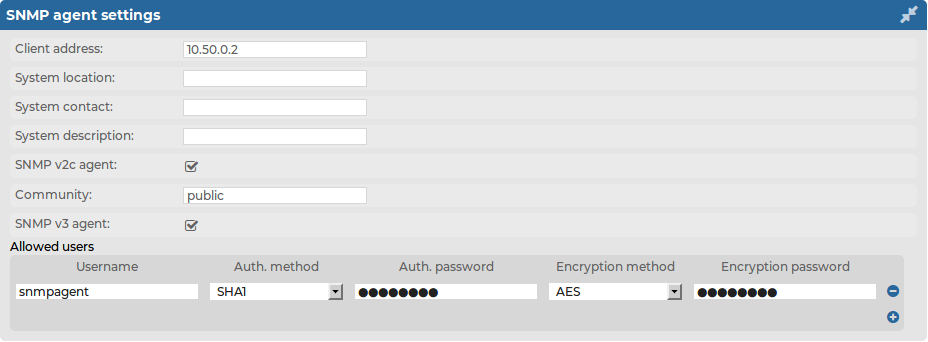
The status of SSB can be queried dynamically via SNMP. By default, the status can be queried from any host. To restrict access to these data to a single host, enter the IP address of the host into the Client address field.
Optionally, you can enter the details of the SNMP server into the System location, System contact, and System description fields.
Select the SNMP protocol to use.
To use the SNMP v2c protocol for SNMP queries, select SNMP v2c agent, and enter the community to use into the Community field.
By default, information about SSB is available using the public community. If you are using a high-availability SSB cluster, then each node provides information about its own status using a specific community. This community is the Node ID of the node (as displayed in the Basic Settings > High Availability > This node > Node ID field), for example, 00:56:56:6f:00:8F.

To use the SNMP v3 protocol, select SNMP v3 agent and complete the following steps:
Click  .
.
Enter the username used by the SNMP agent into the Username field.
Select the authentication method (MD5 or SHA1) to use from the Auth. method field.
Enter the password used by the SNMP agent into the Auth. password field.
Select the encryption method (Disabled, DES or AES) to use from the Encryption method field.
The supported AES method is AES-128.
Enter the encryption password to use into the Encryption password field.
To add other agents, click .
|
|
NOTE:
SSB accepts passwords that are not longer than 150 characters. The following special characters can be used: !"#$%&'()*+,-./:;<=>?@[]^-`{|} |
Click .
© ALL RIGHTS RESERVED. Terms of Use Privacy Cookie Preference Center

