
Stage Model
The Stage Model has been created to help implement solutions using VDS to produce modular designs. This allows you to reuse particular functional modules throughout a solution, and also to choose the order in which those functions are applied.
Stages, effectively, contain "function holders", in that they provide an area for different scripts and plugins to be attached. Requests sent by a client application, and accepted by a listener, are automatically routed through all of the stages defined in the "attached stages" list for that listener. As the request moves through each stage, it will trigger the functions attached to each stage holder. So the list of stages attached to a listener provides a "processing stack" that will make use of each modular function that you want to apply to requests that are accepted by that listener.
VDS permits you to configure any number of stages per listener in a design. Processing Stages are handled sequentially, so that the results of the functionality implemented in one stage are passed on to the next stage for further processing. This allows you to take a complex directory customization task and reduce it into a set of simpler subtasks that can be implemented independently.
Stages have other implications as well. If a subrequest is launched somewhere within the middle of the processing stack, it will pass through all stages that follow the one it was launched from. And the subresponse will traverse the stages in inverse order until the stage where the subrequest was launched is reached. This does not mean that all of the processing instructions within each stage will apply to the request and response, as VDS provides a conditional model to determine whether processing should be applied. However, requests will still move through each successive stage, and responses will return through each stage until they arrive at the stage from which the request was generated from. As a result, the organization of processing stages is the most important architectural design that will need to be implemented in any deployment.
Stages
A stage is used to process protocol packets and act on them. Stages are typically used to separate processing steps. You can think of VDS as a pipeline: clients make requests to the listener, these requests are then handled by going through a set of stages, and finally the requests arrive at the server group and are sent to a back-end server. Of course, during the processing in a stage, a packet can be responded to straight away without going any further down the pipeline, or sub-requests can be emitted that are by themselves processed by other stages. Think of a stage as a module of functionality that acts on requests on the way from the client to the back-end, and vice versa.
Fig-54: VDS Processing

Creating a Stage
Click on the "New" button to create a new stage. Alternatively, you can also right-click the "Stages" node in the Navigator and select "New". You can also click the "New" button on the toolbar, or select "New" from the "Entry" menu.
A window will pop up asking you for a name for your new Stage. Make sure the name is different from other stages that you create - every Stage must have a unique name. You will also need to select whether you want to create a automatic, or a manual stage. Once you have created your Stage, it will appear in the navigator. Select it in order to configure it, and then start attaching plugins (for automatic stages) or hooks (for manual stages).
VDS provides a set of pre-written scripts that can be used as plugins within any stage. To easily facilitate the use of these plugins, DSGUI provides the option of setting up either Automatic or Manual stages. These different stage types are fairly artificial in that all stage definitions appear identical to VDS and the actual configuration will not make any differentiation between them. Automatic stages simply provide an easy method to implement any of the built-in plugins, while Manual stages are more complex to configure, but will allow you to define your own scripts and processing to be performed on PDUs. We will discuss the differences between these stage types and how to configure them later.
Condition Model
In order to add more control to the different attached functionalities within a stage, VDS offers a condition model that can be used to control the execution of each function. This provides fine-grained control over whether a particular function applies to the data passing through the stage, and helps to avoid unnecessary processing.
The condition model consists of a set of conditions that are evaluated each time a PDU reaches the function holder within a stage. In manual stages, the function holder is described as a 'Hook', while in automatic stages the function holder is described as a Plugin. All function holders will include a condition line which will be used to evaluate whether or not the functionality provided should be invoked. So, for example, if a configuration requires a mapping functionality for entries stored in a certain branch, the condition model can be used to specify that the mapping functionality should only be invoked if the PDU is accessing that particular branch.
The are three different conditions that can be defined for both automatic and manual stages and another optional one that can be used only in manual stages:
- Suffix / Base DN / Prefix
-
For LDAP operations this string specifies the DN suffix that must match the DN of the PDU for the functionality to be triggered. If the string is empty the suffix match is not made at all. If the string begins with an exclamation mark, the functionality is triggered if the DN of the PDU does NOT match the suffix. For LDAP operations that do not have a natural DN (unbind, queries responses, extended...) the evaluation of any suffix will always return false. For HTTP operations a prefix match on the URL is performed unless the first character of the string is an asterisk in which case, a suffix match is performed instead.
- Bind DN
-
Specifies the credential DN that must been in use in the client connection for the attached plugin or script to be executed. An empty value means that the credential is not checked, and an exclamation mark at the beginning of the string indicates that the credential DN must NOT match the specified one. Also, a special value "anon" indicates that only non-authenticated connections will trigger the functionality (with "!anon" meaning ANY authenticated connection). For HTTP requests the "Host:" header of the PDU is matched.
- IP / Mask
-
Specifies the range of client IPs that must match. An exact IP match can be obtained by specifying a 255.255.255.255 mask. The match can be omitted by leaving both fields empty or by specifying a mask of 0.0.0.0. Adding an exclamation mark will invert the checking as it does for the other conditions
- Condition
-
Can only be used in conditions of HOOKs in manual stages. This field holds an expression that uses a syntax similar to that used to filter LDAP search requests, and is able to check values of PDU hash keys, checks on existence, using exact value or wild card matches. Only attributes present within the PDU can be checked.
Table 2:Condition Model Samples
| Prot. | Suffix / Base DN | Bind DN | IP / Mask | Description |
|---|---|---|---|---|
| LDAP | ou=market,dc=com | Only LDAP operations sent to "ou=market, dc=com" subtree. | ||
| LDAP | uid=Smith,dc=com | Only LDAP operations on connections authenticated with "uid=Smith, dc=com" user | ||
| LDAP | 192.168.1.1 / 255.255.255.0 | Only LDAP operations from IPs between 192.168.1.0 and 192.168.1.254 | ||
| LDAP | !ou=groups,dc=com | 127.0.0.1 / 255.255.255.255 | Only LDAP operation sent from localhost that are NOT trying to work on "ou=groups, dc=com" | |
| LDAP | !anon | 10.2.8.157 / 255.255.0.0 | Only LDAP operations sent from a client between 10.2.0.0 and 10.2.254.254 IP address using an authenticated connection |
Configuring condition model
Conditions can be applied to both types of stages (automatic and manual), but are applied to each function holder within a stage. The configuration panel for the function holders in an automatic stage looks different to the configuration panel for the function holders in a manual stage.
To configure the conditions for automatic stages see Plugin configuration
For manual stages, please see Adding Conditions to a Hook
Types of stages
VDS supports two types of stages: Automatic stages and Manual stages. This differentiation is provided only by VDS's configuration tool, DSGUI. VDS itself only treats both stage types as identical in terms of how they function. However, DSGUI allows you to easily configure many predefined functions by using plugins. To do this, DSGUI, presents the concept of an Automatic Stage.
Automatic Stages
An automatic stage can be used to attach the predefined modules bundled with VDS. These predefined modules provide a wide range of commonly used functions, including mapping database interfaces and merging multiple directory trees. Configuring Automatic Stages is, as the name implies, a relatively easy task. Automatic stages simply require you to select the modules that you'd like to install within the stage.
Once you have created a Automatic Stage, you can directly attach functional modules, called plugins, into the stage. These plugins implement specific functionality and come with their own configuration panels to provide an interface that will allow you to configure their specific parameters.
Although it is allowed to attach any number of plugins into the same stage, we recommend putting no more than one in each. The reason is different plugins may use the same hooks, possibly resulting in an unexpected behavior. Configuring plugins in different stages is good practice that helps isolate multiple functional modules.
It is still possible that due to the nature of different plugins, some combinations may not work as expected even if configured in different stages, or depending on how they have been ordered. It might not make sense functionally, or due to how the plugins have been internally implemented.
Selecting a plugin
The Plugin Selector dialog allows you to select the Plugin that you wish to attach to an Automatic Stage. Plugins are generally grouped by protocol, allowing you to select the protocol for which the plugin is relevant, so that it is easier to find the plugin that you are looking for. The Plugin Selector lists the available plugins and allows you to select one from the list. A description of each plugin is provided on the right-hand side of the selector, when you click on any of the plugins listed.
Fig-55: The Plugin Selector

The Plugin Selector will automatically create a name for the Plugin within the text field on the top. You can change this name if required. You will certainly need to choose a new name if you decide to attach the same plugin more than once in a particular stage, as each attached plugin requires a unique name.
Once you have selected and named the plugin, you can attach it by clicking the OK button. Alternatively, you can cancel the operation by clicking the Cancel button.
Each plugin provides its own Help file which fully documents the plugin's purpose and its configuration options. You can access this information either by clicking on the Help button in the configuration panel for each plugin, or by looking at the PDF documents that are included with VDS.
Configuring a Plugin
Once a plugin has been inserted into an automatic stage, you will be able to use DSGUI to configure it. As the settings for each plugin are different, each plugin has its own unique configuration panel, however there are a couple of sub-panels that are common to all plugins and that we will explain here:
The condition selector
This sub-panel is available for every plugin and allows you to specify values for the different conditions used to determine whether the processing functionality provided by the plugin is applied to a PDU. The settings that are specified here will configure exactly what traffic should be processed by the plugin. The methodology behind this is explained in more detail in the section titled Condition model .
Fig-56: The condition selector

The condition selector consists of a table with the following fields:
Table 3:Fields used to define a condition
| Field | Description |
|---|---|
| Suffix | A suffix of the request that should be matched. This has meaning only for protocols that support the notion of a suffix, such as LDAP and HTTP. For LDAP, this is typically the DN (distinguished name) of the request. For HTTP, this is typically the URL. For other protocols, the meaning of "suffix" can be found on the Dell One Identity Virtual Directory Server Developer's Reference Manual. |
| Bind DN | The credentials of the current client session that this protocol packet belongs to. For LDAP, this is the DN that was used by the client to BIND (authenticate). |
| IP / Mask | An IP range together with a subnet mask. You can use this mechanism to match a specific client range. |
The Debug Level
Most of the plugins support a debug level that, when set, makes the plugin return messages that may assist in diagnosing problems or tracing and debugging the plugin itself. As with most components in the configuration, log levels for debugging can be controlled using a slider control to determine the verbosity of logging output. The debugging options are as follows:
- Critical
-
System critical messages which cannot be disabled.
- Warning
-
Returns messages when something unforeseen that is not yet an error, happens.
- Info
-
Returns informational messages, describing normal actions within the plugin.
- Trace
-
Returns messages whenever key parts of the plugin are entered and exited.
- Processing
-
Returns messages during significant processing steps of the plugin.
- PDU
-
Dumps the entire PDU when the plugin is called.
- Debug
-
Returns detailed debugging messages (verbose!).
- Dump
-
Dumps contents of internal structures as they are used (very verbose!).
Fig-57: Debug Level Configuration

As the slider moves from left to right, the verbosity will increase. Selecting a particular log level will output this detail to the log, along with all of the log data for the preceding log levels (i.e. those to the left of the selected level). Please also see the section on Debug Logs for live instances.
Manual Stages
Manual stages intercept each packet based on a condition. This condition is evaluated for each packet arriving at the stage, and when it matches, a scriptlet written in DirectoryScript is called and will take custom action. DirectoryScript is a simple, but very powerful scripting language that permits you to do virtually anything that you need to do in order to process your packet. With DirectoryScript, you can completely rewrite a packet, adding, deleting or changing attributes as you require. You may also make sub-requests in any of the protocols supported by VDS, including the ability to call external libraries.
All of the plugins that are bundled with VDS and which are available for automatic stages, are also written in DirectoryScript. As such, the only difference between an automatic stage and a manual stage, is that the DirectoryScript scriptlets in an automatic stage are delivered with the product and include some configuration tools to make the scriptlets easier to use.
Once you have created a manual stage, you can attach hooks to it. Each hook supports a different protocol operation. For instance, when using the LDAP protocol, there is one hook for each LDAP operation type. Requests and responses are considered to be different operation types. So there would be a hook available for BIND requests, and a separate hook available for BIND responses. Hooks are used to trigger your custom written functions, based on the operations defined by the requests and responses that move through VDS.
Selecting HOOKs to add to your manual stage
The hook selector allows you to add hooks to your manual stage. Hooks are grouped by protocol. Every protocol operation will have its appropriate hook. For many protocols that implement a request-response mechanism, you will see a different hook for each request type, as well as its reciprocal response type. For a detailed description of what types of hooks are available, consult the chapter "Stages, Hooks and Condition" in the Dell One Identity Virtual Directory Server Developer's Reference Manual.
Fig-58: The Hook Selector

The following commonly used hooks are available)") :
:
LDAP and LDAPS protocols
Table 4:LDAP Hooks
| Request | Response | Explanation |
|---|---|---|
| REQ_BIND | RES_BIND | |
| REQ_SEARCH | RES_SEARCH_ENTRY | There are multiple |
| RES_SEARCH_DONE | possible responses to | |
| RES_SEARCH_REF | REQ_SEARCH | |
| REQ_MODIFY | RES_MODIFY | |
| REQ_ADD | RES_ADD | |
| REQ_DELETE | RES_DELETE | |
| REQ_MODDN | RES_MODDN | |
| REQ_COMPARE | RES_COMPARE | |
| REQ_UNBIND | n/a | Connection closes |
| REQ_ABANDON | n/a | No response for this req |
| REQ_EXTENDED | RES_EXTENDED |
HTTP and HTTPS protocols
Table 5:HTTP Hooks
| Request | Response | Explanation |
|---|---|---|
| REQ_HTTP_GET | RES_HTTP | The RES_HTTP response |
| REQ_HTTP_POST | ditto | hook works for all HTTP |
| REQ_HTTP_HEAD | ditto | requests. |
Changing the Protocol
Before selecting a hook, you first need to select the protocol. When the hook selector comes up, the LDAP protocol is chosen by default. You may change the protocol by selecting it from the combo box at the top of the hook selector dialog.
Selecting one or more Hooks from the List
The list of hooks will always display the available hooks that you can add to your stage, based on the protocol that is selected. You can only add a specific hook once to each manual stage. If a certain hook is already added to the stage that you are adding hooks to, it will not appear in the list. You can select multiple hooks from the list before adding them to the stage. Once you have selected the hooks that you require, clicking the "OK" button will add the selected hooks to your stage. Alternately, you can cancel out of the hook selector by clicking on the "Cancel" button.
Adding Conditions to a Hook
A hook can contain zero or more conditions that determine what should happen when a packet matches certain characteristics. For example, if you are using LDAP, you may create a condition based on a SEARCH request that matches a specific search base, or that comes from a certain IP address. Whenever this condition matches a protocol packet, a Scriptlet (function written in DirectoryScript) is called. You specify this by providing the path to the file containing the DirectoryScript code, and the function name within the condition. The conditions available to Manual Stages are a superset of the condition model of Automatic Stages.
To define a condition for any hook, you will need to click on the hook in the configuration navigator. You will be able to see a list of currently attached conditions, as they are stored in the configuration file, and an "Add Condition" button that can be clicked to add a new condition.
Fig-59: The Hook Configuration Panel
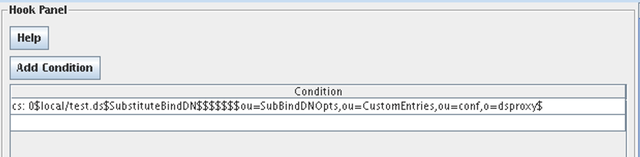
Each condition consists of several fields which are used to construct a dollar separated string which is stored in the configuration file as a 'cs' entry. The Hook Configuration Panel displays each 'cs' entry as it appears in the configuration file. The fields that make up the dollar separated strings that are presented are as follows:
Table 6:Fields used in a condition
| Field | Description |
|---|---|
| Seq | Running Sequence. This is managed by dsgui. You cannot change the sequence number, however you can move conditions up and down to order them sequentially to your preference. |
| Source | The name of the file containing the DirectoryScript function that you want to call when the condition matches. |
| Function | The name of the DirectoryScript function that is to be called when the condition matches. |
| Prio | An optional priority that should be assigned to the current packet that is being matched. For a list of all priorities, refer to the chapter titled "Configuration file format for dsproxy" in the Dell One Identity Virtual Directory Server Administrator's Reference Manual. Priority values are listed in the table entitled "Priority values" in the section "Hooks and Condition". |
| Suffix | A suffix of the request that should be matched. This has meaning only for protocols that support the notion of a suffix, such as LDAP and HTTP. For LDAP, this is the destination DN (distinguished name) or base of the request. For HTTP, this is typically the URL. For other protocols, the meaning of "suffix" can be found on the Dell One Identity Virtual Directory Server Developer's Reference Manual. |
| Bind DN | The credentials of the current client session that this protocol packet belongs to. For LDAP, this is the DN that was used by the client to BIND (authenticate). |
| IP / Mask | An IP range together with a subnet mask. You can use this mechanism to match a specific client range. |
| Condition | A special condition written in the VDS's versatile condition language. You can use this field to specify a highly flexible and customized condition that cannot be expressed by using the other fields. Information about VDS's condition language can be found in the Dell One Identity Virtual Directory Server Developer's Reference Manual. |
| Parameter | An optional parameter that will be made available to the function that is called whenever the condition matches. Your function will have access to this parameter typically by a special field (aka magic attribute) in the PDU structure. |
| Comment | An optional comment that you can use for informational purposes. Comments can be one line only. |
Note that nearly all of these fields are optional, and can be used in any combination that you like, to achieve the functionality that you require. This provides an exceedingly flexible way of controlling access to data. For instance, a condition entry that looks like this:
cs: 1$$$13$ou=protected,dc=mycompany,dc=com$$192.168.0.1$255.255.255.255$$$
will drop all connnections from the IP address 192.168.0.1 if the request is trying to access the ou=protected,dc=mycompany,dc=com branch.
When adding a new condition or editing an existing condition, you will be presented with the Condition Editor, which will appear in the configuration panel. This editor simplifies the task of constructing a 'cs' string by presenting the fields in an easy to edit form.
Fig-60: The Condition Editor

As conditions are added to the configuration, they will appear as entries in the configuration navigator. You can edit a condition by simply clicking on it within the navigator, and accessing the form that appears in the configuration panel. You can change the order of conditions (i.e. edit the 'seq' number) by right clicking on these entries and selecting the option to either move an entry up or down in the configuration.
Fig-61: Conditions in the configuration navigator

Specifying the Source
The input Source field has some extra functionality. It consists of a text field where you can enter a file name into the field. There are also two buttons to the left and right of the text field. The button to the right is labelled with three dots (...). When you click it, a file selector will pop up allowing you to select an existing file or to write the name of a new file to be used in this field. To the left of the text field is a small button labelled Edit. Clicking on this button will open up the specified file with the default DirectoryScript editor that you have defined in your DSGUI preferences.
When you click the Edit button, the editor will pop up in a new window with the contents of your file. If the file could not be found, a dialog will pop up asking you to confirm whether you would like to create the file, and the file will be created without any content.
DirectoryScript Editor
The built-in DirectoryScript editor is a simple editor that supports the basic editing of text files. The editor window has a menu bar, an editor field in which you can edit the text, and a status line below that indicates the current line number and column that you are editing.
Fig-62: DirectoryScript Editor Window

The editor supports a number of features:
- Preferences for Font and Tab Size
-
This is described in more detail in Editing preferences . Note that if you change the font, you need will need to reopen the file for the change to take effect. All tabs are automatically converted to spaces, so tab size is only significant for new lines (and autoindent).
- Syntax coloring
-
Supports numbers, strings, comments, reserved words, punctuation.
- Autoindent
-
Blocks of code are automatically indented.
- Brace matching
-
Positioning the cursor after a brace highlights both the opening and closing brace.
- Incremental Search
-
Press Control+I, enter text, use the up and down keys to navigate. Press Esc to continue editing.
- Unlimited undo / redo
-
available from the Edit menu.
- Current line highlighting
-
The line where the cursor is positioned is highlighted.
- Automatic insertion of function declarations
-
When opening a scriptlet, if the function declaration is present, the editor will position the cursor in its body. If the function declaration cannot be found, a default declaration will be inserted automatically.
The following menu options are available:
- File
-
The save command will save the changes to your file.
- Edit
-
The standard cut, copy, paste, undo and redo commands are available from this menu.
PLUGINS AND SAMPLES
VDS comes with a rich library of plugins that implement a wide range of useful functionality. As already described previously in this document, plugins are essentially pre-written DirectoryScript scriptlets that can be bundled with VDS. These scriptlets have their own configuration panels and are available within the DSGUI application to be used within Automatic Stages. Thanks to the staged processing model within VDS, plugins can be chained together to create very complex solutions. As of the version 6 Release of VDS, all plugins are independent 'modules' or 'extensions' that can be installed within DSGUI as required. By default, all bundled plugins provided with the release will be installed and enabled, so that they are ready to use out of the box. However, since the plugins are separate components that can be installed into the GUI, you no longer have to wait until a new release of the core software to obtain an updated or modified version of a plugin that better suits your environment. Furthermore, new extensions can be made available to you as they become available. The extension model that is used to handle plugins also allows to quickly develop a GUI configuration panel for Manual processing stages, to convert them into 'easy to use' configuration components that can be used within Automatic stages in the future. This means that customers, who require bespoke processing scripts and configuration options, can be catered for in a way that simplifies configuration of the product in the future. While Manual Stages will still prove useful to more advanced users, who wish to develop their own custom solutions, the extension model offers a way to develop custom scripts that can be used within Automatic Stages and which will include an intuitive configuration panel for your solution, so that they can be more easily configured and controlled.
For more detail on how to actually use plugins within an Automatic Processing Stage, please see the section on Automatic Stages .
Plugin Protocols and Groupings
Note that plugins will appear in the DSGUI application according to the protocol selected in the protocol selector and grouped by category. Currently the protocol selector provides options for LDAP, HTTP and Radius protocols. Plugins that apply to more than one protocol will appear in each protocol list. The list of protocols for which plugins are listed will change dynamically as extensions that support other protocols are added. Categories attempt to group plugins into logical usage scenarios. There are many situations where a plugin may not fall into a particular category very well, and there are a few categories that attempt to act as 'catch-all' categories to cover these plugins. The plugin categories are as follows:
-
Logging: All plugins that are designed to log protocol events are grouped into this category.
-
Authentication: Plugins that assist with Authentication issues, such as adding credentials to an anonymous BIND request, are grouped here.
-
Mapping and Transformation: Plugins that map attributes or suffixes and transform the contents of PDUs accordingly, are usually found here.
-
Security: Security related plugins that control data access or views can be found grouped into this category.
-
Data Validation: Plugins that control data input and presentation, such as the Enumeration and Limits plugins, appear here.
-
Caching and Virtual Content: This category is used for plugins that are used to store content in memory and serve it directly in response to requests.
-
Tools: This category acts as a 'catch-all' and is used for plugins that extend the functionality or behavior of a backend directory.
-
Directory Integration: Plugins that are commonly used to integrate data from multiple directories, or that solve problems for particular directory types will generally appear in this category.
-
Pagination: Plugins that resolve pagination issues for various LDAP servers and clients, are found here.
-
Routing: Plugins that control the routing of requests and responses based on particular variables are stored in this category.
Note that the categories that are listed will depend on which plugins are installed and enabled within your DSGUI configuration tool. The list may extend as new plugins are released and added to the product, and may diminish if you have removed or disabled some of the default plugins that are installed with the product.