
Inband destination selection
Using fix destination selection has the disadvantage of requiring one connection policy per protected server, because policies are mapped to servers based on IP addresses or port numbers.
Inband destination selection allows you to create a single connection policy and allow end-users to access any server. by including the name of the target server in their username (for example ssh username@targetserver:port@scb_address). SPS can extract the address from the username and direct the connection to the target server.
Figure 6: Inband destination selection
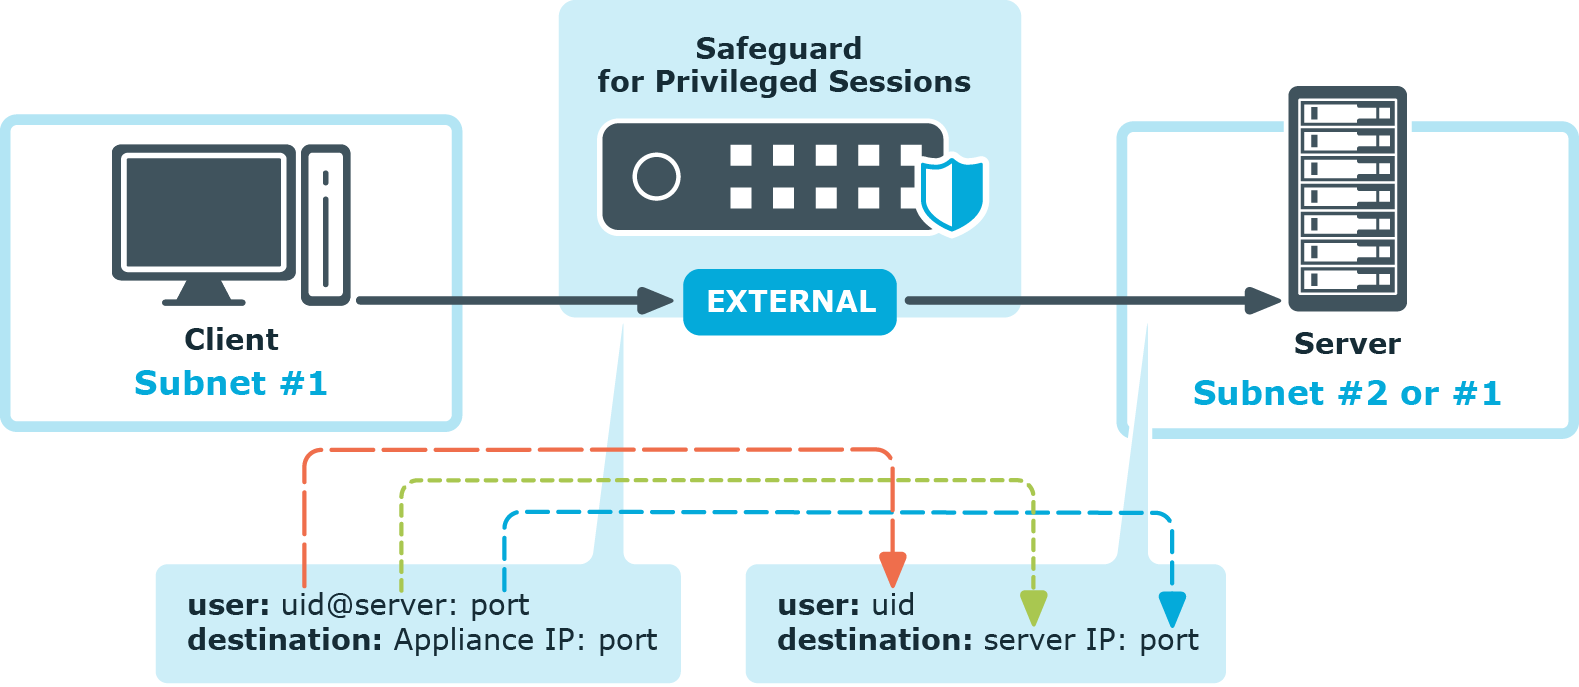
The process looks like the following:
-
End-users specify the destination server as part of the username, for example in the format of <username>@<server address>:<port>@<SPS address>, where the server and SPS address can be either a hostname or an IP address.
-
SPS tokenizes the username and the server address to forward the connection to.
-
SPS forwards the connection to the server.
For details, see Using inband destination selection in SSH connections.
Configuring inband destination selection
The following describes how to configure a Connection Policy to extract the address of the server from the username.
To configure a Connection Policy to extract the address of the server from the username
-
Navigate to the Connection policy you want to modify, for example, to SSH Control > Connections.
-
Select Inband destination selection.
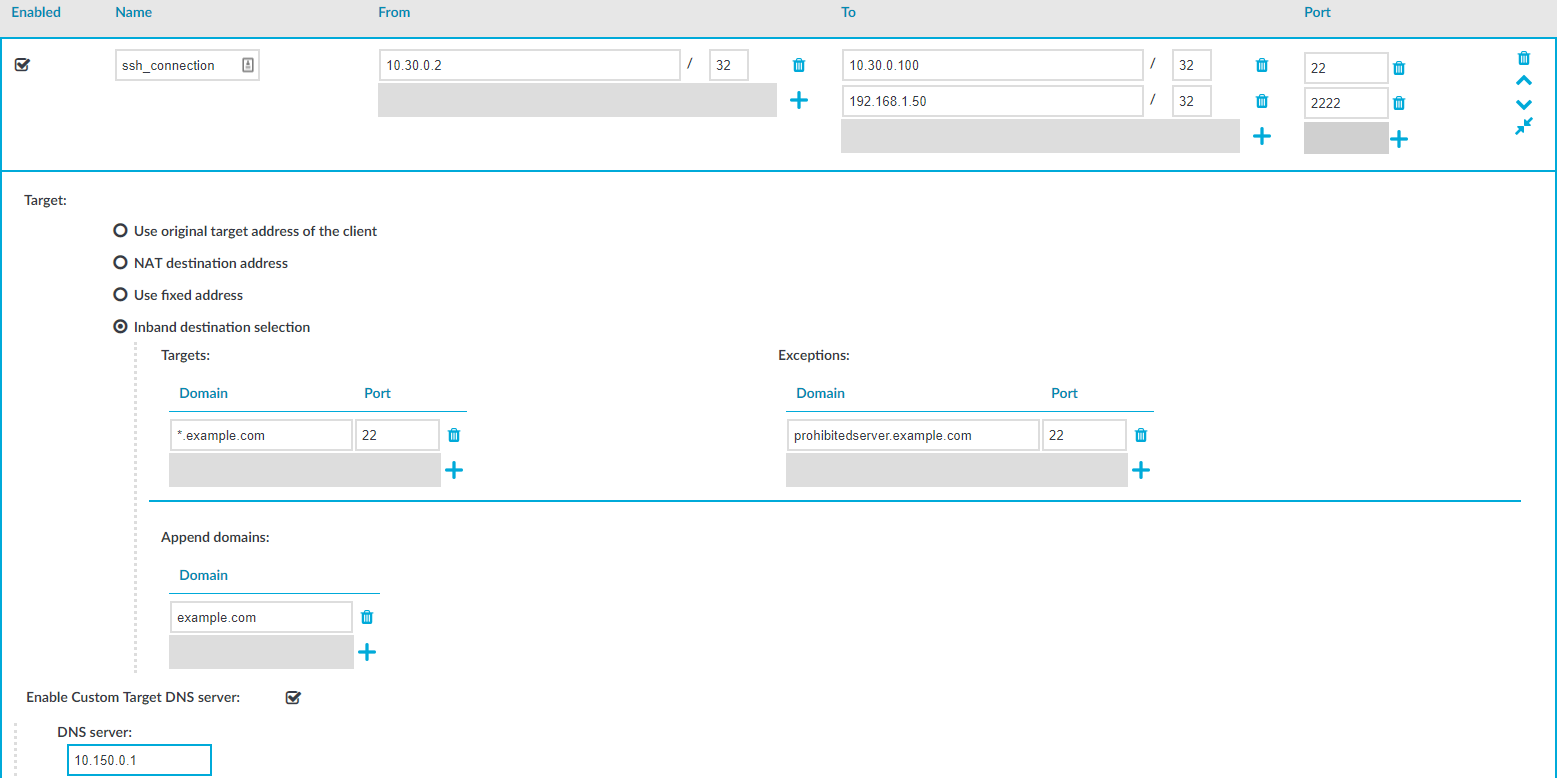
Figure 7: Configuring inband destination selection
-
Enter the addresses of the servers that the users are permitted to access into the Targets field.
-
If the clients can access only a specified port on the server, enter it into the Port field. If the Port is not set, the clients may access any port on the server.
-
If there are any servers that the users cannot target using inband destination selection, add them to the Exceptions field.
-
Click
.
Example: Initiating a connection
Once the connection policy is configured correctly, a sample connection initiation would look like the following:
$ ssh root@192.168.56.10@192.168.56.200
-
root = server user
-
192.168.56.10 = target server
-
192.168.56.200 = IP address of SPS
-
Gateway authentication
When gateway authentication is required for a connection, the user must authenticate on SPS as well. This additional authentication can be performed on the SPS web interface, so it provides a protocol-independent, outband authentication method. That way the connections can be authenticated to the central authentication database (for example LDAP or RADIUS), even if the protocol itself does not support authentication databases. Also, connections using general usernames (for example root, Administrator, and so on) can be connected to real user accounts.
Figure 8: Gateway authentication
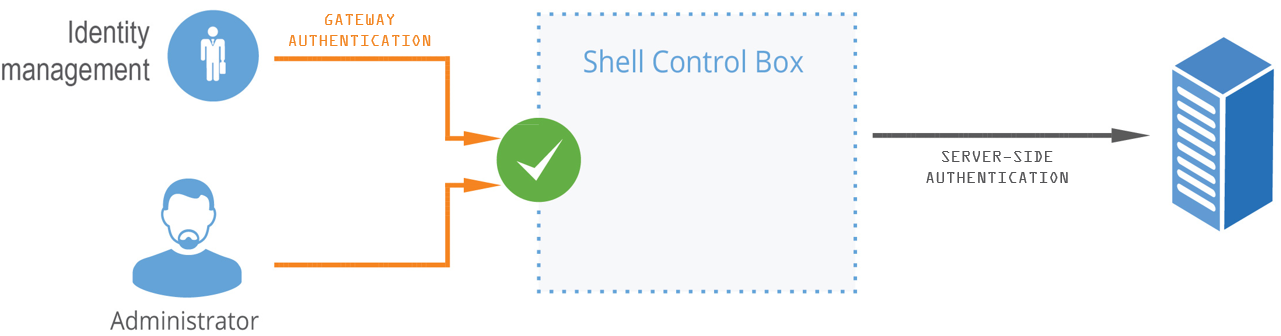
For details on gateway authentication, see The gateway authentication process.
Password-based gateway (local) + password-based server-side authentication from credential store
The goal of this scenario is to demonstrate an SSH connection in which end-users must authenticate themselves successfully with their own passwords against a local user database maintained on SPS and have a session opened to the requested destination with a different account without any further interaction (that is, have SPS complete the password-based login process).
To configure password-based gateway (local) + password-based server-side authentication from credential store
-
Create a local user database:
Navigate to Policies > Local User Databases and create a local user database.
For details, see Creating a Local User Database.
-
Connect the local user database with a client-side gateway authentication policy:
Navigate to SSH Control > Authentication Policies. Create an authentication policy. Select Authenticate the client to SPS using > Local. Select Password. Configure the required settings.
For details, see Local client-side authentication.
-
Create a user list:
Navigate to Policies > User lists and create a user list.
For details, see Creating and editing user lists.
-
Create a usermapping policy:
Navigate to Policies > Usermapping policies and create a usermapping policy.
For details, see Configuring usermapping policies.
-
Create a local or remote credential store with the server user and its password. SPS provides a plugin framework to integrate with other remote credential stores/password management systems.
For details, see Using a custom Credential Store plugin to authenticate on the target hosts.
-
Expected outcome:
If all prerequisites are met, SPS is ready to perform inband gateway authentication in an SSH session, which together with inband destination selection could be performed with the following connection string by an end-user:
Example: Inband gateway authentication and destination selection
$ ssh gu=myusername@root@192.168.56.10@192.168.56.200
-
gu=myusername = gateway user (myusername)
-
root = server user
-
192.168.56.10 = target server
-
192.168.56.200 = IP address of SPS
-