Installing the Active Roles Management Shell
The Active Roles Management Shell component allows you to manage and configure Active Directory and Active Roles objects, Active Roles Administration Service instances, or Web Interface sites via PowerShell scripting.
NOTE: The Active Roles Management Shell can be installed and used by any Active Roles On Demand user.
To install the Active Roles Management Shell
-
Launch the installer package of the Management Shell from the Active Roles source files. The files are available at the following locations of the extracted Active Roles installer (when using the .zip file) or the mounted .iso image:
-
If you use a 32-bit operating system, run \Components\ActiveRoles Management Shell\x86\Shell_x86.msi
-
If you use a 64-bit operating system, run \Components\ActiveRoles Management Shell\x64\Shell_x64.msi
NOTE: The installation will progress without interaction, and will complete without a completion prompt.
Upon completion, the Active Roles Management Shell will appear in the Windows Start Menu as Active Roles 7.5.3 Management Shell.
-
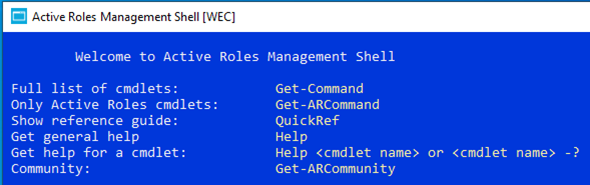
To verify that the Management Shell has been installed properly, launch it by clicking Active Roles 7.5.3 Management Shell in the Windows Start Menu.
The Management Shell interface will appear.
Adding the first domain to the Active Roles Console
After installing the Active Roles Console (also known as the MMC Interface) as described in Installing the Active Roles Console, you must add a new domain to Active Roles On Demand with it.
To add a Domain to Active Roles On Demand
-
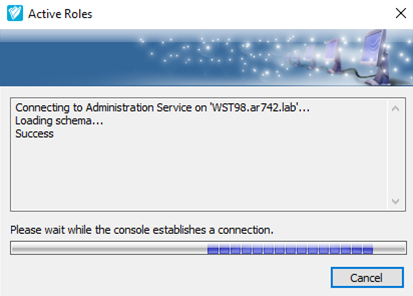
On a workstation where the Active Roles Console is installed, launch the Console from the Windows Start Menu by navigating to One Identity Active Roles 7.5.3 > Active Roles 7.5.3 Console.
The Console will automatically find the Active Roles server and connect.
-
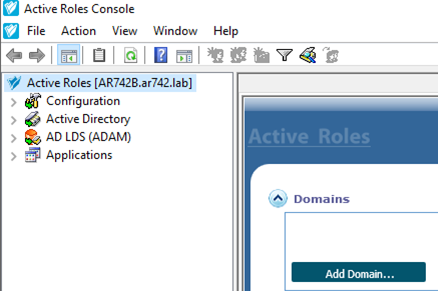
To open the Add Managed Domain Wizard, click Add Domain in the middle pane, then click Next.
-
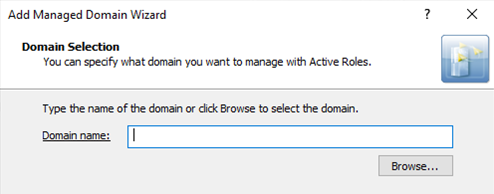
In the Domain Selection step, either enter the name of the Active Directory domain you want to manage in Active Roles into the Domain name field, or click Browse to select it.
-
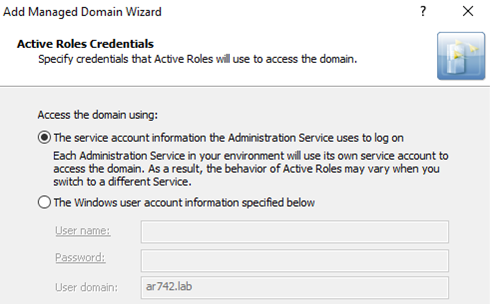
In the Active Roles Credentials step, select the default service account Active Roles was configured with.
-
For typical use cases, select The service account information the Administration Service uses to log on.
-
If the domain to add is not in the same domain as the Active Roles server, or you must use a different account because of any technical or administrative reason, select The Windows user account information specified below, and provide the service account credentials.
-
Review your changes, then to apply the domain configuration, click Finish.
-
The configured domain then appears grayed out on the Active Roles Console while it loads information into Active Roles. To refresh the loading status, click Click to update the display.
When this one-time loading operation finished, the Domain information is being loaded state will change to Available for management, and the Active Directory domain will appear in the Active Roles Console on the left pane under the Active Roles > Active Directory node.
Validating the Active Roles Web Interfaces
When you specified a new domain as described in Adding the first domain to the Active Roles Console, confirm that each Active Roles web interface (that is the Administrator Site, the Help Desk Site and the Self-Service Site) opens and works properly.
To validate the Active Roles Web Interfaces
On any workstation, open each of the following web sites in a supported browser to confirm they are working properly:
-
Administrator Site: http://<activeroles-fqdn-servername>/ARWebAdmin
-
Help Desk Site: http://<activeroles-fqdn-servername>/ARWebHelpDesk
NOTE: The home page level of the Help Desk Site looks the same as the Administrator Site.
-
Self-Service Site: http://<activeroles-fqdn-servername>/ARWebSelfService
When prompted for credentials for any of the interfaces, use your Active Directory credentials.
Installing the Active Roles Collector and Report Pack
Optionally, if you require Active Roles reporting capabilities, install the Active Roles Collector and Report pack. For more information on the available reports, see Available Active Roles Reports.
NOTE: Although this component must be installed on-premises, the reporting database itself is hosted in the Active Roles SaaS tenant in Azure SQL. Therefore, no on-premises database sizing is required.
Prerequisites
Make sure that the following conditions are met before installing the Active Roles Collector and Report Pack:
-
The SQL server and SQL Server Reporting Services are installed, configured, and confirmed to be running on premises.
TIP: One Identity recommends the Reporting Services web portals use SSL certificates.
-
A server is available to:
This server will act as the on-premises Active Roles Reporting Server, and will be referred to as such in later parts of the configuration procedure.
-
The following PowerShell modules are available:
-
Exchange Online PowerShell v2 module x64
NOTE: Use version v2.0.3 of the module.
To install the module, enter the following command:
Install-Module -Name ExchangeOnlineManagement -RequiredVersion 2.0.3
-
A dedicated Active Roles Reporting domain service account is available.
NOTE: When using a dedicated Active Roles Reporting domain service account, you must explicitly grant Log on as a batch job user rights assignment on the Active Roles Reporting Server, as indirect membership will not work.
To grant Log on as a batch job user rights assignment for the Active Roles domain service account
-
On the Active Roles Reporting Server, right-click the Windows Start menu and click Run.
-
Type gpedit.msc and click OK.
-
Navigate to Computer Configuration > Windows Settings > Security Settings > Local Policies > User Rights Assignment.
-
Double-click Log on as a batch job and add the Active Roles Reporting domain service account.
-
To refresh the policy change and have it take effect immediately, open a Command Prompt and type gpupdate /force.
-
The Active Roles Reporting domain service account must be a member of:
-
The Active Roles Administrators group, so that it can read all Active Roles configuration data. For more information on configuring the Active Roles Administrators group, see First-time configuration of Active Roles On Demand
-
(Optional) The local Event Log Readers group of the Active Roles Reporting Server to read all event logs from the Active Roles Admin Service event log. However, leveraging a Log Management or SIEM solution may be preferred instead.
To install the Active Roles Collector and Report pack
-
On the Active Directory Reporting Server, in the root folder of the extracted Active Roles installer (when using the .zip file) or the mounted .iso image, right-click ActiveRoles.exe and run it as an administrator.
-
On the Introduction screen, select the Due to the new features... check box, and review the linked license requirements. When you are ready, click Next.
-
In the License Terms step, select I accept the terms in the license agreement and click Next.
-
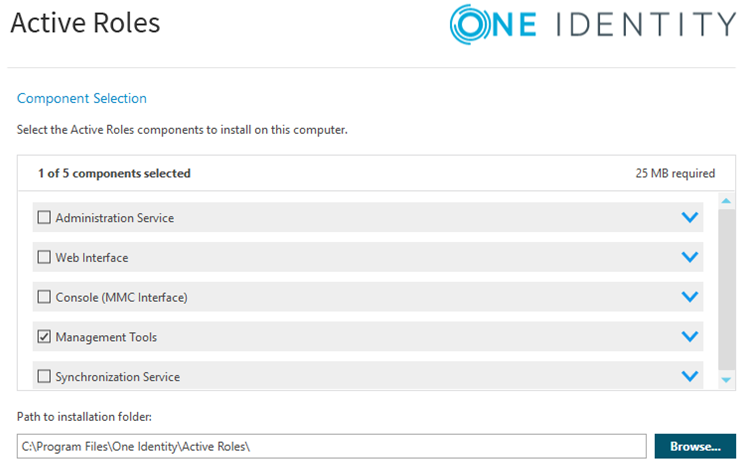
In the Component Selection step, select only Management Tools from the list, and specify the installation folder path.
-
In the Ready to Install step, verify that only the Management Tools are selected and click Install.
NOTE: The Install button may be grayed out if any prerequisite software is missing at this point. All missing software are listed and linked in this step.
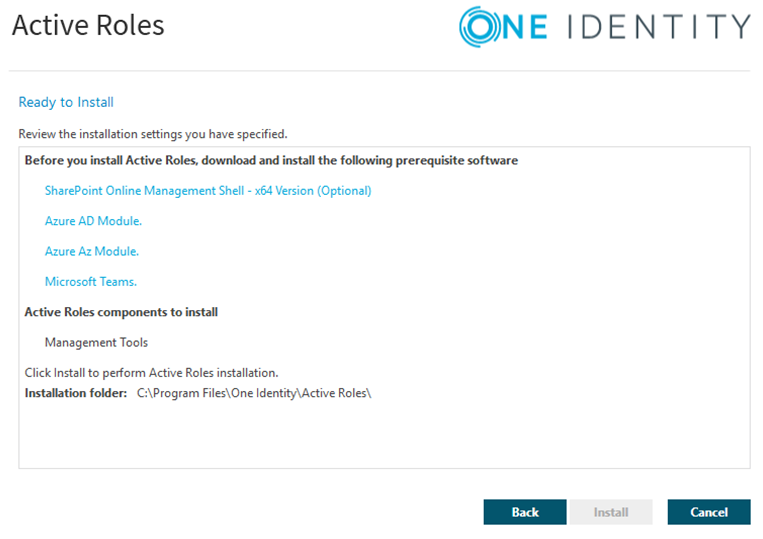
To finish the installation of the Active Roles Management Tools, install all listed prerequisite software, click Back, then Next, and finally Install, when it is enabled.
-
The installation will begin. Monitor the progress on the Setup Progress page. When installation is ready, on the Completion page, click Finish
-
From the Active Roles source files of the extracted Active Roles installer (when using the .zip file) or the mounted .iso image, run the \Solutions\Collector and Report Pack\ActiveRolesCollectorAndReports_7.5.3.msi package.
-
On the introduction screen, click Next.
-
In the License Terms step, accept the license terms and click Next.
-
In the Installation Folder step, enter the path where you want to install Active Roles Collector and Report Pack.
-
In the Ready to Install step, click Install, then click Finish when installation completed.
