Labeling changed data
Changes to data are labeled with extra icons in front of the modified value. As long as the changes have not been saved, you can undo the changes by clicking on the icon.
Figure 9: Labeling changed data

Table 20: Labeling the input fields when data changes
|

|
Changed value. The value is not yet saved. Click the icon to discard the change. |
|

|
The value will be changed at a specified time. You can change the value only at the specified time. |
|

|
The value will be changed at a specified time. |
For detailed information about planning activation times, see the One Identity Manager Operational Guide.
Displaying the column names
The column name is shown for every input field. If the full column name is too long to display, it is shortened with [...]. Use a tooltip to display the full name.
In the Manager, you can display the technical names of the columns in expert mode. in the format column@table.
To display the technical names in expert mode in the Manager
Related topics
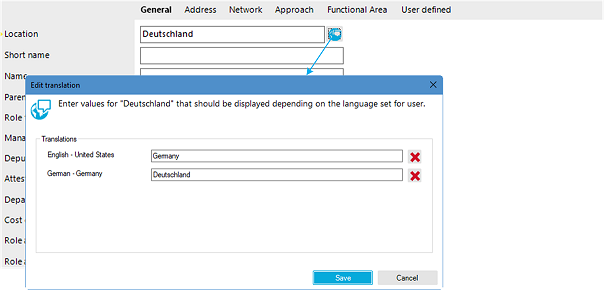
Translating entries
For more information about localization in One Identity Manager, see in the One Identity Manager Configuration Guide.
If a column is marked as multilingual, an extra button  is displayed next to the input field.
NOTE:
-
The value is always entered in the input field in the specified default language. The value is then translated into the required languages.
-
The translations are only used to display a value, for example, in the overview form or in lists. The input fields to be edited still show the value entered in the default language.
-
You can edit translations in different places. When you change a translation, all those places are shown. Before changing a translation, check in the Designer about how it is used.
-
Users can only edit object and column translations for which they have permissions.
-
To edit all translations, users require the Allow translation of text data regardless of the edit permissions for the base object program function (Common_Translation).
To translate an entry:
-
Click beside the input field to open the dialog window for entering the translations.
-
Use next to the translation field to delete a translation.
NOTE: You can use the  button beside the translation input to delete a translation.
-
Click Save.
Figure 10: Translating entries
Entering a list of permitted values
If you have the option to set a list of permitted values for a column, the input field looks like this:
-
If there is no defined list, enter the value in the simple input field that appears.
-
If there is a defined list, select the value from the selection list that appears.
Figure 11: Selecting from a list of permitted values

The control on the default forms in the Manager is only available for the predefined columns and for the user-defined columns (generally Spare field no. 01–Spare field no. 10).
