If an external user (such as a contractor, or other non-employee resource with limited permissions) must be added to the organization, invite them as Azure guest users to the Azure tenant of the organization using the Active Roles Web Interface.
To invite an Azure guest user
-
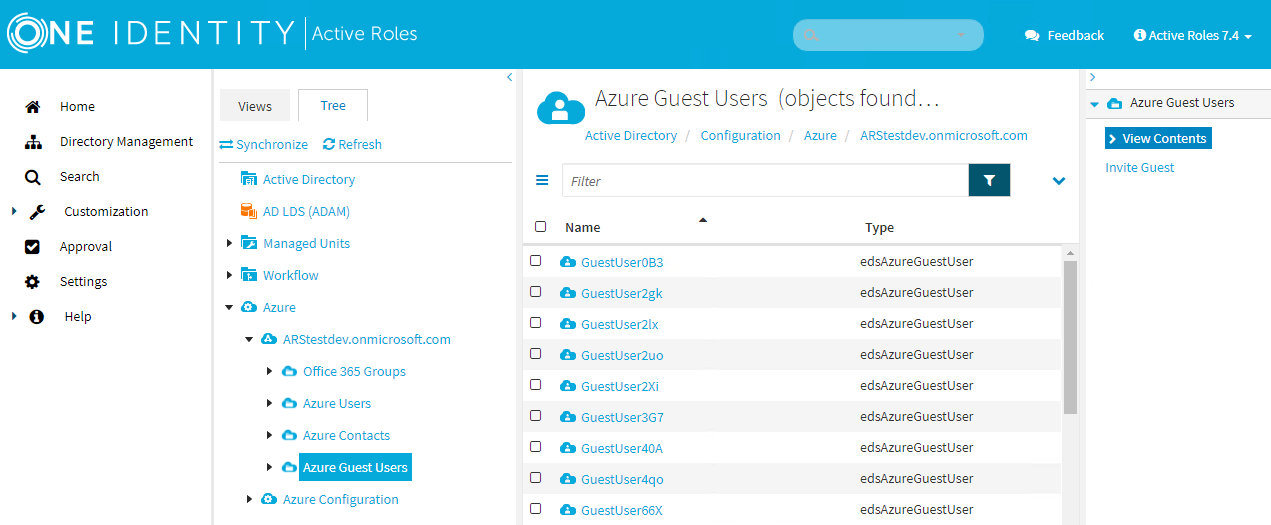
Navigate to Directory Management > Tree > Azure > <azure-tenant-name> > Azure Guest Users.
The list of Azure guest users of the selected tenant is displayed.
Figure 30: Directory Management > Tree View > Azure > <azure-tenant-name> > Azure Guest Users — Listing the Azure guest users in the tenant
-
In the right-side pane, click Invite Guest.
You will invite a new guest user, and set up their account, application licenses and various admin roles, too.
-
Identity
Configure the settings required by your organization for setting up the identity of the guest user.
Figure 31: Azure Guest Users > Invite Guest > Identity – Configuring basic user account settings for the Azure guest user
-
(Optional) Enter the First Name of the Azure guest user.
NOTE: If you do not enter a First Name, Active Roles will fill this field with the local part of the specified Email address.
-
(Optional) Enter the Last Name of the Azure guest user.
-
(Optional) Enter the Display Name of the Azure guest user.
TIP: By default, the Display Name is automatically generated from the specified First Name and Last Name, but you can modify it to something else (such as a nickname).
CAUTION: Hazard of data loss!
The Display Name field supports special characters. However, to avoid any potential problems in Active Roles when managing the Azure object, do not use any semicolons (;) in the specified display name.
-
Enter the Email address where Active Roles will send out the invitation. This field is mandatory and must be unique.
-
(Optional) Enter the Azure Tenant ID of the Azure tenant that will contain the guest user.
-
To grant the Azure guest user access to the configured licenses and admin roles, select Allow user to sign in and access services.
-
If this setting is selected during this step, the guest user will receive access as soon as they accept the invitation.
-
If left clear, you must manually grant access later by enabling this setting in the Azure Properties page of the guest user. For more information, see Viewing and updating the properties of an Azure guest user.
TIP: Leaving this setting clear is useful if the account of the Azure guest user is created in advance, and they require access to the assigned resources only later (for example, because their contract project starts only at a later date).
-
-
(Optional) Enter a unique Personal message that the invitation email will contain.
-
-
Licenses
Select the Microsoft application resources licensed in your organization that you want to assign to the configured Azure guest user.
Figure 32: Azure Guest Users > Invite Guest > Licenses – Assigning application licenses to the Azure guest user
-
O365 Admin Roles
Select the O365 role(s) that you want to grant for the Azure guest user.
Figure 33: Azure Guest Users > Invite Guest > O365 Admin Roles – Assigning Office 365 administrator roles to the Azure guest user
NOTE: You can assign roles to the Azure guest user in Active Roles without any limitation. However, One Identity recommends that you assign Azure guest users only the admin roles that external contractors typically receive in your organization.
-
(Optional) Job Info
Enter the Job Title and the assigned Department of the guest user, if needed.
Figure 34: Azure Guest Users > Invite Guest > Job Info – Specifying organizational information for the Azure guest user
-
To save your changes and send the invite email to the guest user, click Finish.
NOTE: Consider the following when administering cloud-only Azure guest users:
-
You can resend the invitation later for the guest user, if needed. For more information, see Resending the invitation to an Azure guest user.
-
You can modify the user account settings later, if needed. For more information, see Viewing and updating the properties of an Azure guest user.
-