It can happen that the invitation email sent out at the end of the Inviting an Azure guest user procedure must be sent again to the Azure guest user (for example, because the guest user cannot access the specified email address for some reason, or because the previous invitation was accidentally deleted). In such cases, you can resend the invitation email.
To resend the invitation to an Azure guest user
-
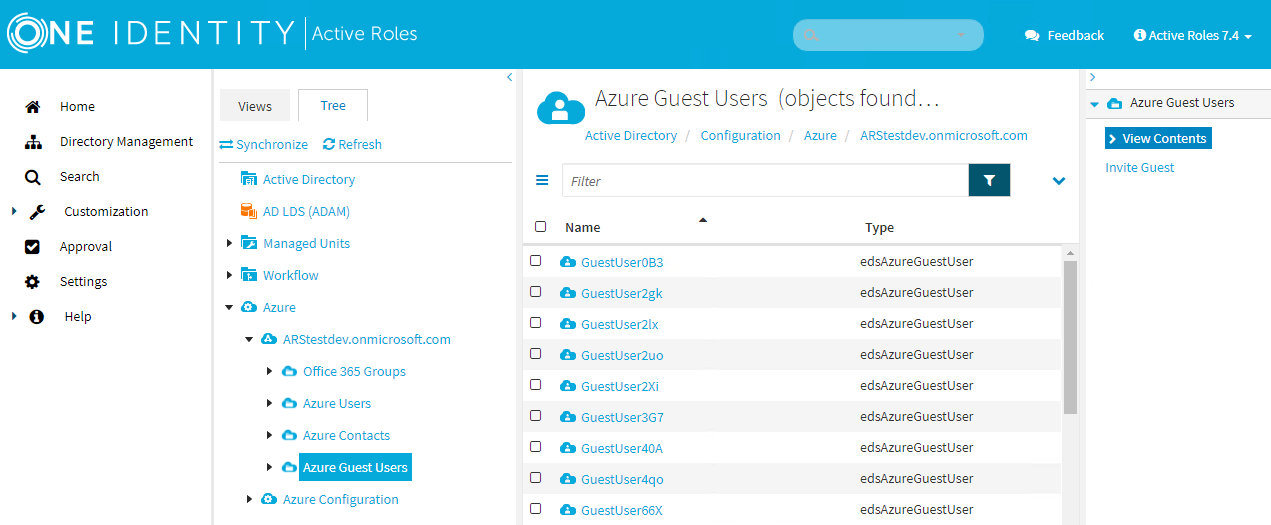
Navigate to Directory Management > Tree > Azure > <azure-tenant-name> > Azure Guest Users.
The list of Azure guest users of the selected tenant is displayed.
Figure 38: Directory Management > Tree View > Azure > <azure-tenant-name> > Azure Guest Users — Listing the Azure guest users in the tenant
-
Select the Azure guest user for which you want to resend the invitation.
-
Click Resend Invitation.
Active Roles will then resend the invitation to the email address previously specified with the Invite Guest > Email address property.
If an Azure guest user account must be renamed for any reason (for example, to fix a typo or an incorrect first/last name), you can use the Rename option of the Active Roles Web Interface.
To rename an Azure guest user
-
Navigate to Directory Management > Tree > Azure > <azure-tenant-name> > Azure Guest Users.
The list of Azure guest users of the selected tenant is displayed.
Figure 39: Directory Management > Tree View > Azure > <azure-tenant-name> > Azure Guest Users — Listing the Azure guest users in the tenant
-
Select the Azure guest user that you want to rename.
-
To open the rename form, click Rename.
Figure 40: Azure Guest Users > Rename – Renaming an Azure guest user

-
Update the First Name, Last Name or Display Name of the guest user as needed.
|

|
CAUTION: Hazard of data loss!
The Display Name field supports special characters. However, to avoid any potential problems in Active Roles when managing the Azure object, do not use any semicolons (;) in the specified display name. |
-
To apply your changes, click Finish.
Once you configured and invited a new Azure guest user as described in Inviting an Azure guest user, you can modify their account settings with the Azure Properties option later if any change occurred to the user that must be reflected in their account.
To view and update the properties of an Azure guest user
-
Navigate to Directory Management > Tree > Azure > <azure-tenant-name> > Azure Guest Users.
The list of Azure guest users of the selected tenant is displayed.
Figure 41: Directory Management > Tree View > Azure > <azure-tenant-name> > Azure Guest Users — Listing the Azure guest users in the tenant
-
From the list in the middle pane, select the Azure guest user that you want to update.
-
To open the properties of the selected Azure guest user, click Azure Properties on the right pane.
-
In the available Azure Properties pages, configure the Azure guest user settings that you want to change.
Table 2: Available Azure properties
| Identity |
View and configure user identity settings and information in this tab. |
| Settings |
View and configure user authentication settings in this tab. |
| Job Info |
View and configure job and organizational information in this tab. |
| Contact Info |
View and configure contact and location information in this tab.
Note: You can only update certain Contact Info properties (such as phone numbers or email addresses) for non-administrator Azure guest users, or for Azure guest users with a specific set of limited administrator roles. For more information on these roles, see the Update User page of the official Microsoft documentation.
Attempting to update these properties for an Azure guest user with different administrative roles assigned to it will result in failure, and the following error log message appearing in the Windows Event Log: Post-processing operation on object caused a policy violation. |
| Licenses |
View and configure the Microsoft application resources available in the organization to the Azure guest user. |
| O365 Admin Roles |
View and configure the O365 roles in the organization granted for the guest user. |
-
To apply your changes, click Save.
NOTE: Active Roles lists the available cloud-only Azure users, Azure guest users, and Azure contacts on the Active Roles Web Interface with the following restrictions:
-
Active Roles can initially list 999 items.
-
The items listed in the list have a sliding expiry of 8 hours, after which the objects that have not been accessed will be flushed.
-
Whenever you perform a search in the list, Active Roles will always fetch the list of objects from Azure to update the cache.
You can update the name settings of an Azure guest user in an Azure tenant with the Azure Properties > Identity tab.
Note: You can only change the First Name and Last Name settings of the guest user on this tab. You can change the rest of the identity settings when inviting the guest user. For more information, see Inviting an Azure guest user.
To update the settings of an existing Azure guest user
-
On the Active Roles Web Interface, navigate to Directory Management > Tree View > Azure > <azure-tenant> > Azure Guest Users.
-
From the list in the middle pane, select the Azure guest user that you want to update.
-
To open the properties of the selected Azure guest user, click Azure Properties on the right pane.
-
To open the name settings, click the Identity tab.
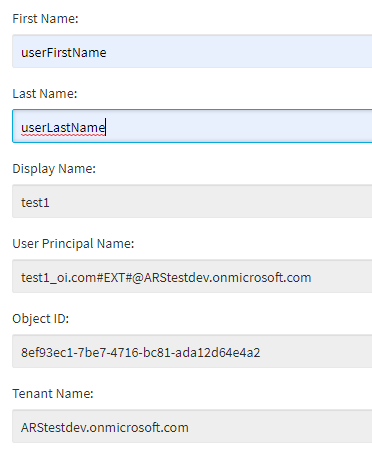
Figure 42: Directory Management > Tree View > Azure > <azure-tenant> > Azure Guest Users > <azure-guest-user> > Azure Properties > Identity — Configuring the identity-related information of an Azure Guest user
-
Enter the First Name of the Azure guest user. If no first name has been specified in this field when inviting the Azure guest user, this text box contains the local-part of the email address where the invite has been sent.
-
Enter the Last Name of the Azure guest user.
-
To apply your changes, click Save.
NOTE: You can also view the following identity properties of the selected Azure guest user on this page:
-
Display Name: Shows the display name of the Azure guest user. By default, the display name consists of the specified First Name and Last Name.
TIP: You cannot directly modify the Display Name of the guest user on this tab. To do that, use the Rename action. For more information, see Renaming an Azure guest user.
-
User Principal Name: Displays the User Principal Name (UPN) of the Azure guest user. The UPN has the following syntax:
<azure-guest-user-email-address>#EXT#@<azure-tenant>
-
Object ID: Displays the object ID of the Azure guest user
-
Tenant Name: Displays the Azure tenant containing the Azure guest user.
