Creating a script
Creating a script
To create a new script module, in the console tree, right-click Script Modules and select New | Script Module. This opens the New Object - Script Module wizard.
|

|
TIP: It is advisable to store custom script modules in a separate container. You can create a container as follows: Right-click Script Modules in the console tree, and select New | Scripts Container. After you have created a container, you can have the wizard add a script module to that container rather than directly to Script Modules: right-click the container in the console tree and select New | Script Module. |
The first page of the wizard looks as shown in the following figure.
Figure 62: Script module: Creating a script
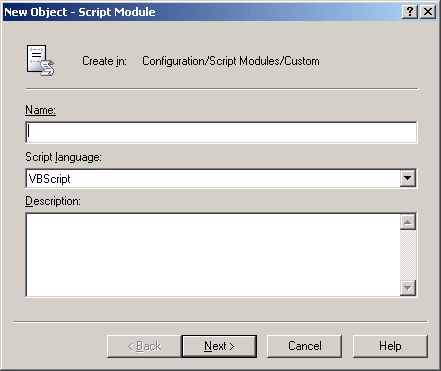
Type a name and description for the new script module, and select script language. Then click Next. The next page looks as shown in the following figure.
Figure 63: Script Module: Policy script
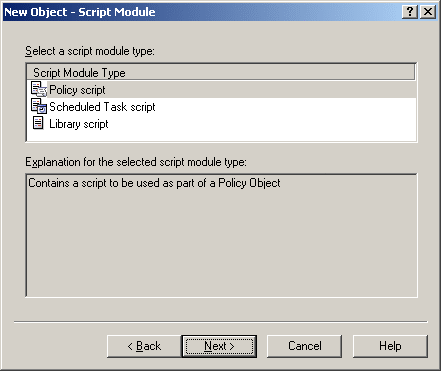
On this page, select a type of the script module. Select Policy script to create a script that will be used as part of the Policy Object. The other options are:
- Scheduled Task script. Script that you can schedule to run on the Administration Service.
- Library script. Script to be used by other script modules. You can collect commonly used functions into a standalone script module and include it in other modules requiring those functions. This allows you to re-use some pieces of existing scripts, thus reducing development effort and time.
Select Policy script and click Next. This displays the page with a list of event handler functions shown in the following figure.
Figure 64: Script Module: Event handler functions
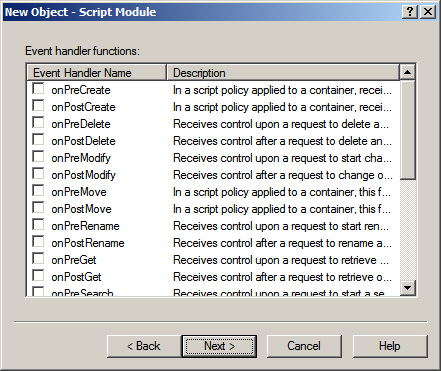
On this page, select functions to be used in the script, and click Next. Then, click Finish to create the script module.
For instructions and guidelines on how to develop policy scripts, refer to the Active Roles Software Development Kit (SDK).
In the Active Roles console, you can view and modify scripts, both imported and newly created.
Editing a script
Editing a script
To edit a script, select it in the console tree under Configuration/Script Modules. You can view and modify the script in the details pane. To start editing the script, right-click the script module and click Edit Script. Then, click Yes to confirm the operation. You can make changes to the script in the details pane.
When you are editing the script, a red asterisk is displayed next to the name of the script module in the console tree. This indicates the changes you are making to the script are not saved. You can undo your changes or save them:
- To undo changes, press CTRL+Z. (The redo function is also available: press CTRL+Y.)
- To undo all unsaved changes, right-click the script module and click Discard Changes. (This operation is irreversible: if you perform this command, your changes to the script are lost.)
- To save the changes, right-click the script module and click Save Script on Server.
When the script module is ready, you can proceed to configuring a script policy that will use the prepared script module.
Active Roles allows you to attach a debugger to the Administration Service’s script host for a given policy script or scheduled task script. When the script is being executed by the specified Administration Service, the debugger may help you identify and isolate problems, if any, with the policy or task based on that script.
To enable debugging of a script in the Active Roles console, display the Properties dialog box for the script module containing the script, go to the Debugging tab, and select the Enable debugging check box. From the Debug on server list, select the Administration Service where you want the debugger to run.
Configuring a policy to execute a script
Configuring a policy to execute a script
To configure a script-based policy, select Script Execution on the Select Policy Type page in the New Provisioning Policy Object wizard, in the New Deprovisioning Policy Object wizard, or in the Add Policy wizard. Then, click Next to display the Script Module page.
Figure 65: Script Module: Executing a script
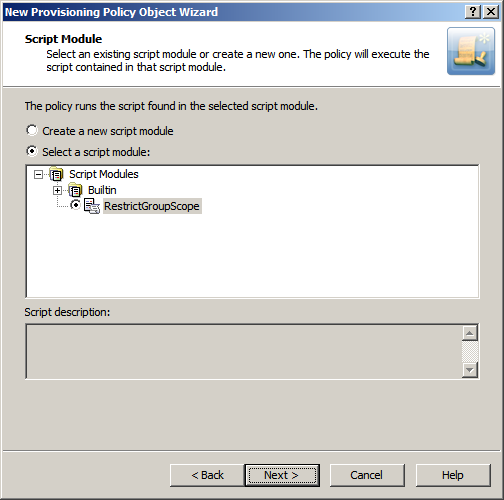
On this page, click Select a script module and select the script module. Then, click Next and follow the instructions in the wizard to create the Policy Object.
Steps for configuring a Script Execution policy
To configure a Script Execution policy
- On the Policy to Configure page, select Script Execution, and then click Next.
- On the Script Module page, do one of the following:
- To use an existing script module, click Select a script module, and select the script module in the box beneath this option.
- To create a new script module, click Create a new script module, and click Next. Then, specify a name for the script module, and click Next. Then, select the event handlers you want the script module to include.
- Click Next.
- On the Policy Parameters page, do the following:
- If necessary, from the Function to declare parameters list, choose the function that defines the parameters specific to this policy.
The list contains the names of all script functions found in the selected Script Module. The policy has the parameters that are defined by the function specified in the Function to declare parameters box. Normally, this is a function named onInit.
- Under Parameter values, view or change the values of the policy parameters. To change the value of a parameter, select the name of the parameter and click Edit.
Clicking Edit displays a page where you can add, remove, or select a value or values for the selected parameter. For each parameter, the function that is used to declare parameters defines the name of the parameter and other characteristics, such as a description, a list of possible values, the default value, and whether a value is required. If a list of possible values is defined, then you can only select values from that list.
- On the Enforce Policy page, you can specify objects to which this Policy Object is to be applied:
- Click Add, and use the Select Objects dialog box to locate and select the objects you want.
- Click Next, and then click Finish.
To create a script module
- In the console tree, under Configuration | Script Modules, locate and select the folder in which you want to add the script module.
You can create a new folder as follows: Right-click Script Modules and select New | Scripts Container. Similarly, you can create a sub-folder in a folder: Right-click the folder and select New | Scripts Container.
- Right-click the folder and select New | Script Module.
- Specify the name and language of the module to create. Then, click Next.
- In Select a script module type, click the type of the module to create. Then, click Next.
- If you selected the Policy script type for the module, select the event handlers you want the module to include, and then click Next.
- Click Finish.
To edit a script module
- In the console tree, expand Configuration | Script Modules.
- Under Script Modules, click the folder that contains the script module you want to edit.
- In the details pane, right-click the script module, and then click Edit Script.
- Use the details pane to make changes to the script.
- Right-click the script module in the console tree, and do one of the following:
- To commit the changes you have made, click Save Script on Server.
- To quit the script editor without saving your changes, click Discard Changes.
To import a script module
- In the console tree, under Configuration | Script Modules, locate and select the folder in which you want to add the script module.
You can create a new folder as follows: Right-click Script Modules and select New | Scripts Container. Similarly, you can create a sub-folder in a folder: Right-click the folder and select New | Scripts Container.
- Right-click the folder, and click Import.
- Locate and select the file containing the script to import, and click Open.
To export a script module
- In the console tree, expand Configuration | Script Modules.
- Under Script Modules, select the folder that contains the script module you want to export.
- In the details pane, right-click the script module, and select All Tasks | Export.
- Specify the file to which you want to save the script, and then click Save.
