Generating TSA certificate with Windows Certificate Authority on Windows Server 2008
To generate a TSA certificate with Windows Certificate Authority (CA) that works with syslog-ng Store Box (SSB), generate a CSR (certificate signing request) on a computer running OpenSSL and sign it with Windows CA, then import this certificate into SSB for time stamping.
Prerequisites:
A valid configuration file for OpenSSL with the following extensions:
[ tsa_cert ]
extendedKeyUsage = critical,timeStamping
TIP: You can copy /etc/ssb/openssl-ca.cnf from SSB to the computer that will be used for signing. Rename the file to openssl-temp.cnf.
The TSA certificate is considered valid, in terms of compatibility with SSB, if the following conditions are met:
-
Must be a valid CA certificate (CA is true).
-
Key Usage: Time Stamping is required. No other key usage is permitted.
-
Extended Key Usage: Must be set to critical.
-
Optional Key Usage: If Key Usage is present, it must be digitalSignature and/or nonRepudiation. Other values are not permitted. Make sure that in Encryption, Allow key exchange without key encryption (key agreement) is selected.
|

|
Caution:
In Encryption, do NOT select Allow key exchange only with key encryption (key encipherment), because it will result in errors. |
The following X509v3 extensions are supported:
-
Hard requirement:
X509v3 Extended Key Usage must be critical, and must only contain Time Stamping.
-
Optional:
X509v3 Key Usage, if present, must be digitalSignature and/or nonRepudiation.
To generate TSA certificate with Windows Certificate Authority on Windows Server 2008
-
Create CSR using the new configuration file: openssl req -set_serial 0 -config openssl-temp.cnf -reqexts tsa_cert -new -newkey rsa:2048 -keyout timestamp.key -out timestamp.csr -nodes
-
Complete the required fields according to your environment:
Generating a 2048 bit RSA private key
........................+++
......................................+++
writing new private key to 'timestamp.key'
-----
You are about to be asked to enter information that will be incorporated
into your certificate request.
What you are about to enter is what is called a Distinguished Name or a DN.
There are quite a few fields but you can leave some blank
For some fields there will be a default value,
If you enter '.', the field will be left blank.
-----
Country Name (2 letter code) [AU]:HU
State or Province Name (full name) []:Budapest
Locality Name (eg, city) []:Budapest
Organization Name (eg, company) [Internet Widgits Pty Ltd]:BalaBit IT Security
Organizational Unit Name (eg, section) []:Service Delivery
Common Name (eg, YOUR name) []:scb35-1-i1.tohuvabohu.balabit
Email Address []:vlad@balabit.com
-
Sign the generated CSR with your Windows CA. Make sure that the CSR file is accessible from your Windows CA server.
-
To issue and sign the new certificate request, open the Microsoft Certification Authority Management Console: Start > Run and run certsrv.msc.
-
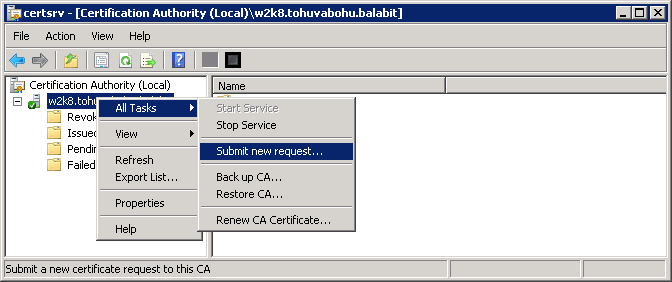
Right-click on the server name and navigate to All Tasks > Submit new request.
Figure 88: Submitting a new request
-
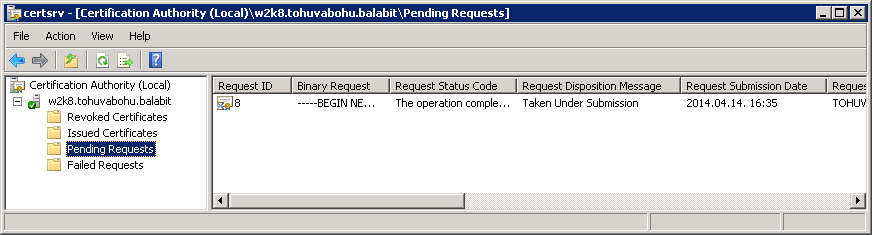
Select the CSR created in the second step.
-
On the left pane, click Pending Requests. The new certificate request is displayed in the right pane.
Figure 89: Issuing a new certificate
-
To issue the new SSL certificate, right-click the pending certificate request, select All Tasks and click Issue.
-
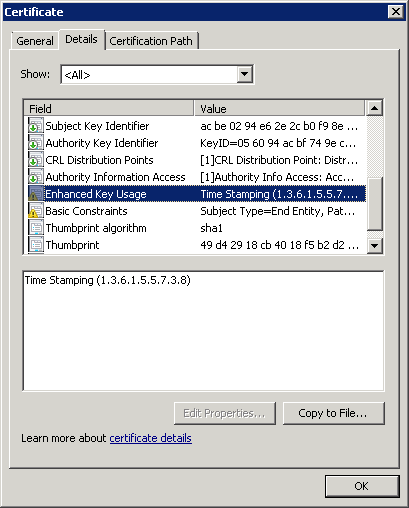
Select Issued Certificates and double-click on the certificate issued in the previous step.
-
The CA Certificate window opens. Navigate to the Details tab. Ensure that the required Enhanced Key Usage field is visible and contains the Time Stamping value.
Figure 90: Verifying certificate details
-
Click Copy to File. The Certificate Export Wizard launches. Click Next.
-
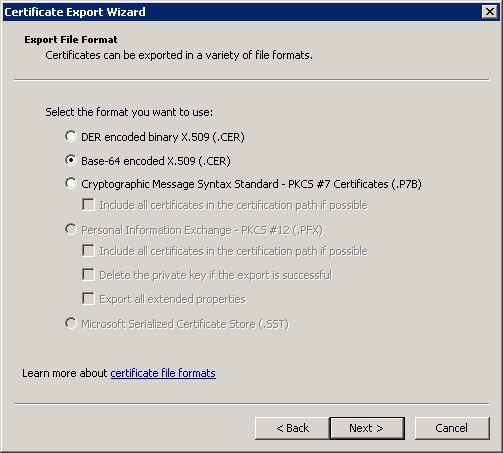
Select the format of the certificate: Base-64 encoded X.509 (.CER). Click Next.
Figure 91: Selecting certificate file format
-
Select location to save the certificate, and save it.
-
The Completing the Certificate Export Wizard screen is displayed. Click Finish.
-
In SSB, navigate to Basic Settings > Management > SSL certificate.
-
Click  next to TSA X.509 certificate, browse for the previously generated certificate, and click Upload.
-
Click next to TSA private key, browse for the previously generated key, and click Upload.
NOTE: If the root CA (the CA X.509 certificate field under Basic Settings > Management > SSL certificate) that is used for other certificates on SSB is different from the CA that was used to sign the TSA certificate, a warning is displayed. In this scenario, ignore this warning.
Generating TSA certificate with Windows Certificate Authority on Windows Server 2012
To generate a TSA certificate with Windows Certificate Authority (CA) that works with syslog-ng Store Box (SSB), generate a CSR (certificate signing request) on a computer running OpenSSL and sign it with Windows CA, then import this certificate into SSB for time stamping.
Prerequisites:
A valid configuration file for OpenSSL with the following extensions:
[ tsa_cert ]
extendedKeyUsage = critical,timeStamping
TIP: You can copy /etc/ssb/openssl-ca.cnf from SSB to the computer that will be used for signing. Rename the file to openssl-temp.cnf.
The TSA certificate is considered valid, in terms of compatibility with SSB, if the following conditions are met:
-
Must be a valid CA certificate (CA is true).
-
Key Usage: Time Stamping is required. No other key usage is permitted.
-
Extended Key Usage: Must be set to critical.
-
Optional Key Usage: If Key Usage is present, it must be digitalSignature and/or nonRepudiation. Other values are not permitted. Make sure that in Encryption, Allow key exchange without key encryption (key agreement) is selected.
|
|
Caution:
In Encryption, do NOT select Allow key exchange only with key encryption (key encipherment), because it will result in errors. |
The following X509v3 extensions are supported:
-
Hard requirement:
X509v3 Extended Key Usage must be critical, and must only contain Time Stamping.
-
Optional:
X509v3 Key Usage, if present, must be digitalSignature and/or nonRepudiation.
To generate TSA certificate with Windows Certificate Authority on Windows Server 2012
-
Create CSR using the new configuration file: openssl req -set_serial 0 -config openssl-temp.cnf -reqexts tsa_cert -new -newkey rsa:2048 -keyout timestamp.key -out timestamp.csr -nodes
-
Complete the required fields according to your environment:
Generating a 2048 bit RSA private key
........................+++
......................................+++
writing new private key to 'timestamp.key'
-----
You are about to be asked to enter information that will be incorporated
into your certificate request.
What you are about to enter is what is called a Distinguished Name or a DN.
There are quite a few fields but you can leave some blank
For some fields there will be a default value,
If you enter '.', the field will be left blank.
-----
Country Name (2 letter code) [AU]:HU
State or Province Name (full name) []:Budapest
Locality Name (eg, city) []:Budapest
Organization Name (eg, company) [Internet Widgits Pty Ltd]:BalaBit IT Security
Organizational Unit Name (eg, section) []:Service Delivery
Common Name (eg, YOUR name) []:scb35-1-i1.tohuvabohu.balabit
Email Address []:vlad@balabit.com
-
Create and configure a time stamping web server template in the Certificate Authority, and use that to generate the TSA certificate.
-
Start the Certification Authority Microsoft Management Console, and select the CA server.
-
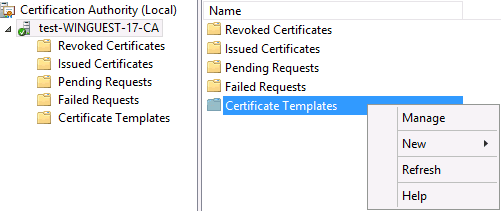
Right-click Certificate Templates, and choose Manage.
Figure 92: Managing certificate templates
The Certificate Templates Console opens.
-
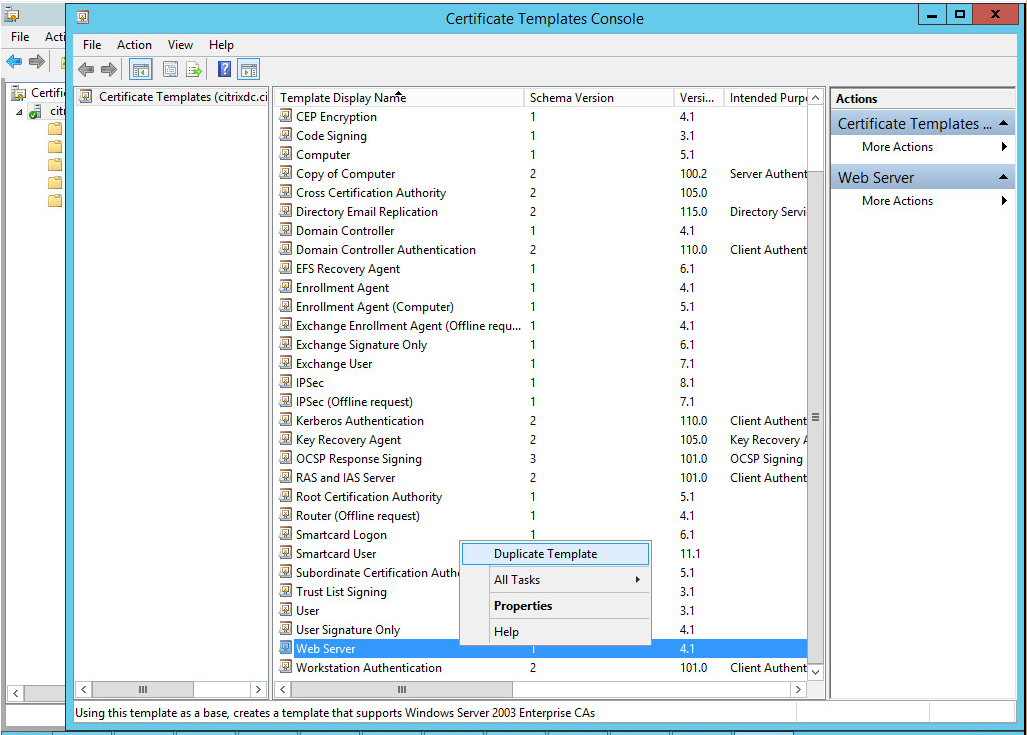
Right-click the Web Server template, and choose Duplicate Template.
Figure 93: Duplicating a Template
The Properties of New Template window is displayed.
-
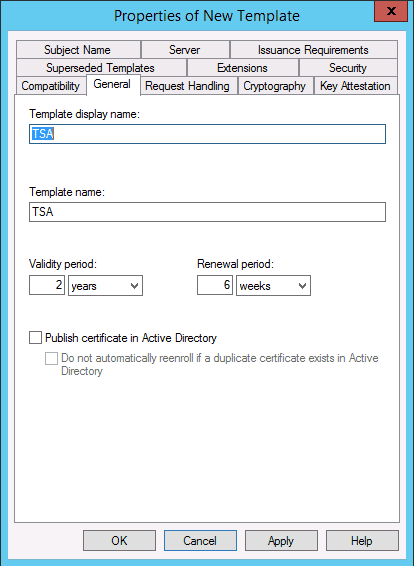
Make the following changes to the new template:
-
On the General tab, change the Template display name to TSA.
Figure 94: Creating the new template
-
On the Request Handling tab, enable the Allow private key to be exported option.
-
On the Extensions tab, make the following changes:
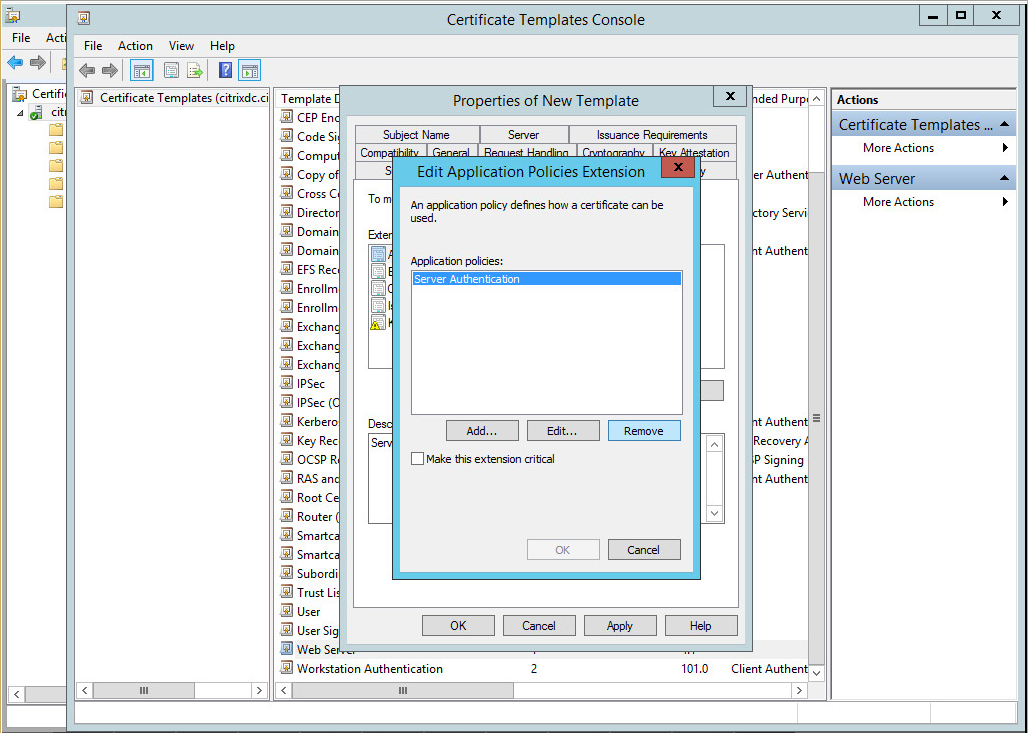
To edit Application Policies
To remove Server Authentication
To add Time Stamping
To make Time Stamping critical
-
Select Time Stamping and enable the Make this extension critical option, then click OK.
Figure 98: Making Time Stamping critical
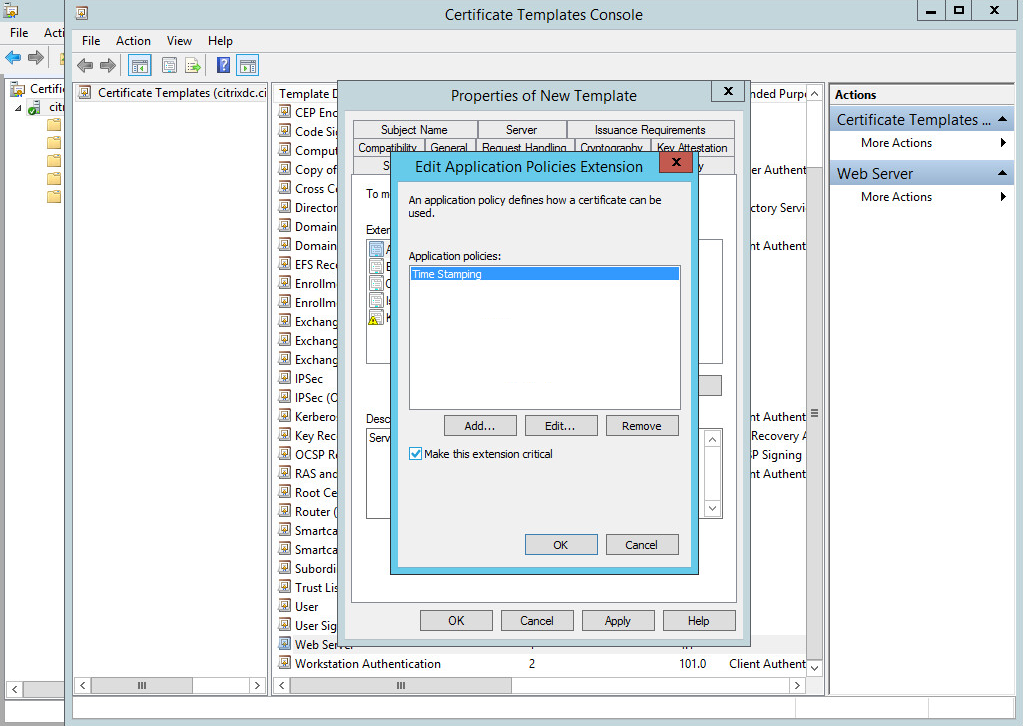
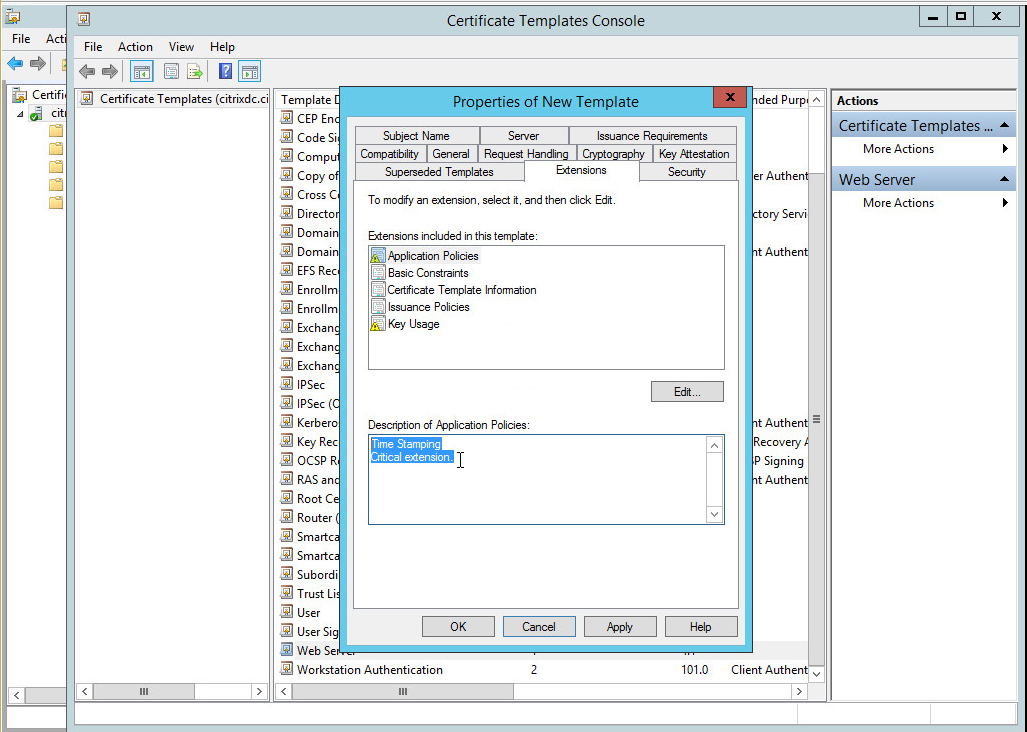
Time Stamping and Critical extension are listed in the Description of Application Policies.
Figure 99: Description of Application Policies
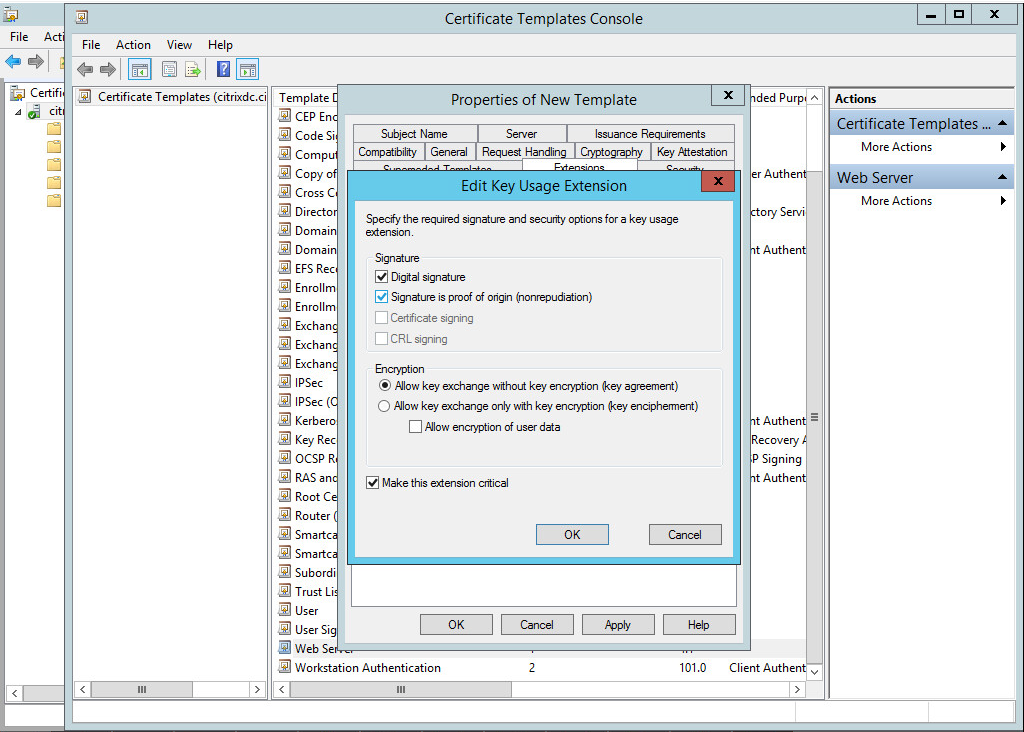
To edit Key Usage
- Select Key usage, click Edit. Enable the Signature is proof of origin (nonrepudiation) option.
-
Select Allow key exchange without key encryption (key agreement).
-
Click OK.
Figure 100: Editing Key Usage
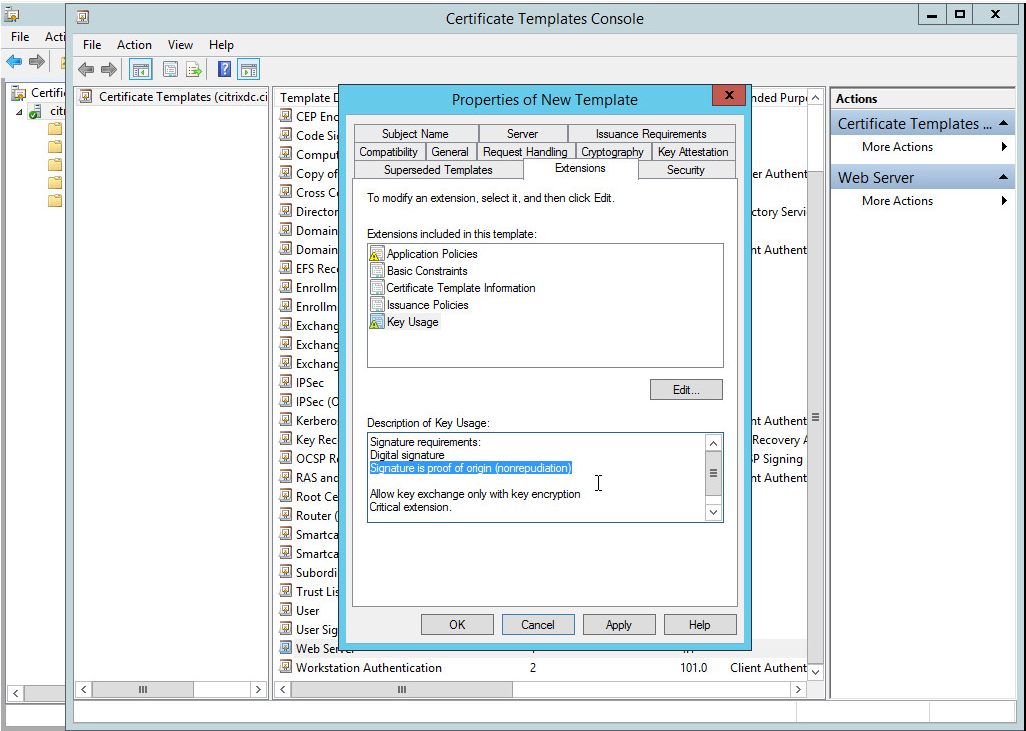
The following are listed in the Description of Key Usage.
Figure 101: Description of Key Usage
-
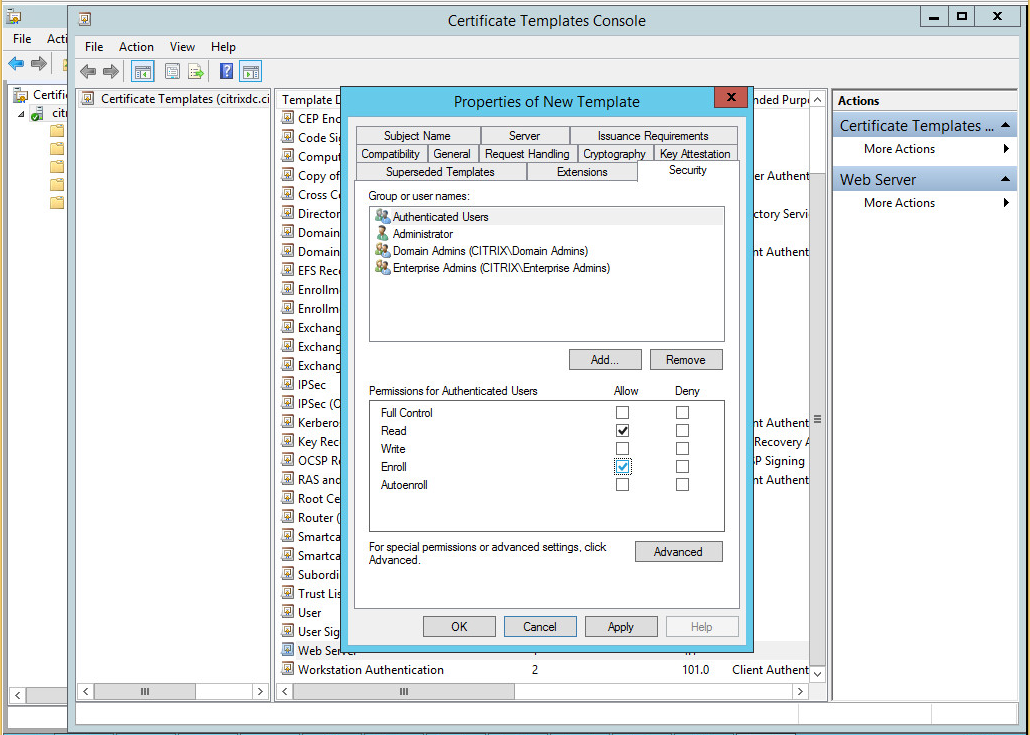
On the Security tab, select Authenticated Users, and set Enroll to Allowed.
Figure 102: Configuring permissions for the template
-
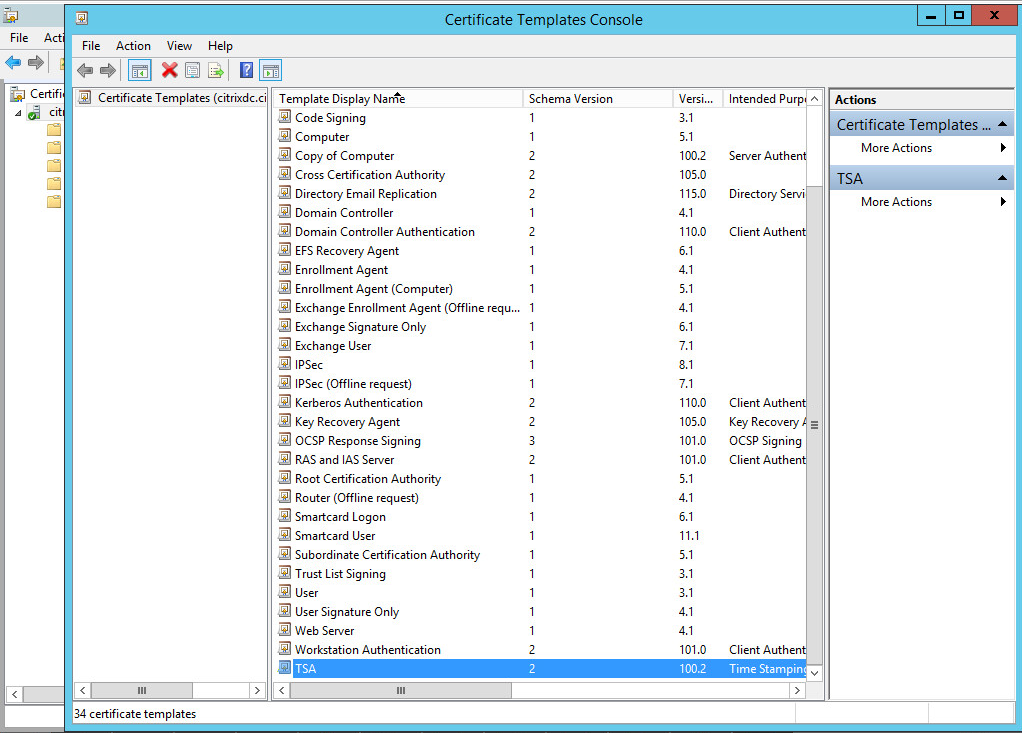
Click Apply. Click OK. The new TSA template is now displayed in the list of templates.
Figure 103: The new TSA template is now displayed in the list of templates
-
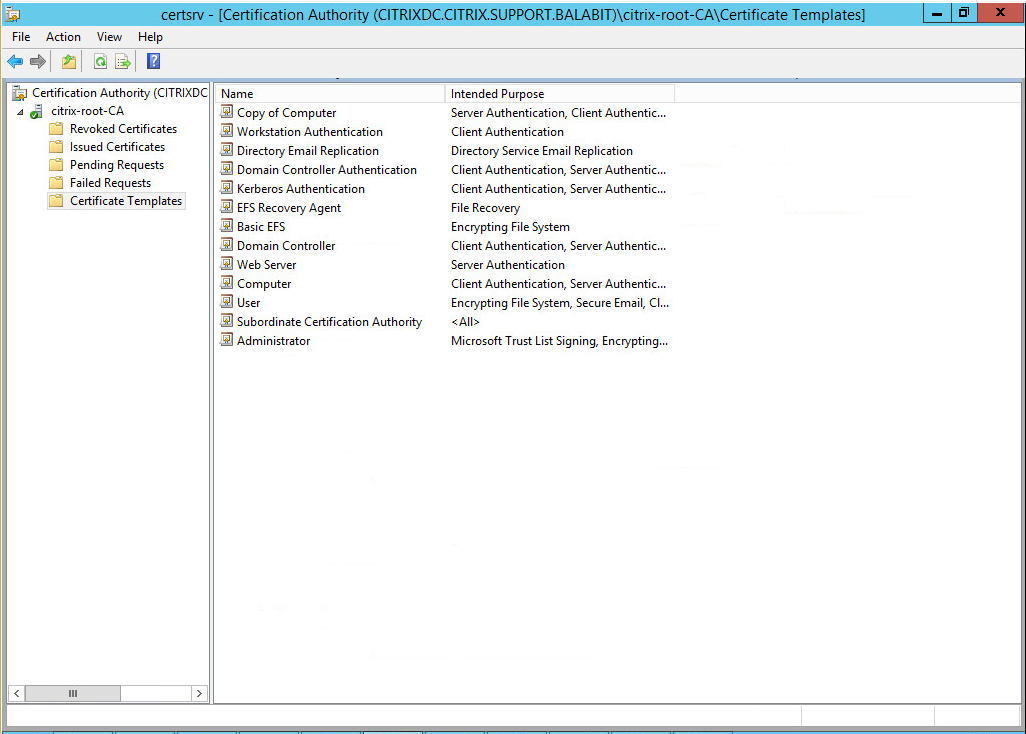
Close this window and return to the Certification Authority main screen, and select the Certificate Templates folder.
Figure 104: Certificate Templates
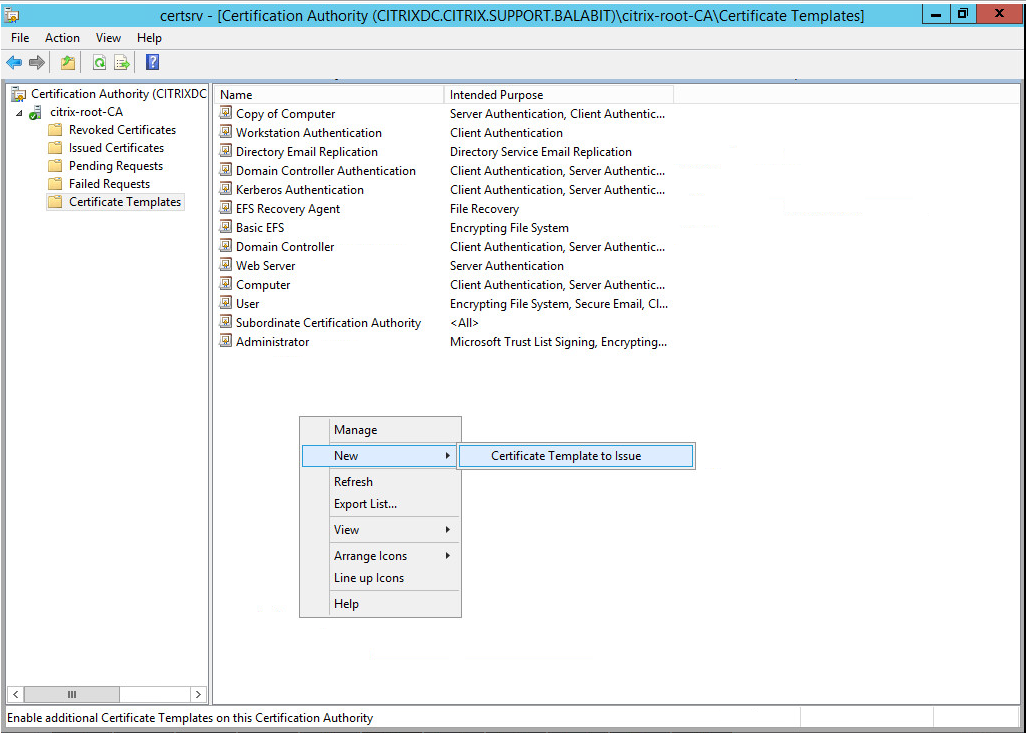
Right-click under the list, and choose New > Certificate Template to Issue.
Figure 105: Certificate Template to Issue
The Enable Certificate Templates window is displayed.
Figure 106: Enable the new template
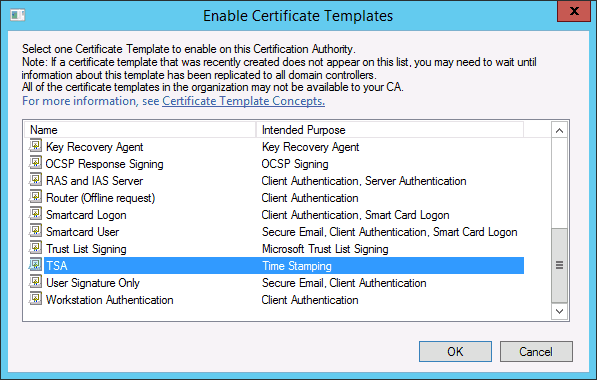
-
Select the TSA certificate template, and choose OK. Close this window.
-
Open the command line, and issue the following command:
certreq -submit -attrib "CertificateTemplate:TSA" <CSR>
Replace <CSR> with the full path of the CSR created earlier (in the second step).
-
The Certification Authority List is displayed. Select the CA.
-
The Save Certificate window is displayed. Choose an output folder.
The certificate is generated to the specified folder.
-
In SSB, navigate to Basic Settings > Management > SSL certificate.
-
Click next to TSA X.509 certificate, browse for the previously generated certificate, and click Upload.
-
Click next to TSA private key, browse for the previously generated key, and click Upload.
NOTE: If the root CA (the CA X.509 certificate field under Basic Settings > Management > SSL certificate) that is used for other certificates on SSB is different from the CA that was used to sign the TSA certificate, a warning is displayed. In this scenario, ignore this warning.
Creating hostlist policies
The syslog-ng Store Box (SSB) appliance can use a list of host and network addresses at a number of places, for example for limiting the client that can send log messages to a log source, or the hosts that can access shared logspaces.
Creating hostlists
This section describes how to create a new hostlist.
To create a new hostlist
-
Navigate to Policies > Hostlists and select  .
.
-
Enter a name for the hostlist (for example servers).
Figure 107: Policies > Hostlists — Creating hostlists

-
Enter the IP address of the permitted host into the Match > Address field. You can also enter a network address in the IP address/netmask format (for example 192.168.1.0/24). To add more addresses, click and repeat this step.
-
To add hosts that are excluded from the list, enter the IP address of the denied host into the Ignore > Address field.
TIP: To add every address except for a few specific hosts or networks to the list, add the 0.0.0.0/0 network to the Match list, and the denied hosts or networks to the Ignore list.
-
Click  .
.
NOTE: If you modify a hostlist, you only need to restart syslog-ng if a host, which is already connected, needs to be ignored with a hostlist. Navigate to Basic Settings > System > Service control > Syslog traffic, indexing & search: and select Restart syslog-ng for the changes to take effect.