Chat now with support
Chat with Support

One Identity Management Console for Unix 2.5.2 - Administration Guide

One Identity Privileged Access Suite for Unix Introducing One Identity Management Console for Unix Installing Management Console for Unix Preparing Unix hosts Working with host systems Managing local groups Managing local users Active Directory integration Authentication Services integration Privilege Manager integration Reporting Setting preferences Security Troubleshooting tips
Auto profiling issues Active Directory Issues Auditing and compliance Cannot create a service connection point Check Authentication Services agent status commands not available CSV or PDF reports do not open Database port number is already in use Elevation is not working Hosts do not display Import file lists fakepath Information does not display in the console License information in report is not accurate Out of memory error Post install configuration fails on Unix or Mac Privilege Manager feature issues Profile task never completes questusr account was deleted Readiness check failed Recovering from a failed upgrade Reports are slow Reset the supervisor password Running on a Windows 2008 R2 domain controller Service account login fails Setting custom configuration settings Single Sign-on (SSO) issues JVM memory tuning suggestions Start/stop/restart Management Console for Unix service Toolbar buttons are not enabled UID or GID conflicts
System maintenance Command line utilities Web services Database maintenance

Adding (or Removing) role members

Note: This task requires that you are logged in as the supervisor or an Active Directory account with rights to add or remove members of console roles; that is, an account in the Manage Console Access role.

To add additional Active Directory members or groups to a role

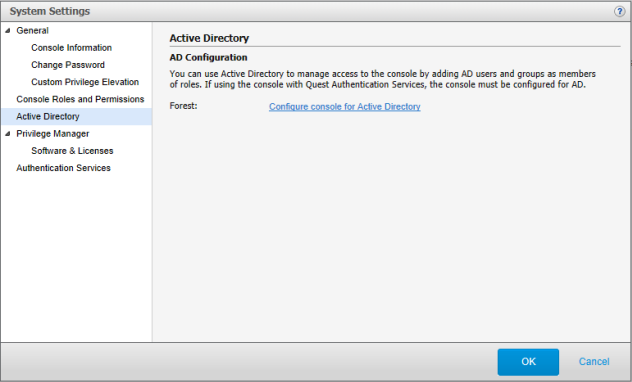
  1. From the top-level Settings menu, navigate to System settings | Console Roles and Permissions.
  2. Select a role and click Members

    Note: If you are logged in as supervisor, the mangement console requires that you authenticate to Active Directory in order to select Active Directory users or groups to add members to a role.

  3. On the Role Members dialog, click Add.
  4. On the Select AD Object dialog, use the search controls to find and select Active Directory users or groups.
  5. Select one or more objects from the list and click OK.

    The mangement console adds the selected objects to the list.

  6. Click OK to save your selections.
  7. Click OK on the Console Roles and Permissions dialog to close System Settings and return to the mangement console.

Reviewing the Console Access and Privileges report

The Console Access and Permissions report lists users who have access to the mangement console based on membership in a role and the permissions assigned to the role.

To create the Console Access & Privileges report

  1. From the mangement console, navigate to Reporting.
  2. From the Reports view, double-click the Console Access and Permissions report name.

    The report opens a new Console Access and Permissions tab on the Reports view.

  3. Open the Export drop-down menu and select the format you want to use for the report: PDF or CSV.

    Note: If you are logged in as supervisor, the mangement console requires that you authenticate to Active Directory in order to view the settings for Active Directory.

    It launches a new browser or application page and displays the report in the selected format.

    Note: When generating multiple reports simultaneously or generating a single report that contains a large amount of data, One Identity recommends that you increase the JVM memory. See JVM memory tuning suggestions for details.

Active Directory system settings

Use the Active Directory settings to configure the console for Active Directory, specify which sites, domains, domain controllers, and global catalogs the mangement console may access, and to define the default domain you want the console to use when authenticating a user account.

Note: If you are logged in as supervisor, the mangement console requires that you authenticate to Active Directory in order to view the settings for Active Directory.

Active Directory configuration

To configure the mangement console for Active Directory

  1. From the top-level Settings menu, navigate to System settings | Active Directory.

  2. On the AD Configuration dialog, click the Configure console for Active Directory link next to Forest.

    Note:

    If a domain name is displayed instead of the link, the mangement console is already configured for Active Directory. To limit how the console accesses Active Directory, refer to Configuring advanced settings for information about limited the sites, domains, domain controllers, or global catalogs you want the console to contact.

  3. On the Configure console for Active Directory Logon dialog,

    1. Enter a domain in the forest.

    2. Enter the Active Directory credentials.

      The wizard uses these credentials to configure the mangement console for use with Active Directory.

    3. Click Connect to Active Directory.

    4. When you see the message that indicates your console connected to Active Directory successfully, click Next.

  4. On the Set up console access by role dialog, click Add to specify the Active Directory users and groups that you want to have access to the features available in Management Console for Unix.

    The Select Users and Groups dialog opens:

    1. Use the search controls to find and select Active Directory users or groups. Select one or more objects from the list and click OK.

      The mangement console adds the selected object(s) to the list on the Set up console access by role dialog.

      By default the mangement console assigns users to All Roles, which gives those accounts permissions to access and perform all tasks within the console. See Console Roles and Permissions system settings for more information.

      Note: During the initial set up, you can only assign one role per user. Use System Settings to add additional roles to a user. See Adding (or Removing) role members for details.

    2. Click in the All Roles cell to activate the drop-down menu from which you can choose a role for the user account.

    3. Click Finish to save your selections and return to System Settings.

  5. Click OK to close System Settings and return to the mangement console.

    The additional features are now unlocked; however, you must be logged on as an Active Directory user to perform Active Directory tasks.

  6. Navigate to the User menu in the upper right-hand region of the screen and click Sign out. Then sign back on using an Active Directory account that has been granted access to the mangement console (that is, an account that was added to the list on the Set up console access by role dialog).
Related Documents

The document was helpful.

Select Rating

I easily found the information I needed.

Select Rating